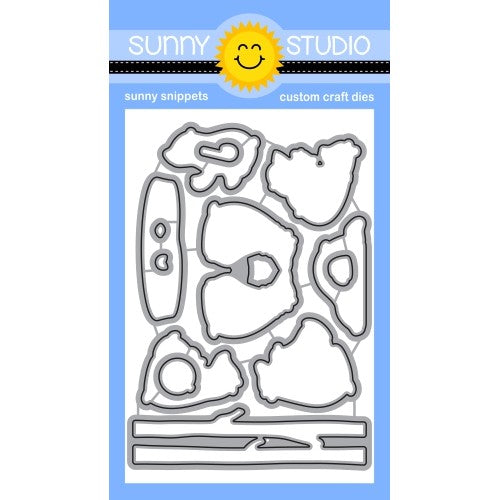
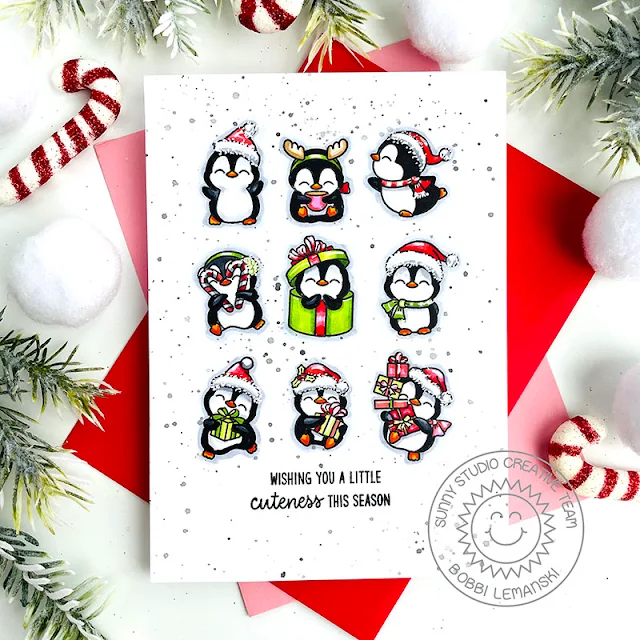
Hi there. It’s Bobbi here with a festive load of cuteness to share. I’m using the new Penguin Party stamp set and coordinating
die set and let me tell
you, there are a whole lot of cute penguins in this set! I couldn’t choose my
favorite so I used almost all of them on my one-layer card today. These little guys are so festive that
you’ll want to add them to all your holiday gift tags and greetings.
To make this 5″ X 7″ card, I started by stamping all my penguins on my 5″ X 7″ card front panel cut from 80lb Neenah Solar Crest white cardstock. I used the same cardstock for my card base, too. I stamped all the penguins at once using my MISTI stamp tool, positioning them in clean columns and rows, along with a sentiment from the set. You can make lots of these one-layer cards for the holidays once you have the stamps in place on your MISTI grid. Just ink up and stamp over and over. It’s so easy and great for mass production of cards for the holidays.
I colored the penguins on the card front in shades of red, pink and green to contrast with the penguins’ colors of black and white. To make the penguins stand out, I added shading to their bodies and around each image using cool grays to make them “pop” off the page. This is a great trick when you are creating one-layer cards. The shadowing creates the look of dimension on the flat surface.
Here are the Copic
Sketch Marker colors I used:
Reds:
R29, R17, R14
Greens:
YG67, YG17, YG 13, YG03
Pinks:
RV55, RV02
Oranges:
YR09, YR68, YR15 (for beaks and feet)
Cool
Grays: 100, C8, C7, C5, C3, C1, C0 (for penguin bodies and shadowing)
Plus,
a Gelly Roll White Gel pen for the fur trim on the hats and earmuffs
To finish the card front, I die cut all the penguins, using the coordinating die set, out of scrap paper, positioned them over the penguins (no adhesive used) along with a rectangle over the sentiments and splattered the entire front with black watercolor paint, mixed with a little water, to create the random splatter background. The light splatter dries quickly. I removed the masks and attached the card front to the card base.
Inside the card base, I stamped more sentiments from the set along with a few little accent images/”little things” from the set to connect to the phrase. I used my MISTI tool again to position all these little images and then stamped them all at one time.
You can shop these products at Sunny Studio Stamps. Thanks for stopping by today. If you want to see more ideas and inspiration from me, subscribe to my blog, BobbiHartDesign.com. I’ll send you updates on new posts! You can also find me on Instagram as @BobbiHartDesign and on Facebook as BobbiHartDesign.
------------------------------------------
Hey
friends! Cathy here today and I’ve got some partying penguins to share having
some fun for the Holidays!
I wanted to
create an arctic scene for them, so I’ve combined several background stamps and
elements which work so perfectly with these adorable penguins. To start, I
die-cut a frame from a soft creamy yellow cardstock using a Fancy Frames Rectangle Die and
adhered it to a pink A2 card base. For the background scene, I die-cut a piece
of white cardstock using a Stitched Rectangle Die and
inked the top 2” of the cardstock with Spun Sugar and Saltwater Taffy Distress
inks. I colored the water at the bottom 2” of the cardstock with Copics using
random streaking motions with BG49, BG57, BG34, BG23, BG13, and BG11. I heat
embossed the sentiment along the bottom with white embossing powder.
For the
mountain scene, I cut a piece of Neenah Classic Crest 80lb solar white
cardstock 3” x 5 1/2", stamped the mountains from the Country Scenes Stamps across
the top and colored it with Copics. I die-cut along the top of the mountain
scene using the coordinating dies and
die-cut along the bottom of the cardstock piece using a Slimline Nature Borders Die.
To keep a continuous stitched look around the panel, I die-cut the sides of
this cardstock piece using the same Stitched Rectangle Die and adhered the
mountain piece to the sky/water cardstock piece about 1/2" from the top
edge.
I stamped all
the images on Neenah Classic Crest 80lb solar white cardstock, colored them
with Copics and fussy cut them. The penguins from the Penguin Party Stamps are
just adorable and fit perfectly on ice floats from the Winter Scenes Stamps and Bear Hugs Stamps. The
Christmas tree from the Cozy Christmas Stamps helped
to complete my festive scene along with a slightly smaller pine tree from
the Seasonal Trees Stamps.
I hope you enjoyed and thanks for stopping by today! For more inspiration, please visit my blog www.inkredibleadventures.com and you can also find me on Instagram as @cathy.chapdelaine.
Sunny Studio Supplies Used:
 Stitched Rectangle Dies Shop at: Sunny Studio |
 Bear Hugs Stamps Shop at: Sunny Studio |
 Bear Hugs Dies Shop at: Sunny Studio |
 Fancy Frames- Rectangles Shop at: Sunny Studio |
 Seasonal Trees Stamps Shop at: Sunny Studio |
 Seaonal Trees Dies Shop at: Sunny Studio |
 Slimline Nature Borders Shop at: Sunny Studio |
 Winter Scenes Stamps Shop at: Sunny Studio |
 Winter Scenes Dies Shop at: Sunny Studio | |
 Country Scenes Stamps Shop at: Sunny Studio |
 Country Scenes Dies Shop at: Sunny Studio |
 Cozy Christmas Stamps Shop at: Sunny Studio |
 Cozy Christmas Dies Shop at: Sunny Studio | |
 Penguin Party Stamps Shop at: Sunny Studio |
 Penguin Party Dies Shop at: Sunny Studio |


OMGoodness, these are both simply ADORABLE!! TFS -
ReplyDeleteLori S in PA
Adorable cards!!
ReplyDeleteThank you so much for sponsoring the 2022 Cat Lovers Hop at Her Peaceful Garden!