Hi there! Kay here and I'm sharing a card I created with some of the fun new products from the brand new release! I'm using the new Stitched Rectangle dies and the adorable Looking Sharp stamp set.
So for my card, I first off stamped all of the images and sentiment from the Looking Sharp stamp set in Tuxedo Black ink onto white cardstock. I then used a fine line black marker and ruler and drew the line across to give the illusion they are sitting on a table. I then colored everything with Copic markers.
I then cut the colored piece out with the middle sized Stitched Rectangle die. I used some light teal cardstock Aqua Mist from Papertrey Ink and the largest Stitched Rectangle die to cut a second larger mat. I added the larger blue mat to the card base with double sided tape and then added the colored panel on top of this with foam tape.
I
hope you have enjoyed my card today! Thanks so much for stopping by!
---------------------------------------------------
Are you in love with this new release as much as I am?!
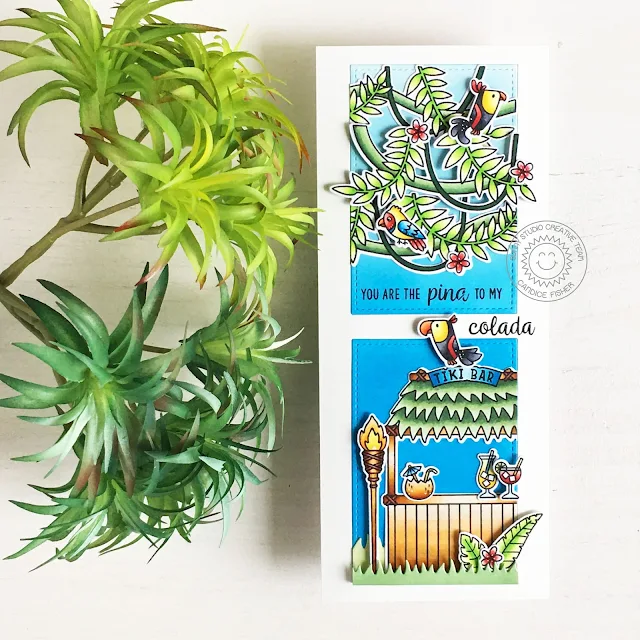
It's Candice back on this Friday sharing a fun
summery card with you highlighting a fun way to use the new Stitched Rectangles on
a slimline design!
I used these Sunny Studio products on my slimline design:
- Tiki Time stamps & coordinating dies
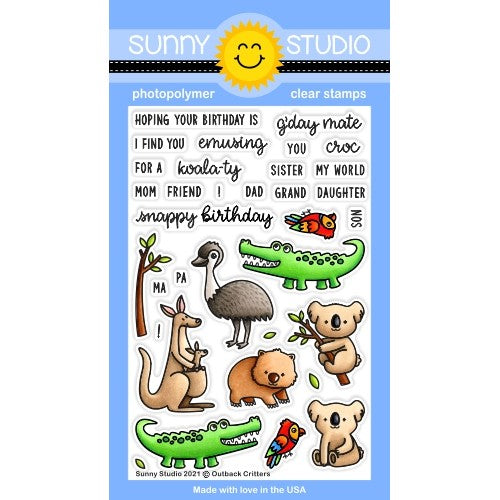
- Outback Critters stamps & coordinating dies
- Tropical Scenes stamps & coordinating dies
- Stitched Rectangles dies
- Picket Fence dies (grass)
I began my
slimline with an 8 1/2 x 3 1/2 card base. For the background, I first trimmed a
piece of Bristol Smooth cardstock to cover the card front, die cut the 2 stitched rectangles to
create a frame, and inked the inside pieces with salty ocean and tumbled glass.
I then die-cut 2 grass pieces, inked
them with rustic wilderness and bundled sage, and adhered to the bottom insert.
Next, I stamped the images from the sets listed above, colored them with Copic markers, and used the coordinating dies to cut them out. I glued the background images onto the inked stitched rectangles and trimmed the edges. I then glued the frame and the stitched rectangles to my card front and used foam tape to add dimension to the scenes. I finished by stamping the sentiment in Versafine black ink!
Thank you for
stopping by with me today!
 Looking Sharp Stamps Shop at: Sunny Studio |
 Looking Sharp Dies Shop at: Sunny Studio |
 Outback Critters Stamps Shop at: Sunny Studio |
 Outback Critters Dies Shop at: Sunny Studio |
 Tiki Time Stamps Shop at: Sunny Studio |
 Tiki Time Dies Shop at: Sunny Studio |
 Picket Fence Border Dies Shop at: Sunny Studio |
 Stitched Rectangle Dies Shop at: Sunny Studio |
 Tropical Scenes Stamps Shop at: Sunny Studio | |
 Tropical Scenes Dies Shop at: Sunny Studio |


No comments:
Post a Comment