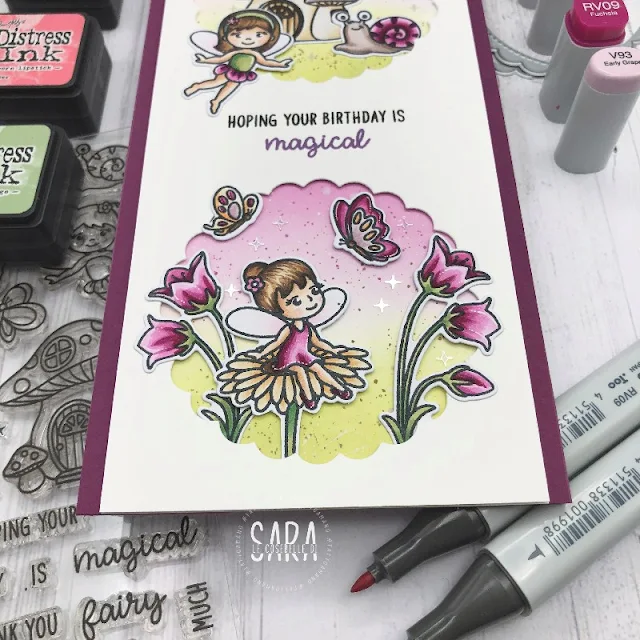
Hi friends, Sara Zoppi here! I am totally thrilled because today I am guesting for Sunny Studio Stamps. As a fairy stamp lover, I couldn't skip this Garden Fairy stamp, which I used to make two cards.
On a different panel (with the same dimensions) I ink blended distress oxides in Seedless preserves, Warm Lipstick and Bundled Sage. I also splattered the same colors to create a little texture.
I assembled the two panels with foam tape and I arranged all my images with liquid glue or foam to create depth. Between the two scalloped circles I stamped my sentiment. I really hope you will like it!
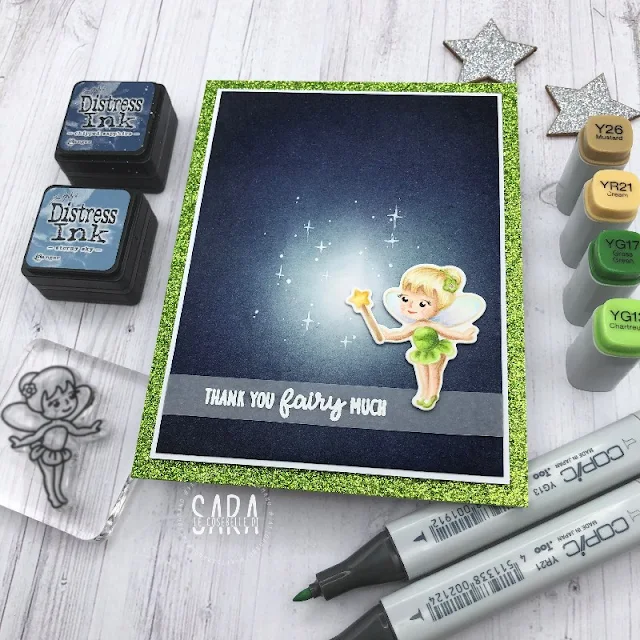
For my second card I used the same stamp set. When I received it, I instantly though that one of the fairies looked like Thinker Bell. I am a big fan of Disney movies, so I couldn't resist. I firstly decided how to arrange her, because I needed to know where the magic wand was. I then ink blended the background with regular distress inks in Black Soot, Chipped Sapphire and Stormy Sky, trying to keep a light hand where I wanted the fairy to be. I then stamped my image with Gina K Amalgam ink in Warm Glow: I absolutely love this for no-line coloring.
I colored everything with Copics but I used my Polycromos pencils to shade my details (since the image is so small and the Copic nib is quite big). I then white heat embossed my sentiment on a piece of vellum, and I arranged everything on the card. I also added some white gelly roll sparkles. For a finishing touch I matted my panel with white and lime glitter cardstock.
For my third card I was inspired by an illustration found on Pinterest. I usually search on Pinterest looking for color combos, illustrations or card sketches, I found it so useful and inspiring. I firstly stamped the main frog, from the Feeling Froggy set, at the center of my piece of paper, trying not to stamp the leaf below. Anyway, as I used no-line ink, that line will disappear when coloring the image. I then sketched the background and colored everything with Copics.
I had the idea of framing my scene with the Stitched Arch die, and that's what I did, adding a second piece of paper with some foam. At the end, I white embossed the sentiment on a piece of red cardstock: I used the word hoppy from the same stamps, while the word kisses belong to Hogs & Kisses.
For my last card I was inspired by a Pinterest illustration as well. I wanted to make a cute and happy background for the Loveable Llama. But this time, I worked on two different piece of cardstocks, one for the background and one for the images. When I have to create a card like this, I spend lot of time searching a color palette that I like: I usually like 3 or 4 shades of color, because too many can be so confusing. And that's what I did here: blue-green, yellow and fuchsia. For the background lighter colors, that let the main image pop.
I added some details with the white gelly roll pen, and some others with Polycromos (I usually get them when I do no-line coloring and I want to give more details). Two piece of white cardstock and...that's all!
It was a great pleasure to Guest Design for this brand, their images are so cute and sweet. And I really hope you will find all these cards inspiring. Thanks for stopping by and many hugs from Italy!
Sunny Studio Supplies Used:
 Hogs & Kisses Stamps Shop at: Sunny Studio |
 Stitched Arch Dies Shop at: Sunny Studio |
 Feeling Froggy Stamps Shop at: Sunny Studio |
 Garden Fairy Stamps Shop at: Sunny Studio |
 Garden Fairy Dies Shop at: Sunny Studio |
 Lovable Llama Stamps Shop at: Sunny Studio |
 Lovable Llama Dies Shop at: Sunny Studio |
 Scalloped Circle Mat 1 Dies Shop at: Sunny Studio |


Your cards are all beautiful but I must admit the llama is my favorite. Thanks for sharing them with us.
ReplyDeleteThat sweet frog❤❤❤❤❤❤❤ the lighting is beautiful!
ReplyDelete