Hi folks, Kavya
here. I am back with a fun way to use those new layered Stitched Circle Small dies and Stitched Circle Large dies with the
Scalloped Circle Mat dies! I love how you can stack every single one of them
and use them in many different ways. I use two different sizes of the stitched
circle die to make a circle frame slimline card.
I first started off by using the Stitched Circle Small and Large die to find the circles of the right size. I then arranged them on a white cardstock panel of slimline size and die cut it when I was happy with the layout. For the larger middle circle, I added a pink scalloped frame by using the coordinating Scalloped Circle Mat 1 die.
Later, I stamped multiple images from the Home Sweet Gnome and Garden Fairy set and colored the critters using alcohol markers and colored pencils. I used the die cut circles as backdrops by ink blending the sky using shades of blue and purple dye inks. I created the land out of green card stock and the Slimline Nature Border die. Once I was happy with the arrangement, I added the slimline circle frame that we created earlier to the card base using foam tape. Finally, I finished the card by heat embossing a sentiment from the gnome set on purple cardstock.
That’s it folks! Wasn’t that cute and adorable? No fancy techniques…. you can create any custom slimline frame by using simple basic shape dies! Hope you like this. Be sure to check back tomorrow for more awesome inspiration.
---------------------------------------------------
Hello everyone!
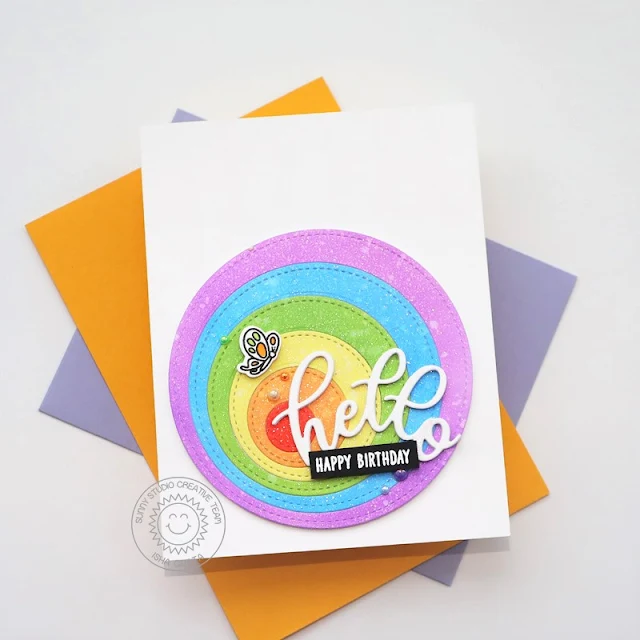
Isha here with you sharing the Inlay die-cutting technique featuring our Stitched Circle Small dies.
To start with, I sponged some white cardstock pieces in rainbow colors using Distress Oxide ink. Now to create the inlay die-cuts. I started by die-cutting the biggest circle die using the purple paper, now die-cut the 2nd largest circle from the same purple keeping the die slightly off-set. Next is the blue circle, die-cut it using the 2nd. largest circle dies. Then die-cut the inside using the 3rd. largest circle keeping it off-set. Die-cut all the pieces in the same way by simply going down the circle size . These circles will fit in each other and we will have a flat eccentric circle piece.
Add 3d foam to the circles to the back so they stick together.
Before removing the release paper, flick some water to get a subtle texture. I
then sprayed this circle with Imagine Shimmer spray for a lovely shine. Adhere
this circle focal image to a white card base.
Die-cut the word "Hello" from the Slimline Scalloped Frame dies. Die-cut them 4 times and stack them together for some dimension. Apply spectrum noir shimmer pen to it and adhere to the card. Stamp the sentiment from the Inside Greetings - Birthday stamp set, onto black stripe and heat emboss using white embossing powder by WOW!
Stamp the butterfly from the Garden Fairy stamp set and
die-cut using the coordinating die. Add a
touch of color. Adhere to the card. To finish, adhere some Rainbow Pearls.
Thank you for stopping by. Have a nice day!
Sunny Studio Supplies Used:
 Home Sweet Gnome Stamps Shop at: Sunny Studio |
 Home Sweet Gnome Dies Shop at: Sunny Studio |
 Slimline Nature Borders Shop at: Sunny Studio |
 Slimline Scalloped Frame Shop at: Sunny Studio |
 Garden Fairy Stamps Shop at: Sunny Studio |
 Garden Fairy Dies Shop at: Sunny Studio |
 Inside Greetings Birthday Shop at: Sunny Studio |
 Scalloped Circle Mat 1 Dies Shop at: Sunny Studio |
 Stitched Circle Small Dies Shop at: Sunny Studio | |
 Stitched Circle Large Dies Shop at: Sunny Studio |


The circle die slimline may just be my all time favorite layout for a slimline. I have not made a slimline yet, but this makes me really want to make one. Super cute too!
ReplyDelete