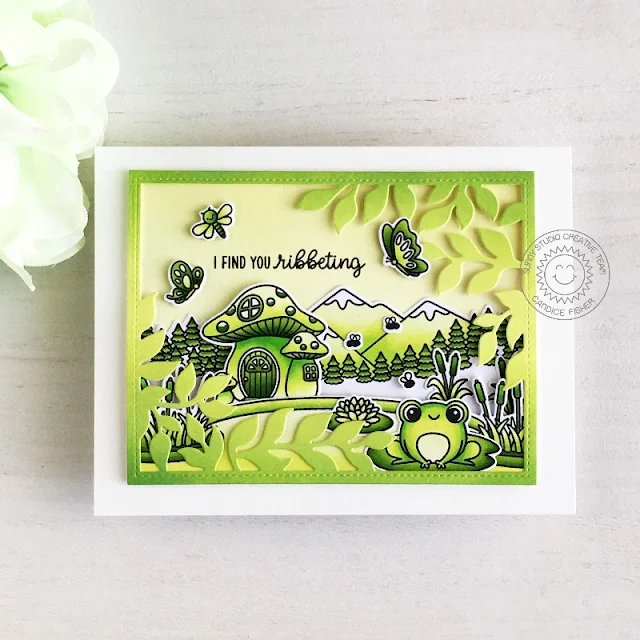
Hi my crafty friends! Candice with you today with a fun green
monochromatic card using the fun new Country Scenes stamp set!
- Country Scenes stamps & coordinating dies
- Feeling Froggy stamps & coordinating dies
- Garden Fairy stamps & coordinating dies
- Botanical Backdrop die
For my background, I began by inking a piece of Bristol Smooth
cardstock with mowed lawn, twisted citron and shabby shutters and cut it out
with the Botanical Backdrop die. I then trimmed another
piece of Bristol Smooth cardstock to fit behind the frame and inked it lightly
with shabby shutters.
Next, I stamped the pond, the mountains with pine trees, mushroom house, frog, butterflies and flies from the stamp sets listed above, colored them with green Copic markers (listed at the end of my post) and used the coordinating dies to cut them out. To put the card together, I glued the frog and lily pond to the pond and adhered this to back of the frame. I lined up the mountains and glued that to the inked panel and used foam tape to add the frame over this. I then used glue or foam tape to tuck the other images in giving the scene lots of dimension! I finished by stamping the sentiment with Versafine black ink!
Green Copic Markers used: YG17, YG25,YG05, YG03, YG01, YG00
& YG0000
If you haven't tried a monochromatic card, you should pick your
favorite color and give it a go, it is fun to see the results! Thank you for
visiting today!
------------------------------------------------
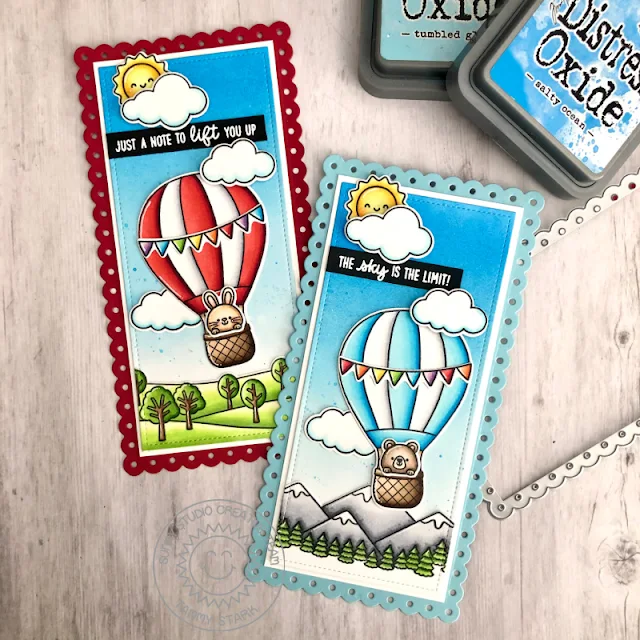
Hi friends! Tammy with you today sharing these fun Mini Slimline cards,
featuring the Country Scenes stamp set. Of course I had to add the adorable set, Balloon Rides to compliment these sweet little country scene cards!
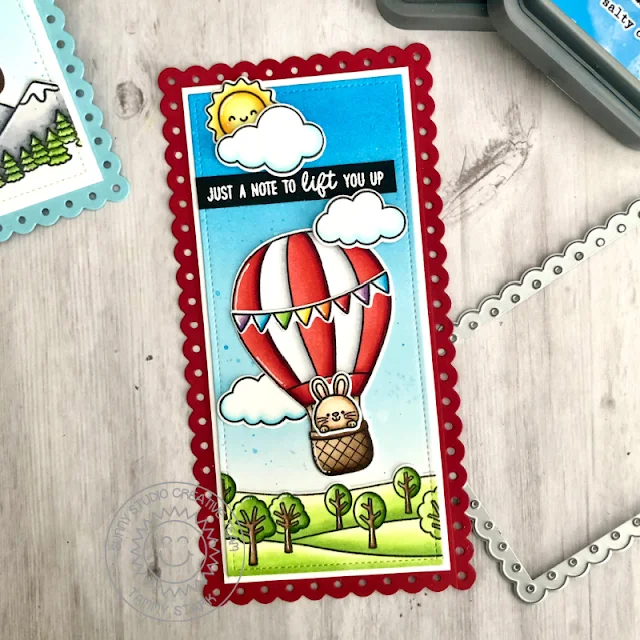
To begin, I cut red and blue cardstock using the Slimline Scalloped Frame Dies. To create the mini slimline size, I repositioned the slimline scallop die onto the die cut rectangles and ran it through my die cutting machine to give me a finished size of approximately 3 1/2 X 6 1/2". Next, using Bristol smooth cardstock, I cut the smaller rectangle the same way, repositioning the die and cutting again using the Slimline Die. I inked the backgrounds with Salty Ocean and Tumbled Glass Distress Oxide inks and matted onto white cardstock before attaching to the scalloped rectangles.
Next, I stamped,
colored with Copic markers, and die cut images from the following sets:
Country Scenes Stamps/ Coordinating Dies
Balloon Rides Stamps/ Coordinating Dies
I die cut the Country Scenes with the smaller
rectangle from the Slimline Scalloped Frame Dies to
fit perfectly onto my background. Next, I attached the stamped images to my
cards, using foam tape on some for dimension.
Lastly, I white heat embossed the sentiments onto a strip of black cardstock and attached my card fronts to a white 3 1/2 X 6 1/2" card base to complete my cards.
I hope you enjoyed my mini cards today and you are inspired to make a mini slimline card, they are so much fun!! Thanks so much for stopping by!
Sunny Studio Supplies Used:
 Botanical Backdrop Die Shop at: Sunny Studio |
 Slimline Scalloped Frame Shop at: Sunny Studio |
 Balloon Rides Stamps Shop at: Sunny Studio |
 Balloon Rides Dies Shop at: Sunny Studio |
 Country Scenes Stamps Shop at: Sunny Studio |
 Country Scenes Dies Shop at: Sunny Studio |
 Feeling Froggy Stamps Shop at: Sunny Studio |
 Feeling Froggy Dies Shop at: Sunny Studio |
 Garden Fairy Stamps Shop at: Sunny Studio | |
 Garden Fairy Dies Shop at: Sunny Studio |


No comments:
Post a Comment