Hello everyone! Isha today with a fun card featuring the
new Wonderful Windows dies.
I paired these dies with a few older and new products. For this card I decided
to not add the sentiment as we all need some general cards in our stock.
I started by adhering the blue pattern paper from the Spring Fever paper pack to a white card base. Next, I die-cut the windows using white card. Adhere vellum behind the window grid panel. Stamp the images, color and die-cut using the coordinating dies.
Twig, bird
- Little Birdie Stamps and Dies
Tulip cluster,
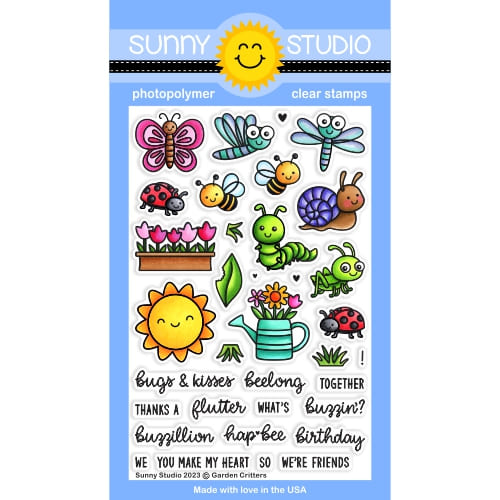
bees, caterpillar - Garden Critters Stamps and Dies
Bunnies, tulips
- Bunnyville Stamps and Dies
Mountain, trees
- Country Scenes Stamps and Dies
Die-cut the fence using the Picket Fence Border Dies. Now die-cut the grass from the Flirty Flowers paper pack using the grass die. Color the pot we die-cut from the Wonderful Windows dies and adhere the tulip cluster behind this.
Assemble
everything together. Thank you for stopping by and have a nice day!
-------------------------------------------
Hi crafty friends! It's Lien here back with a sleek modern card design, perfect to welcome someone to their new home or to your neighborhood!
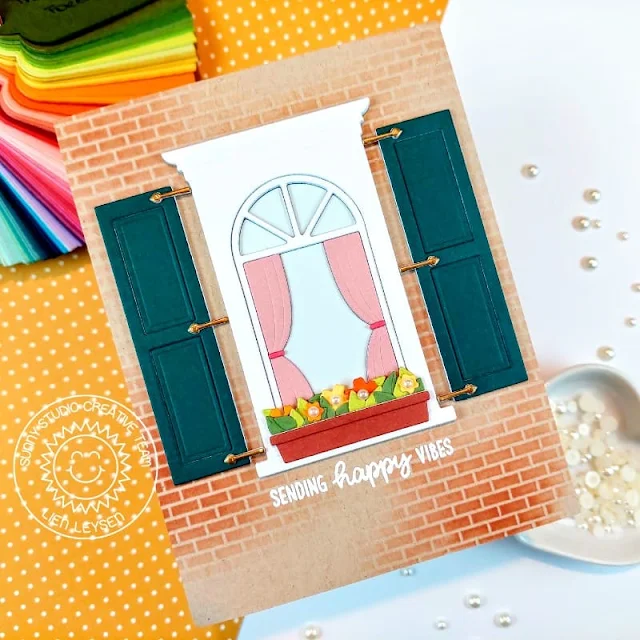
For this card I'm using the Wonderful Windows die set. This is definitely one of my favorites from the spring release because it's so wonderfully versatile. I really wanted to make a simple card that could go for any recipient to welcome them to the neighborhood. The way I'm making my simple window stand out is with dimension.
I cut the main window piece 5 times out of white cardstock and stacked them all together with liquid glue. The shutters I cut out 4 times out of white and once from colored cardstock, when stacking these together I left out one layer from the inside rectangle panels. I even layered up the hinges, die cut once from white and once from matte gold cardstock.
I chose fairly muted colors throughout the design but I made sure the flowers were quite bright. For the background panel I used Neenah Desert Storm and a Honey Bee's Perfect Bricks Stencil, I blended some brick red ink in a few spots on the card panel, a fully stenciled background would have been too busy. To finish this card before actually adding any of the die cuts, I stamped the sentiment from the Panda Party stamp set in VersaMark clear ink and embossed it with bright white embossing powder.
I added all the die cut pieces, starting with the main window because once that is centered on the card, everything else will fall in place. I only added a few pearls as the center of the flowers and no other embellishments.
Sunny Studio Supplies Used:
 Picket Fence Border Dies Shop at: Sunny Studio |
 Flirty Flowers 6x6 Paper Shop at: Sunny Studio |
 Country Scenes Stamps Shop at: Sunny Studio |
 Country Scenes Dies Shop at: Sunny Studio |
 Bunnyville Stamps Shop at: Sunny Studio |
 Bunnyville Dies Shop at: Sunny Studio |
 Little Birdie Stamps Shop at: Sunny Studio |
 Little Birdie Dies Shop at: Sunny Studio |
 Garden Critters Stamps Shop at: Sunny Studio | |
 Garden Critters Dies Shop at: Sunny Studio |
 Panda Party Stamps Shop at: Sunny Studio |
 Wonderful Windows Dies Shop at: Sunny Studio |
 Spring Fever Paper Shop at: Sunny Studio | |


Both of these are lovely - Isha's scene stole my breath for a second! Great work to you both!
ReplyDeleteLori S in PA