Hello everyone! Isha here today featuring the new Lovey Dovey stamp set. I really like the font and the sentiments in this set, it's totally versatile. I decided to make a feminine card with lots of layers. I kept the pastel shades, to keep the sentiment a focal point.
I started by die-cutting the Stitched Rectangle using pattern paper from the Flirty Flowers paper pack. Adhere to a white cardbase. Die-cut the frame from the Fancy Frames Rectangle dies, adhere vellum to the back, tie a yellow floss to this and adhere to the card using 3d foam. Die-cut the circle using the Stitched Circle Small dies, sponge kitsch flamingo distress ink to the center.
Stamp the
sentiment from the Lovey Dovey stamp
set, die-cut using the coordinating dies.
Die-cut one more time using yellow cardstock. Layer this slightly offset.
Adhere to the circle.
Stamp and emboss the flowers from the Cherry Blossoms stamp set. Stamp the leaves using mint ink. This is a layering stamp set for a beautiful dimensional look but if you are in the coloring mood, simply stamp and emboss one of the layers using white embossing powder onto watercolor paper. Add color using watercolors. Die-cut using the coordinating dies. Create a cluster of your liking.
Thank you for
dropping by. Have a nice day!
--------------------------------------
Hi folks, Kavya here. I am back on the blog
with another fun project! This one was super exciting for me because I don’t
made interactive cards that often… I mean I might have made just 2-3 in my card
making journey! I want to change that so get ready for many interactive cards this
year.
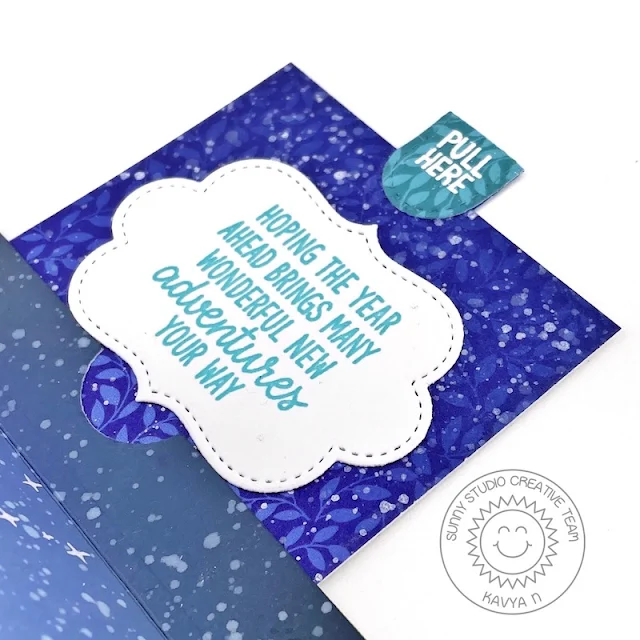
I first started off by creating a card base using the Sliding Window die. The instructions for assembling the base can be found on the website. For the sliding window portion, I ink blended a scene using Black Soot, Chipped Sapphire, Stormy Sky and Mowed Lawn distress oxide inks.
For the land, I die cut green cardstock using Slimline Nature Border dies. For the inner message (blue part in my card), I used Sweater Weather cardstock and for the part behind the sliding window (green in my card), I used All is Bright cardstock. For best results with this die, try using a lighter weight paper. I used 110lb for the sliding window but the other ones are just plain patterned paper stuck on top of 60lb cardstock.
Then, I stamped and colored multiple images from Garden Fairy and Home Sweet Gnome stamp sets. For the top fairy and butterfly, I used some acetate so that it would look like these images are floating when the window is slid! Then, I heat embossed a sentiment from Lovey Dovey on green cardstock.
For the message on the top, I die cut the stitched bracket label from the Sliding Window die and stamped a sentiment from Inside Greetings Birthday sentiments. For the pull tab, I used a few elements from another interactive die and stamp set. Feel free to just add a ribbon on the top.
That’s it! Wasn’t that a fun card? I absolutely had so much making it … even if I probably made it 4 times before I got it right! Happy Crafting!
Sunny Studio Supplies Used:
 Stitched Rectangle Dies Shop at: Sunny Studio |
 Fancy Frames- Rectangles Shop at: Sunny Studio |
 Home Sweet Gnome Stamps Shop at: Sunny Studio |
 Home Sweet Gnome Dies Shop at: Sunny Studio |
 Sliding Window Dies Shop at: Sunny Studio |
 Flirty Flowers 6x6 Paper Shop at: Sunny Studio |
 Slimline Nature Borders Shop at: Sunny Studio |
 Garden Fairy Stamps Shop at: Sunny Studio |
 Garden Fairy Dies Shop at: Sunny Studio | |
 Inside Greetings Birthday Shop at: Sunny Studio |
 Stitched Circle Small Dies Shop at: Sunny Studio |
 All Is Bright Paper Shop at: Sunny Studio |
 Sweater Weather Paper Shop at: Sunny Studio | |
 Cherry Blossoms Stamps Shop at: Sunny Studio |
 Cherry Blossoms Dies Shop at: Sunny Studio |
 Lovey Dovey Stamps Shop at: Sunny Studio |
 Lovey Dovey Dies Shop at: Sunny Studio | |


No comments:
Post a Comment