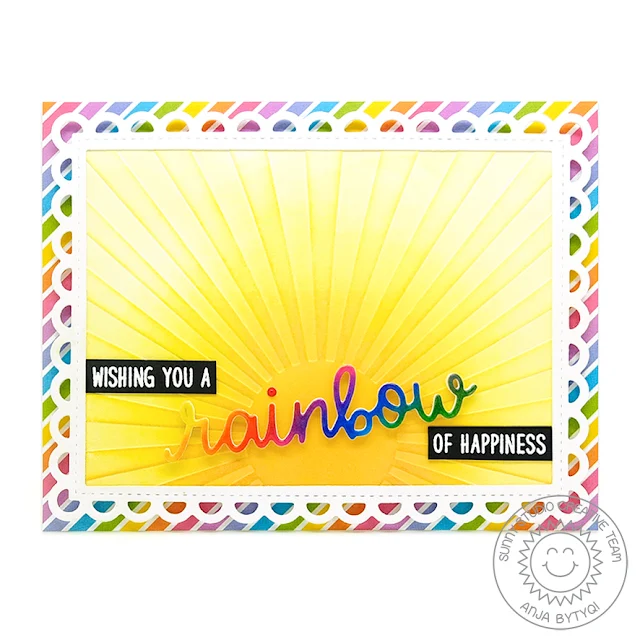
On my card I also used the
new Rainbow Word Die to build the
sentiment. I white heat embossed two of the sentiments on strips of black
cardstock. I die cut the word "rainbow" four times – 3 from regular
white cardstock and one from Strathmore Bristol smooth cardstock
which I colored with ZIG Clean Color Real Brush Pens in
rainbow order before die cutting. I stacked them together and clear embossed
the die cut for a glossy finish.
To go on with the rainbow theme, I picked the pretty striped paper from the Spring Sunburst 6x6 Paper pack and adhered it to my card base. Next, I used the Sunburst Embossing Folder and did some ink blending with Distress Oxide Inks (Squeezed Lemonade, Mustard Seed, Wild Honey) to make it a bright shining sun. I cut the Frilly Frames Lattice Dies from white cardstock (without the lattice insert) and created a scalloped stitched frame by also die cutting a rectangle from the center.
I assembled the card and adhered the rainbow word at an angle. The dot over the "i" was made with Nuvo Red Berry Crystal Drops so I would not have to glue together all the tiny die cut dots ;-)
As a little bonus, I created
a second card using the Inlaid Die Cutting technique that came to my mind
when I saw the previously released Fancy Frames Circle Dies. First, I die cut the
stitched scalloped circles and heart from the Dots & Stripes Pastels 6x6
Paper and the parts in between from white cardstock. Next, I
die cut a white cardstock circle (as big as the biggest blue circle) with a
layer of Ken Oliver Stick it on top. It's like doing a
puzzle when inlaying the die cuts.
I adhered the rainbow circle
a bit off to the right side of my white card base and trimmed the excess with
my paper cutter. Finally, I heat embossed another Over The Rainbow sentiment in silver
and cut the Rainbow Word Die from black glitter
cardstock.
Thank
you so much for stopping by! Have a wonderful day!
-----------------------------------------------------
Hello everybody! Vanessa here today with a happy card using the
wonderful new stamp sets Over The Rainbow and Love Monkey.
I started
with a panel of watercolor paper and applied a soft wash of watercolors. Then I
stamped the sentiment and adhered the panel to the card. I colored a scrap of
white cardstock with Copics, die-cut the Rainbow Word Die from
it and adhered the word to the card.
Now I stamped the
adorable monkey onto white cardstock, colored it with Copics, die-cut it with
the matching die, backed it with fun foam and adhered it. Finally, I added little
heart and circle sequins around the image.
I hope to have brought
some color into your life today! Thank you for stopping by!
Sunny Studio Supplies Used:
 Fancy Frames-Circle Dies Shop at: Sunny Studio |
 Spring Sunburst 6x6 Paper Shop at: Sunny Studio |
 Dots & Stripes Pastels 6x6 Paper Shop at: Sunny Studio |
 Sunburst Embossing Shop at: Sunny Studio |
 Love Monkey Stamps Shop at: Sunny Studio |
 Love Monkey Dies Shop at: Sunny Studio |
 Over The Rainbow Stamps Shop at: Sunny Studio |
 Rainbow Word Die Shop at: Sunny Studio |
 Frilly Frames Lattice Dies Shop at: Sunny Studio | |


Colorful, happy cards with many fun elements. Thanks.
ReplyDeleteSuper FUN and colorful cards!!!
ReplyDelete