I started with a white A2 sized card stock
panel. I added embossed detail using the Quilted Hearts embossing folder. I wrapped some baker’s twine around the panel towards the left
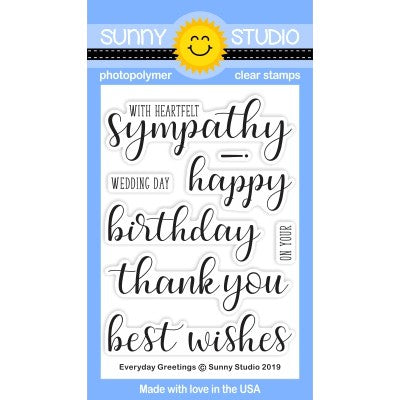
side. I die cut a tag to stamp “happy birthday” which is from Everyday Greetings stamps. The tag comes from the Sliding Window die set. I
lightly inked the edges of the tag with some Seedless Preserves Distress Oxide
Ink. I strung the tag on the twine and tied a bow. I secured the tag to
the background at a slight angle with foam tape.
I then added the flowers all along the left side
of the card. I grouped them fairly close together with some of the petals
overlapping. I used glue dots again for this job. For a
little extra embellishment, I added a scattering of clear sequins. I then
adhered the completed panel to an A2 card base with foam tape.
--------------------------------------------------------
Hello everyone, Eloise
here and today I have a card to share with you all using the Botanical Backdrop die set, I also pulled in the Frilly Frames Lattice dies for an extra layer.
To start off I die cut all my layers from coloured cardstock. I used green and a pink for the frame and flowers and then a blue for the background. I also used the Frilly Frames Lattice dies to die cut out of white as well. I then also added some additional colour to each of them using Distress Inks just to give the plain pieces a little bit of dimension.
(Distress Inks Used: Twisted Citron, Picked Raspberry, Tumbled Glass and Mustard Seed)
Now all my pieces are
die cut out, I created a blue card base which I ink blended some Tumbled Glass
onto as well to give the same effect. I then added foam tape to my lattice
background and adhered it onto the card base. I also adhered my green frame as
well. For my flowers I curled the edges a little and adhered them down and
added yellow enamel dots inside each of them. The flowers in this die set are
originally meant to be layered, but I wanted to make them simpler this
time.
For my sentiment I took the Hello Word die and die cut it from white foam and yellow cardstock. I then ink blended some Mustard Seed Distress Ink onto the yellow piece and adhered it to my white foam. I then adhered the sentiment onto my card and my card is complete.
Thanks so much for stopping by today, I hope you enjoyed and I'll see you next time.
Sunny Studio Supplies Used:
 Hello Word Die Shop at: Sunny Studio |
 Sliding Window Dies Shop at: Sunny Studio |
 Gingham Pastels 6x6 Paper Shop at: Sunny Studio |
 Quilted Hearts Embossing Shop at: Sunny Studio |
 Botanical Backdrop Die Shop at: Sunny Studio |
 Frilly Frames Lattice Dies Shop at: Sunny Studio |
 Everyday Greetings Stamps Shop at: Sunny Studio |


Simply stunning cards!
ReplyDeleteThank you Jean. Thank you for your sweet card too. :)
DeleteThese cards make me long for Spring!! Very pretty!!
ReplyDelete