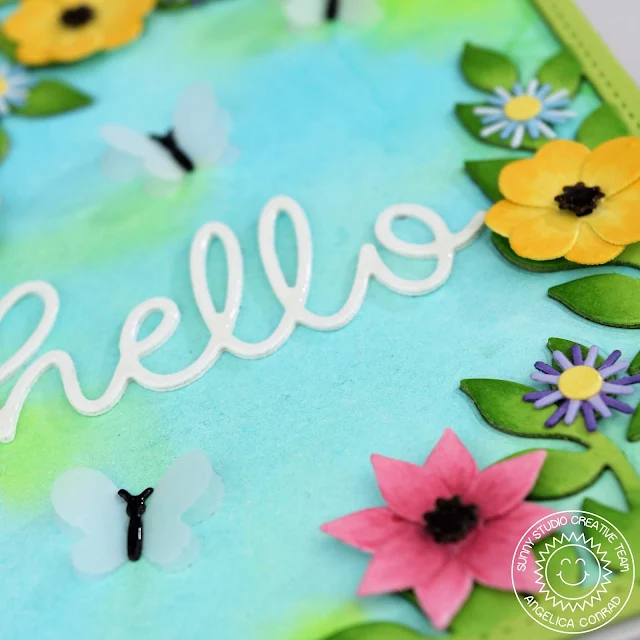
Today's card is all about die-cutting, starting
with the amazing Botanical Backdrop die. I die cut the backdrop twice out of
green card stock, then glued and stacked them together. I masked off the edges
with purple tape, and used Copic markers to add shading to the leaves.
Next I went through my scraps of card stock (this die set is a perfect way to
use your scraps!) and pulled out several different pastel colors. I die cut 3
different styles of small flowers, and again used Copic markers to add shade to
the petals. I glued the flowers together, and started work on a
background.
I used Atlantis Burst, Blue Blitz, and Solar Flare Tonic Shimmer Powders on watercolor paper, blending the powders together with water. Once I was happy with the blend, I used my heat tool to dry the paper. I glued the frame onto the background paper, then attached it to an A2 size card base with double-sided adhesive. I glued the flowers onto the petals, then assembled the word Hello and the butterflies.
I used Atlantis Burst, Blue Blitz, and Solar Flare Tonic Shimmer Powders on watercolor paper, blending the powders together with water. Once I was happy with the blend, I used my heat tool to dry the paper. I glued the frame onto the background paper, then attached it to an A2 size card base with double-sided adhesive. I glued the flowers onto the petals, then assembled the word Hello and the butterflies.
I die-cut each butterfly (it was a website exclusive freebie) twice out
of vellum and used a small dot of glue to adhere them together. I die-cut the
butterflies again with black card stock, and glued the black bodies onto the
vellum. My last die cut was the with the Hello Word die. I die-cut the
words three times out of white card stock, stacked and glued them together,
then glued the word to the card.
I arranged the butterflies around the word, then glued the bottom layer of vellum to the card. My final touch was brushing the butterfly bodies, flower middles, and Hello word with a Nuvo shimmer pen, then adding Nuvo Crystal Glaze for shine.
I arranged the butterflies around the word, then glued the bottom layer of vellum to the card. My final touch was brushing the butterfly bodies, flower middles, and Hello word with a Nuvo shimmer pen, then adding Nuvo Crystal Glaze for shine.
That's all I have for
today. Thanks so much for joining me, and I will see you again next week!
----------------------------------------------------------------
Hello Sunny Studio Friends! It's Juliana here with you today to share two ways to use the Botanical Backdrop die to create two quick, but elegant cards. One card uses the actual die cut itself and the other uses the negative pieces that we often just throw away.
For the first card, begin by die cutting a piece of sage green cardstock using the Botanical Backdrop die. Make sure to save the negative pieces. You're going to use them to create your second card. While you have the Botanical Backdrop die out, die cut a piece of kraft cardstock too and set all of these pieces to the side.
To create the card base for the first card, cut a piece of cream or off white cardstock to 4 1/8 x 5 3/8 inches. Layer this on top of a piece of gold foil cardstock that measure 4.25 x 5.5 inches.
Next, position the Botanical Backdrop that you die cut from sage cardstock on top of the cream cardstock. Take the negative pieces and use a liquid adhesive to adhere only the negative pieces to the cream cardstock.
For the second card, cut a piece of cream cardstock to 4.25 x 5.5 inches and adhere the kraft Botanical Backdrop on top of it. Repeat this with the sage die cut, but rotate the image to achieve an offset of the shape.
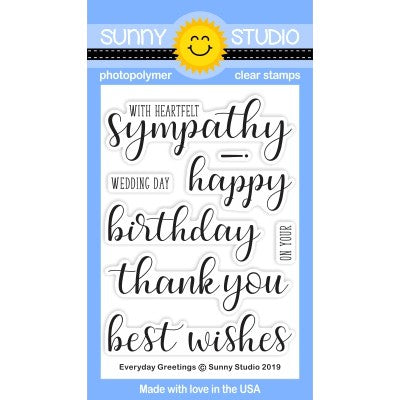
To complete this card, stamp a sentiment from the Everyday Greetings stamp set using Versamark embossing ink and emboss it with gold embossing powder. Don't you just love the touch of elegance the gold embossing adds?
Thanks so much for joining me today. I hope you enjoyed learning how to use the Botanical Backdrop die in two ways...using the actual die cut image itself and using the negative pieces. This is a great way to stretch your dies and make the most of your stash! This is always a win-win in my book!
----------------------------------------------------------------
Hello Sunny Studio Friends! It's Juliana here with you today to share two ways to use the Botanical Backdrop die to create two quick, but elegant cards. One card uses the actual die cut itself and the other uses the negative pieces that we often just throw away.
For the first card, begin by die cutting a piece of sage green cardstock using the Botanical Backdrop die. Make sure to save the negative pieces. You're going to use them to create your second card. While you have the Botanical Backdrop die out, die cut a piece of kraft cardstock too and set all of these pieces to the side.
To create the card base for the first card, cut a piece of cream or off white cardstock to 4 1/8 x 5 3/8 inches. Layer this on top of a piece of gold foil cardstock that measure 4.25 x 5.5 inches.
Next, position the Botanical Backdrop that you die cut from sage cardstock on top of the cream cardstock. Take the negative pieces and use a liquid adhesive to adhere only the negative pieces to the cream cardstock.
Lift up the main die cut and set it to the side to use on your next card. To
complete this card, stamp a sentiment from the Everyday Greetings stamp set
using a slightly darker ink than your cardstock. This will allow the sentiment
to stand out, but still achieve an elegant design.
For the second card, cut a piece of cream cardstock to 4.25 x 5.5 inches and adhere the kraft Botanical Backdrop on top of it. Repeat this with the sage die cut, but rotate the image to achieve an offset of the shape.
To complete this card, stamp a sentiment from the Everyday Greetings stamp set using Versamark embossing ink and emboss it with gold embossing powder. Don't you just love the touch of elegance the gold embossing adds?
Thanks so much for joining me today. I hope you enjoyed learning how to use the Botanical Backdrop die in two ways...using the actual die cut image itself and using the negative pieces. This is a great way to stretch your dies and make the most of your stash! This is always a win-win in my book!
Sunny Studio Supplies
Used:
 Hello Word Die Shop at: Sunny Studio |
 Botanical Backdrop Die Shop at: Sunny Studio |
 Everyday Greetings Stamps Shop at: Sunny Studio |


The flowers are SO CUTE! They remind me of the flowers on the Alice In Wonderland ride at Disneyland.
ReplyDeleteWow!! Beautiful cards!!!
ReplyDelete