Hello
Friends. Waleska here, and I am so happy to be back with a new card inspiration for you. I
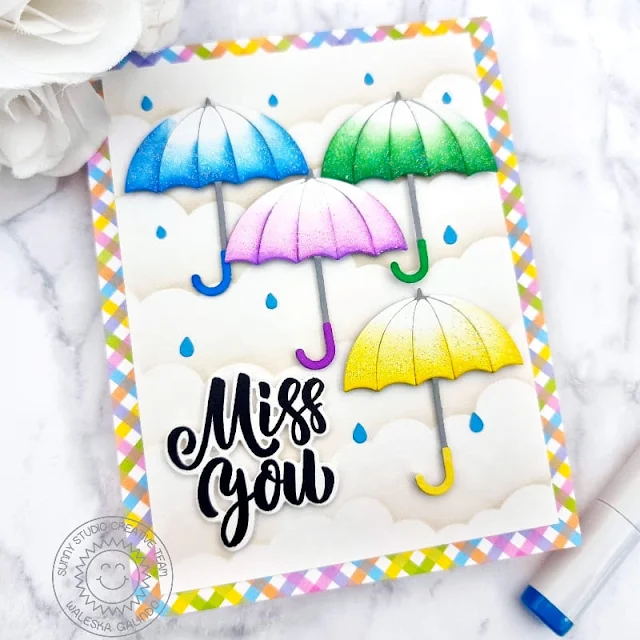
used the super cute Rainy Day Dies and the beautiful Big Bold Greetings stamps.
To create this card I started choosing a pattern paper from the Spring Fever patterned paper as color inspiration. I had the idea of creating a rainy day with lots of grey clouds, to do that I used a cloud stencil and Pumice Stone Oxide ink. I then cut all the pieces to create four umbrellas from white cardstock, I added some color to them with the following inks: Salty Ocean, Mustard Seed, Wilted Violet and Lucky Clover Oxide inks. For the umbrella bases I used grey cardstock. I wanted to add some sparkle to this cute umbrellas so I used Moonstone Glimmer paste to the bottom of all the umbrellas, for the umbrella handles I used copic markers trying to match the same colors I used before.
I finally adhered the umbrellas with 3D foam tape and cut a bunch of water drops from a blue cardstock and I add them around my rainy day scene. For the sentiment I used the handwritten phrase "Miss You" from the Big Bold Greetings stamps. I love how this card, specially to give it to someone you miss in your life. Thank you so much for stopping by today! I hope you have a wonderful day!
-------------------------------------
Hi crafty
friends! Marine here, back with a happy and cheerful slimline infinity
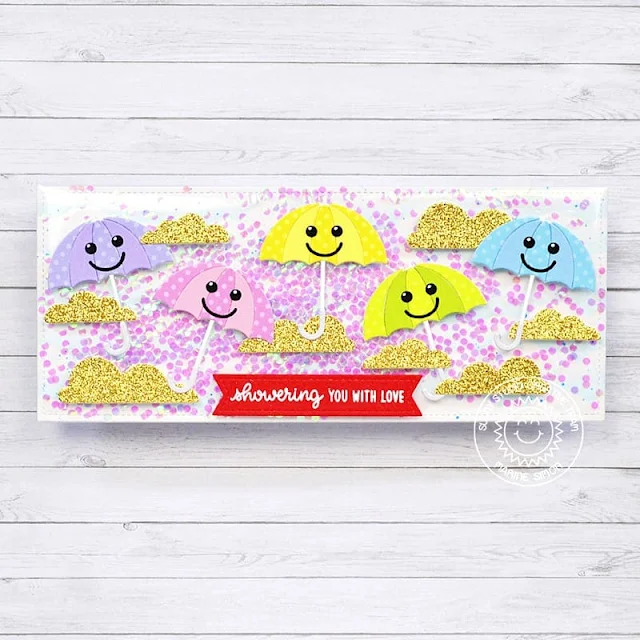
shaker card showcasing the adorable Rainy Days from the new Spring 2023 collection.
I started off by cutting an 8,5" x 4,5" bristol panel, and I used a cloud stencil along with tumbled glass and salty ocean oxide inks to create a very simple background.
Next I created the infinity shaker pocket. I cut a plastic sleeve (like the ones we put in binders for school) to get a single sheet of plastic. I added double sided tape on the four edges of that plastic sheet, I placed my cloudy panel in the middle of it, and while keeping the panel in place with my left hand, I cut the four plastic corners off, and this way created four plastic tabs on each side of the cloudy panel. I folded and attached three of those tabs at the back of the cloudy panel, poured a million iridescent confetti inside the plastic pocket, and then folded and attached the remaining tab to totally close the pocket.
Next I cut the different elements using Rainy Days. I cut the base of the umbrellas out of white cardstock. For the handle I used a light grey cardstock. And for the top and main part, I cut two types of papers: plain colored cardstock, and Spring Fever pattern papers. I assembled the colorful top pieces, as well as the handles on the plain white umbrellas, and once my five umbrellas were complete, I attached them on the shaker panel using 1mm foam squares. And to bring even more sparkles to this card, I cut and attached some gold glitter clouds using dies from the Tropical Trees Backdrop die set.
And then I asked myself "What could I add to bring more cuteness to those umbrellas?" And I thought that smiley faces would be fun. So I searched my entire collection of Sunny Studio die sets, and came across the Nutty For You die set that includes small dies to create cute faces. So I cut those five smiles and five pairs of eyes out of black cardstock, and glued them all on the umbrellas.
For my greeting, I started by cutting a red banner using a die from the Stitched Rectangle die set. I white heat embossed the phrase "Showering you with love" from Spring Showers, and I attached that banner using foam squares again. And last but not least, I added white highlights to the umbrella's eyes to kind of give them more personality. And that's it, the cutest umbrellas to brighten someone's day! Thanks so much for stopping by, and see you next time!
Sunny Studio Supplies Used:
 Stitched Rectangle Dies Shop at: Sunny Studio |
 Nutty For You Dies Shop at: Sunny Studio |
 Spring Showers Stamps Shop at: Sunny Studio |
 Tropical Trees Backdrop Shop at: Sunny Studio |
 Big Bold Greetings Stamps Shop at: Sunny Studio |
 Big Bold Greetings Dies Shop at: Sunny Studio |
 Rainy Days Dies Shop at: Sunny Studio |
 Spring Fever Paper Shop at: Sunny Studio |


No comments:
Post a Comment