Hi dear ones,
it's Alma and I'm so happy to show you the awesome new stamps from the Pumpkin Patch Dies set from the new
release on my new card.
The punches are very versatile, you can use them as Halloween punches or simply as fall pumpkins. I chose the second option and punched the die-cut elements on white paper, glued them together and then coloured them with copics and pencils.
I then speckled and dotted the background, tied the Doodletwine around the card, and die-cut the text from the Words of Gratitude Stamps Set. Now glue the pumpkins on, colour in a shadow with pencils under the pumpkins and you're done!
--------------------------------------------
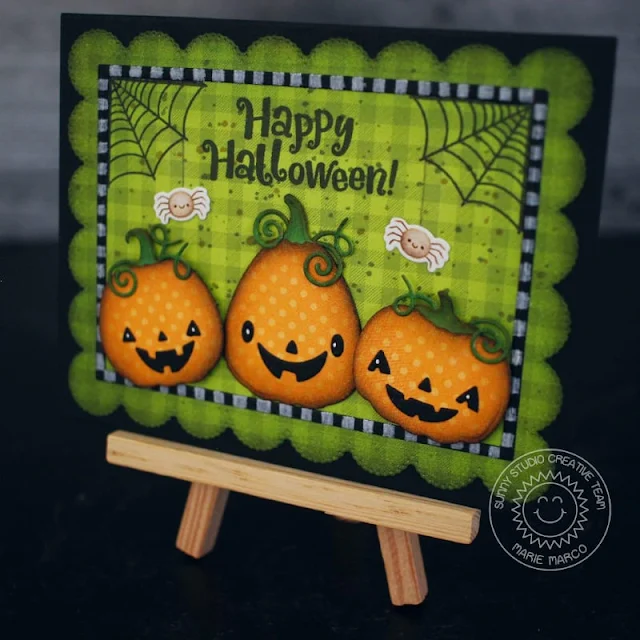
Hello Everyone! I’m Marie! Thank you so much for joining me today for my very first blog post with Sunny Studio Stamps. It’s Spooky season for some people that’s why I am so thrilled to be here to share my simple, fun, and spooktacular Halloween card featuring the new Pumpkin Patch Dies. I also used the New Too Cute To Spook stamp set. There are so many elements in this die set that will help to build all kinds of different pumpkins, from Harvest to the friendly Jack-o’-lantern. These dies are perfect for all fall themed cards.
To create this card, I first started by die cutting an A2 sized panel from 110 lb black card stock as my card base. Using the Frilly Frames Eyelet Lace Die, I cut out my green pattern paper from the Critter Country Paper Pack. I then inked the scalloped edges of my pattern paper with Distress Ink in “Black Soot”. Afterwards, I adhered my pattern paper to the black card base.
Setting my
background panel aside, I die cut my 3 adorable pumpkins from
Orange polka dot paper also from the Critter Country Paper pack. I also die cut
another set of pumpkins using 110 lb. Neenah Solar white cardstock. I attach my
orange pattern paper pumpkins to the solid white card stock to create
sturdy pumpkins. I die cut the pumpkin stems and vines and used a copic marker
in the color G17 Forest Green to color the vines and stem. I then distress the
edges of the stems and vines and entire pumpkins using Ground Espresso Distress
Oxide Inks. After Inking, I die cut some cute jack-o-lantern faces and glued
them to my pumpkins and highlighted their eyes with a white gel pen.
For some added spookiness, I decided to water color 2 tiny spiders from the Too Cute To Spook stamp set, and die cut them them using their corresponding dies.
To build my card, I created a frame from black card stock and used a white color pencil to create spooky black and white stripes around the border. I adhered it to my background panel and I stamped out some spider webs as well as the Happy Halloween Sentiment both from the Too Cute To Spook stamp set. I adhered my happy little pumpkins using foam tape to add dimension to the 2 outer pumpkins and finally I added my super cute spiders.
And there you have it! A cute and fun Halloween
card! Thank you so much for stop! I can’t wait to create more fun and spooky
cards to share with you all during this spooky season! Until Next time, Happy
Crafting!
Sunny Studio Supplies Used:
 Words of Gratitude Stamps Shop at: Sunny Studio |
 Frilly Frames-Eyelet Lace Shop at: Sunny Studio |
 Too Cute To Spook Stamps Shop at: Sunny Studio |
 Too Cute To Spook Dies Shop at: Sunny Studio |
 Pumpkin Patch Dies Shop at: Sunny Studio |
 Critter Country Paper Shop at: Sunny Studio |


Hi, friends - These are terrific. I love the look of the first one, especially, but they are both fabulous cards.
ReplyDeleteLori S in PA
Both cards are amazing. The one created by Alma is beautiful with the soft colors of Fall. Sunny Studios has the best products and ideas!
ReplyDelete