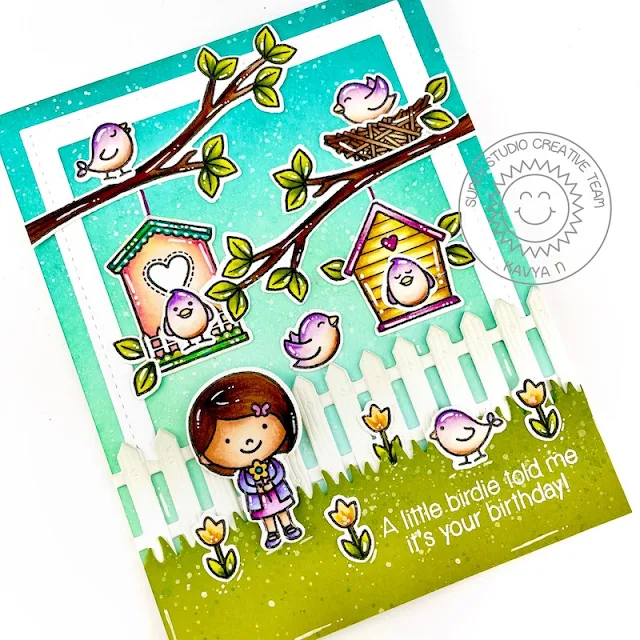
Hi folks, Kavya here. I am back on the blog with another fun card using the new Picket Fence die! As always, I am here to show you a fun way to combine some older stamps to create an adorable card :)
I first created my background by ink blending the top half of a light blue panel with teal and mint dye inks and used the grass die in the Picket Fence die set with some green cardstock. I then splattered some white paint as always :) I created the white border using the largest two dies in the new Stitched Rectangle Dies. Later, I used the picket fence die to create a fence. I felt that the fence was a bit too white so I ink blended the top half of the fence using a soft gray dye ink to make it a bit more realistic.
I then stamped and colored various images from A Bird’s Life and Spring Showers using colored pencils and alcohol markers. Once I finished coloring, I adored the images as shown below and heat embossed a sentiment from A Bird’s Life using white embossing powder :)
That’s it folks! I hope this card
inspires you to combine older stamps with the newer release to create some
totally new cards!
-----------------------------------------------
Hello Everyone! Isha here with a fun fold card featuring
the Picket Fence die. I felt
this kind of card was perfect to showcase this beautiful die and how it matches
perfectly with the previously released products.
To start, I made the base of my side step card. Take a 5.5 by 8.5 inch white cardstock. Mark 2.5 inch from the left edge, along the length. Now on the 3 inch side, score at 6.25, 4.25, 3.25, 2.25 and 1.25 inches. Cut vertically along the marked line from the 6.25 score point to 1.25 score point. Fold the card onto the score lines and the card base is ready.
Sponge the sky on the left longer panel using pinks and yellow inks. Die-cut the fence three times with white cardstock, using the Picket Fence die. Die-cut the grass from the Gingham Jewel Tone pattern paper using the same die.
Emboss a white
scrap using the Woodgrain embossing folder.
Sponge Vintage Photo, Fossilized Amber and Ground Espresso Distress inks. Cut
using a pair of scissors to create the tree trunk.
Stamp images,
color using Copics and die-cut using coordinating dies:
Fairies,
Butterfly, Flowers, Mushroom House: Garden Fairy Stamp and coordinating dies
Gnome,
Mushroom: Home Sweet Gnome stamp and dies
Tree
Leaves: Outback Critters stamp and dies
Mountains: Country Scenes Stamp and dies
Adhere all the dies and images as per the card photo and the card is ready. To finish, add some sparkles to the fairy wings, dots to the gnome hat and some clear sparkle pen to some flowers, fairy dress.
Hope you
enjoyed the card. If you get inspired, don't forget to tag us on instagram
@sunnystudiostamps. We would love to see your beautiful creations. Thanks for
dropping by!
Sunny Studio Supplies Used:
 A Bird's Life Stamps Shop at: Sunny Studio |
 A Bird's Life Dies Shop at: Sunny Studio |
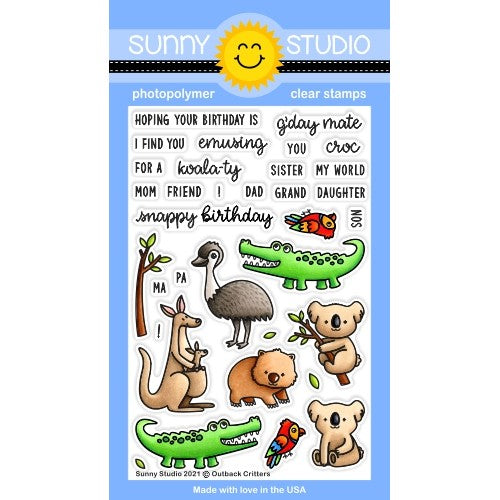
 Outback Critters Stamps Shop at: Sunny Studio |
 Outback Critters Dies Shop at: Sunny Studio |
 Picket Fence Border Dies Shop at: Sunny Studio |
 Stitched Rectangle Dies Shop at: Sunny Studio |
 Gingham Jewel Tones 6x6 Paper Shop at: Sunny Studio |
 Home Sweet Gnome Stamps Shop at: Sunny Studio |
 Home Sweet Gnome Dies Shop at: Sunny Studio | |
 Woodgrain Embossing Shop at: Sunny Studio |
 Spring Showers Stamps Shop at: Sunny Studio |
 Spring Showers Dies Shop at: Sunny Studio |
 Country Scenes Stamps Shop at: Sunny Studio | |
 Country Scenes Dies Shop at: Sunny Studio |
 Garden Fairy Stamps Shop at: Sunny Studio |
 Garden Fairy Dies Shop at: Sunny Studio |


So cheerful, just perfect for spring.
ReplyDelete