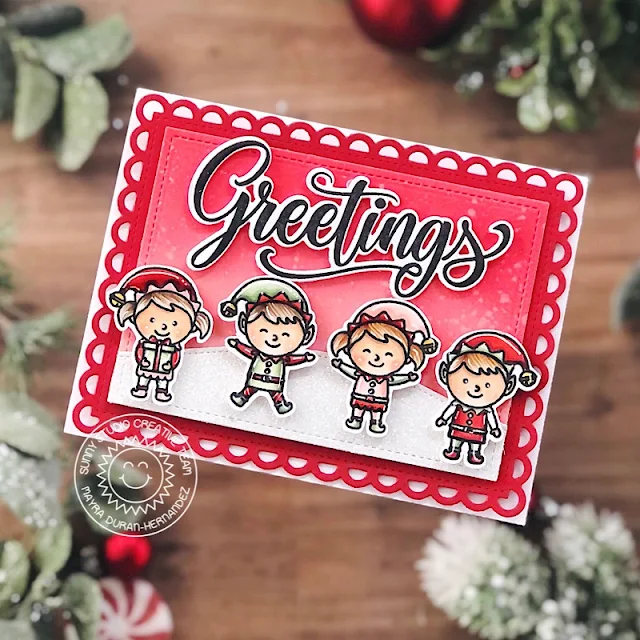
Hello and happy Monday everyone. Mayra here with you today. I am sharing a fun card with you. I used the adorable North Pole stamp set. This is such a cute set. I adore the little elves!!!
I began by coloring these little cuties using Copic markers. I used R26, R17, R05, and R59 for the red areas. For the soft pink, I used R00, R01, and R21. For the soft green, I used G20, G12, G43, G24, and G46. For the skin areas, I used E50, E51, E21, and E23.
Next, I used the lovely Frilly Frames Lattice die to die cut a red scalloped frame for the card. I then die cut a rectangle to fit within the frame. I added color to this die-cut panel using Distress Oxide inks. I used Tattered Rose and Festive Berries. I then stamped the word 'greetings' from what is becoming one of my absolute favorite stamp sets Season's Greetings.
I then used the stitched hill from the Slimline Nature Borders die set to create a snowy hill for the little elves to be on. This was a fun card to create. I hope you feel inspired. Thank you very much for taking the time to stop by. I pray you each have a wonderful and blessed day.
---------------------------------------------
Hi friends! Tammy here! I'm so excited to share this festive holiday card
and coordinating tag set, featuring the adorable set, North Pole. I just love
traditional Christmas sets, and this set has it all...from Santa Claus to his
adorable working elves!
To begin, I stamped, colored with Copic markers, and die cut images from the following sets:
North Pole/ Coordinating Dies
Gleeful Reindeer (trees)/ Coordinating Dies
Santa Claus Lane/ Coordinating Dies
To create this slimline card, I first cut a white scalloped border using the Slimline Scalloped Frame Dies. Next, I cut a piece of Bristol smooth cardstock to fit inside the scallop and ink blended it with Tumbled Glass, Peacock Feathers, Chipped Sapphire, and Black Soot Distress Oxide inks. I added some white embossed snowflakes from Gleeful Reindeer, and die cut a snowy border using the Slimline Nature Borders Dies.
I then attached the panel to
a red slimline card base. Next, I attached the images to my card, using foam
tape on some for dimension, and white heat embossed the sentiment from North Pole to complete my card. Next, I created a fun trio of Christmas tags I can't wait to use
on the kiddos gifts this year!
First, I cut my tag bases from the Very Merry and Holiday Cheer 6X6 paper, using the Scalloped Tag Square Dies. Next, I cut a background to fit inside the square tags, and ink blended it just as I did the slimline card. The snowy hills were created with the Woodland Borders Die and attached to the background.
I then attached a white
frame around the background using the Fancy Frames Square Dies, and added the stamped images, using foam tape on some for
dimension. To complete my tags, I white heat embossed the sentiments from North Pole and Santa Claus Lane onto black cardstock strips, and added red and white
bakers twine.
Thanks so much for stopping by...have a great day!!
Sunny Studio Supplies Used:
 Gleeful Reindeer Dies Shop at: Sunny Studio |
 Gleeful Reindeer Stamps Shop at: Sunny Studio |
 Fancy Frames-Square Dies Shop at: Sunny Studio |
 Woodland Borders Dies Shop at: Sunny Studio |
 Holiday Cheer 6x6 Paper Shop at: Sunny Studio |
 Frilly Frames Lattice Dies Shop at: Sunny Studio |
 Very Merry 6x6 Paper Shop at: Sunny Studio |
 Season's Greetings Stamps Shop at: Sunny Studio |
 Santa Claus Lane Stamps Shop at: Sunny Studio | |
 Santa Claus Lane Dies Shop at: Sunny Studio |
 Scalloped Tags-Square Shop at: Sunny Studio |
 Slimline Nature Borders Shop at: Sunny Studio |
 Slimline Scalloped Frame Shop at: Sunny Studio | |
 North Pole Stamps Shop at: Sunny Studio |
 North Pole Dies Shop at: Sunny Studio |


No comments:
Post a Comment