Hello friends!
It's Ashley with a soft watercolor scene today
featuring one of the Winter Scenes stamps!
I love how these scene stamps make it so easy to compose a card!
I started by stamping my images onto white watercolor cardstock. I wanted a soft scene, so I decided to give no-line watercolor a try. I stamped the snowmen from Feeling Frosty in Inkon3 Fade Out ink, then masked them. I stamped a scene from Winter Scenes on top also using Fade Out ink, then removed the masks. I slowly painted everything in using my Zig Clean Color Real Brush markers, a paint brush, and water. I probably should have gone with a less detailed stamp for my first attempt at no-line watercoloring, but I am happy with the result!
Once I was done with watercoloring, I splattered the whole piece with a bit of watered down white acrylic paint to mimic snow. I die cut the piece with the stitched frame from Frilly Frames Retro Petals and added it to a dark gray card base. I added a sentiment from Inside Greetings Holiday stamped in Pinkfresh Studio Rocky Slope from the Urban Raincoat cube pack. I know these sentiments were designed for the inside of cards, but I just can't stop using them on the front!
Thank you so much for stopping by! Have a wonderful day!
---------------------------------------------------
Happy Monday
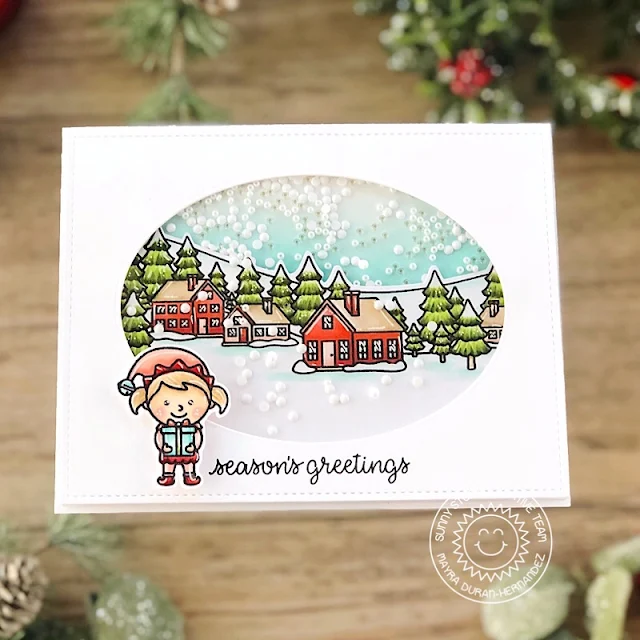
everyone, Mayra here with you today. I have a super fun card to share with you.
I used the super cute Winter Scenes stamp
set.
I began by die-cutting a piece of white cardstock using the large stitched rectangle from the Frilly Frames Quatrefoil dies set. I also cut a second rectangle using Bristol Smooth cardstock. Next, I stamped the image I would be using onto the white die-cut panel using Copic safe black ink. I then colored in my images. For the red areas, I used R05, R22, R17, and R46. For the soft pink areas, R00, R01, and R21. For the trees, I used YG01, BG90, G29, G94, YG99, and YG17. I added a bit of color to the snowy areas by using my Copic markers in BG000, and G000. I also colored one of the cute little elves from the North Pole stamp set.
Next, I added a bit of color to the panel die cut from Bristol Smooth cardstock. I used Peacock Feathers Distress Oxide ink. I then used the Winter Scenes Dies to die cut the image. I adhered it to the base panel using foam tape. I then die cut another stitched rectangle using the Frilly Frames Quatrefoil dies set from white cardstock. This would be the top layer. I used the Stitched Oval Dies set to create a window. I then stamped the sentiment from the Inside Greetings Holiday stamp set onto the top layer. I added acetate and foam tape to create a shaker card. I wanted to give it a snow globe effect.
I hope you enjoy the card I created to share with you and feel inspired to create. Thank you very much for taking the time to stop by. I hope you each have a wonderful and blessed day.
Sunny Studio Supplies Used:
 Stitched Oval Dies Shop at: Sunny Studio |
 Frilly Frames Retro Petals Dies Shop at: Sunny Studio |
 Feeling Frosty Stamps Shop at: Sunny Studio |
 Frilly Frames Quatrefoil Shop at: Sunny Studio |
 Inside Greetings-Holidays Shop at: Sunny Studio |
 North Pole Stamps Shop at: Sunny Studio |
 North Pole Dies Shop at: Sunny Studio |
 Winter Scenes Stamps Shop at: Sunny Studio |
 Winter Scenes Dies Shop at: Sunny Studio | |


Such sweet scenes! Lovely cards!
ReplyDeleteI also want THANK YOU for sponsoring the 2020 Cat Lovers Hop at Her Peaceful Garden!!