Hello friends! It's Rachel here with a nativity-themed box card featuring the new Holy Night Stamp Set.
I created a half-front box card to feature my scene. I stamped all of my images with Tuxedo Memento Black Ink, colored them with Copic Markers, and used the coordinating Holy Night Die Set to cut them out.
Copic Color Combos Used: Skin: E0000, E000, E21, E04; Greens: YG61, YG63, YG67; Blues: B21, B24, B37; Browns: E30, E31, E23, E25, E29; Hay: E50, E53, E55; Yellows: Y13, Y15, V12; Reds: R14, R46, R89; Purples: V01, V04, V17, V09; White: 0, C00, C2, C4; Dark Grays: W0, W2, W4, W5, W7; Light Grays: W0, W2, W4; Camel: E40, E41, E42, E43
For my starry night sky background, I blended a small piece of smooth white card stock with Stormy Sky, Faded Jeans, Blueprint Sketch, and Black Soot Distress Inks. I then splattered this piece lightly with water using a #4 round paint brush and blotted it dry with a clean paper towel. Once my entire ink blended area was dry, I then splattered it again but this time with diluted Opaque White Paint.
Thank you all so much for stopping by! Wishing you the most safe and wonderful weekend!
----------------------------------------------------
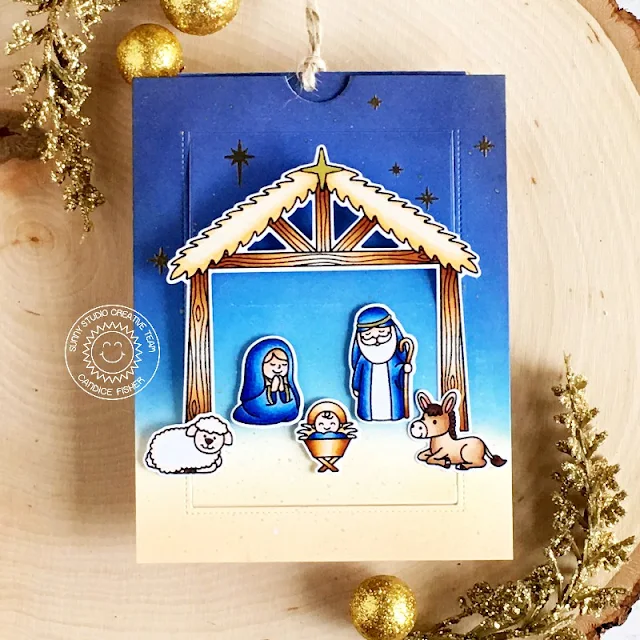
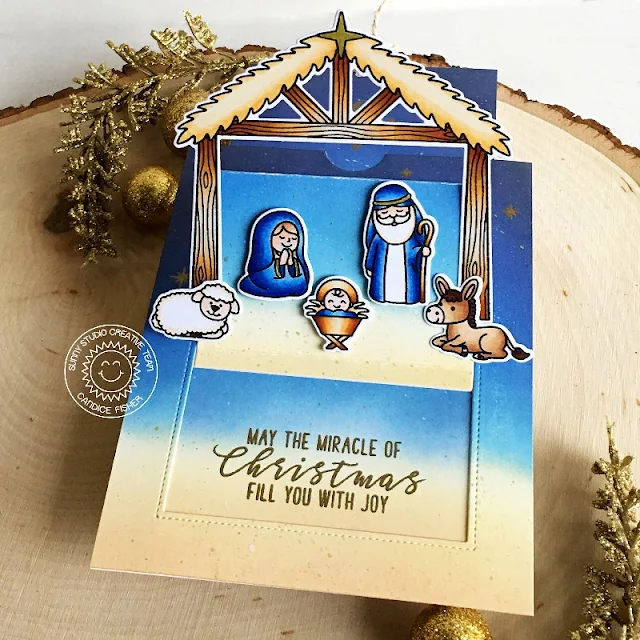
Hello! Candice with you this Friday sharing a meaningful
Christmas card using the wonderful seasonal stamp set, Holy Night!
I used a few great Sunny Studio products for
my interactive card:
First, I cut all my pieces following the instructions here
to for making the sliding window card base and inked them with Black Soot, Chipped Sapphire, Blueprint Sketch, Salty Ocean and Tumbled Glass for the night
sky and tea dye and antique linen for the sand. I then heat embossed the stars in gold
on the top layer, the sentiment on
the bottom layer and O Holy Night on the
tag in gold and then splatter them all with gold and white shimmer spray using
a damp paintbrush.
Next, I stamped all the images from the Holy Night stamp set, colored them with Copic markers and used the coordinating dies to cut them out. I adhered them to the sliding frame, making sure to only add adhesive to the parts that on the sliding frame. I finished by punching a hole for my twine and adding gold accents to my images with a pen!
Thank you so much for stopping by today!
Sunny Studio Supplies Used:
 Sliding Window Dies Shop at: Sunny Studio |
 Holy Night Stamps Shop at: Sunny Studio |
 Holy Night Dies Shop at: Sunny Studio |
 Inside Greetings-Christmas Shop at: Sunny Studio |
 Seasonal Trees Stamps Shop at: Sunny Studio |
 Seaonal Trees Dies Shop at: Sunny Studio |
 Sending Sunshine Stamps Shop at: Sunny Studio |
 Sending Sunshine Dies Shop at: Sunny Studio |
 Woodland Borders Dies Shop at: Sunny Studio |


No comments:
Post a Comment