Hello friends, Leanne here!
Today's card is a throw back to a card I made last year. It was and still
is one of my favorite card designs. I used Merry Mice on last year's card (see the blog post here). For this new card I have used Penguin Pals. They
are very similar in shape to the mice and work perfectly for this design.
I started with a slimline card base that measures 8.5 inches tall by 3.5 inches wide. I die cut the kraft panel using a stitched rectangle die from the Slimline Scalloped Frame set. I die cut two circle Scalloped Tags and one square Scalloped Tags from white card stock. I masked off the scalloped edges and then added color to the tag centers with a blending brush and Festive Berries Oxide ink. Next I added my Copic colored Penguins to the tags. (Copics used: N2, N4, N6, R00, YR12, YR18, G000, G00, G02, R32, R35, R39, E41, E43)
I arranged the tags on the kraft panel while leaving room to stamp the greeting above and below the center tag. This punny greeting is included in Penguin Pals. I added little twine bows to each tag. To finish off this card design, I added the die cut holly leaves and berries. The little holly and berry dies are from an older holiday set but one of my all time favs called Warm & Cozy.
--------------------------------------------------
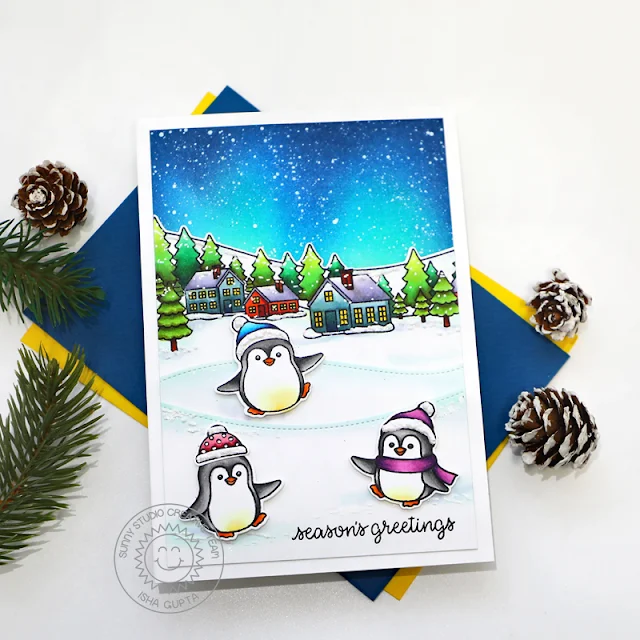
Hello everyone! Isha here today with a cute card featuring the
adorable Penguin Pals stamp set for
you.
To start the sky background, I took a white card and sponged distress inks in cracked pistachio, peacock feathers, salty ocean and chipped sapphire. I then flicked some white paint to it and let it dry. I stamped the beautiful town scene from the Winter Scenes stamp set, colored it using copic markers. I then added some white dots using a white gel pen and die-cut the panel using the coordinating die.
I then die-cut two snow slopes using the Slimline Nature Borders die.
I colored the snow using copic markers. Stamp the sentiment onto the lowest
panel from the Inside Greeting - Holiday stamp set.
I really love this set as it has beautiful sentiments for the inside of the
cards as well.
Stamp the cute and adorable penguins, color and die-cut them using the coordinating dies. I then applied some clear ink using the WOW! embossing pen to the cap, sprinkle WOW! white puff powder and heat set it. This gives a beautiful fur texture. Adhere all the layers to a white card base. This is a slightly bigger card than the normal card. It measures 4.5 by 6.5 inches.
Finally, I applied the WOW! embossing pen to the scene to give a
touch of snow texture, sprinkle puff powder and heat set it. Lastly, I applied a
touch of Nuvo crystal drops for some sparkle.
Thank you for stopping by. Have a nice day!
Sunny Studio Supplies Used:
 Warm & Cozy Dies Shop at: Sunny Studio |
 Scalloped Tags-Circle Shop at: Sunny Studio |
 Scalloped Tags-Square Shop at: Sunny Studio |
 Slimline Nature Borders Shop at: Sunny Studio |
 Slimline Scalloped Frame Shop at: Sunny Studio |
 Inside Greetings-Holidays Shop at: Sunny Studio |
 Penguin Pals Stamps Shop at: Sunny Studio |
 Penguin Pals Dies Shop at: Sunny Studio |
 Winter Scenes Stamps Shop at: Sunny Studio | |
 Winter Scenes Dies Shop at: Sunny Studio |


No comments:
Post a Comment