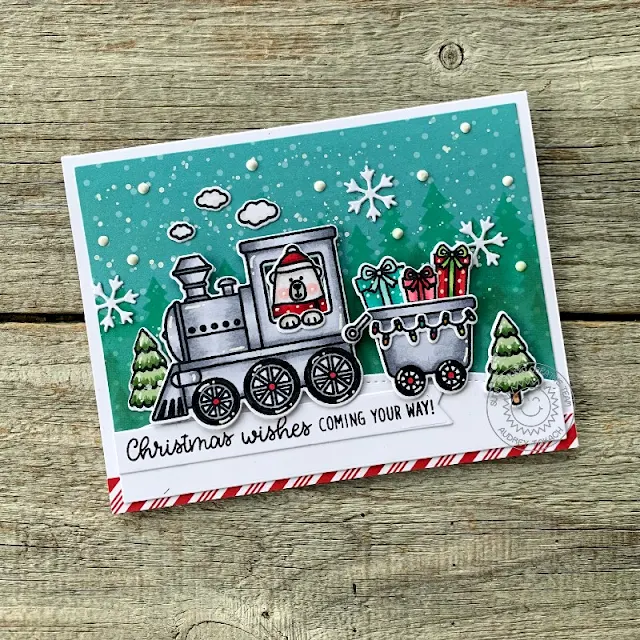
Hello friends! Audrey here with a fun holiday card to share with you!
To create my card, I started off with a piece of patterned paper from the All Is Bright 6x6 paper pad cut to 4" x 5.25". I used the Forest Trees Stencil and teal and green shades of Distress Oxide ink to add a tree line near the top of the panel, when splattered the paper with watered down white paint to add more snowflakes to the background. I added a snowy hill to the bottom of the panel using the Slimline Nature Borders dies and some white cardstock. Then, I stamped and colored images from the Holiday Express stamp set with my Copic markers and die cut them with the coordinating Holiday Express dies. I popped those images up with foam tape once I was happy with the arrangement.
I stamped a sentiment from the set onto a die cut banner and adhered it under the train on the snow bank. Next, I added some die cut snowflakes to the sky above the train using the Basic Mini Shapes II dies, along with some snowflakes made with white Nuvo Drops. Before mounting the panel to an A2 card base with foam tape, I added a strip of candy cane striped paper from the All is Bright paper pad. I finished off my card with some white gel pen accents.
------------------------------------------
Hello friends! Tammy here today with this fun holiday card, featuring
the adorable set, Holiday Express. Santa and his reindeer are traveling by
train this year to deliver all the Christmas packages, haha!
To begin, I cut a piece of Bristol smooth cardstock to 3 1/2 X 8 1/2" and ink blended the background with Peacock Feathers, Broken China, and Tumbled Glass Distress Oxide inks. I cut a snowy border using the Slimline Nature Borders Dies, lightly inking the edge with Tumbled Glass ink before attaching to the bottom of the inked background. Next, I splattered white acrylic paint onto the background for a snowy effect.
I stamped the images from Holiday Express, colored with Copic markers, and die cut with the Holiday Express Dies. I then splattered white acrylic paint, thinned with water, onto the die cut images to give the appearance of freshly fallen snow.
Next, I attached all the images to my card, using foam tape for dimension. Lastly, I stamped the sentiment in black ink across the top of my card then attached it to a 3 1/2 X 8 1/2 white card base to complete my card.
Thanks so much for stopping by! Have a wonderful weekend!
Sunny Studio Supplies Used:
 Holiday Express Stamps Shop at: Sunny Studio |
 Holiday Express DIes Shop at: Sunny Studio |
 Mini Basic Shape Dies II Shop at: Sunny Studio |
 Slimline Nature Borders Shop at: Sunny Studio |
 Forest Trees Stencils Shop at: Sunny Studio |
 All Is Bright Paper Shop at: Sunny Studio |


No comments:
Post a Comment