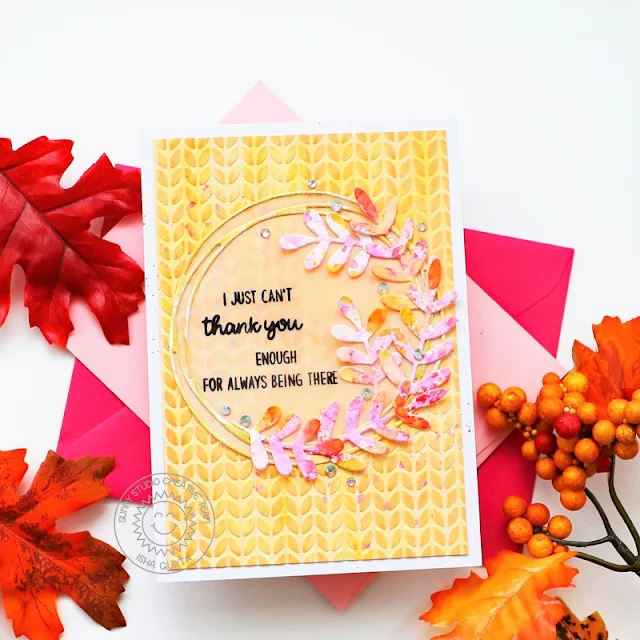
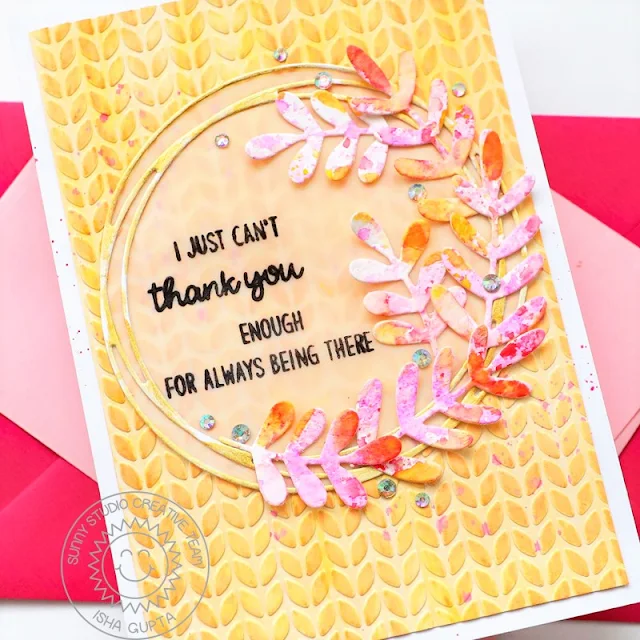
Hello everyone! Isha here with an autumn theme card featuring our Words Of Gratitude stamp set. Have you ever wished to create sentiments to express your feelings? then this set is perfect. It has so many sentiments and the fonts go very well together. I made my own expression by combining four sentiments :)
To start, I created the background by lightly brushing white ink to a yellow cardstock. Emboss this piece using the Cable Knit embossing folder. Now simply brush wild honey distress oxide ink to enhance the embossed part. I then adhered it to a white card and flick some pink paint.
Die-cut the frame using the Snowflake Circle Frame. Add gold watercolor to it and adhere to a piece of vellum. Die-cut leaves from the new Winter Greenery die using watercolor paper. Add picked raspberry, wild honey distress ink with a water-brush and also some gold watercolor.
Stamp the sentiment from the Words of Gratitude stamp to the vellum part. Adhere the frame to the card and then adhere all the leaves. To finish, adhere some Iridescent Jewels.
Thanks for
dropping by! Have a nice day.
---------------------------------------------
Hi folks, Kavya
here. I am back on the blog with another fun card using the new release! I
am still in summer mode so I decided to make a watermelon themed card using
just circle dies! But full disclosure.. this one didn’t turn out exactly how I
planned in my mind. You cannot really make out the watermelon slice and it does
look a bit messy but I still think its a fun way to stretch your supplies and I
also mentioned some ways in which you can avoid the mistakes I made!
I first started off by stamping and coloring multiple images from the following sets:
- Beach Buddies and Beach Babies for all the
critters and beach paraphernalia
- Tropical Scenes and Tiki Time for foliage
and palm tree
For the watermelon slice, I die cut three semi circles using three consecutive dies from Stitched Circle Small and Stitched Circle Large die sets. I ink blended the three circles using red and green dye inks. For the seeds, I simply drew them using a black alcohol marker and added extra details using a white gel pen! I then arranged all the stamped critters around the melon.
Now for the
mistakes to avoid:
- Place
the critters farther away from the melon so that the melon is visible! I don’t
think you can really make it out now..
- Draw
the seeds after placing the sentiment so that it doesn’t look too crowded
and messy :)
That’s it! I hope you liked this fun card :) Check back tomorrow for more inspiration! Happy Crafting.
Sunny Studio Supplies Used:
 Beach Buddies Stamps Shop at: Sunny Studio |
 Beach Buddies Dies Shop at: Sunny Studio |
 Tiki Time Stamps Shop at: Sunny Studio |
 Tiki Time Dies Shop at: Sunny Studio |
 Words of Gratitude Stamps Shop at: Sunny Studio |
 Beach Babies Stamps Shop at: Sunny Studio |
 Beach Babies Dies Shop at: Sunny Studio |
 Cable Knit Embossing Shop at: Sunny Studio |
 Loopy Letters Dies Shop at: Sunny Studio | |
 Snowflake Circle Frame Shop at: Sunny Studio |
 Tropical Scenes Stamps Shop at: Sunny Studio |
 Tropical Scenes Dies Shop at: Sunny Studio |
 Stitched Circle Small Dies Shop at: Sunny Studio | |
 Stitched Circle Large Dies Shop at: Sunny Studio |
 Winter Greenery DIes Shop at: Sunny Studio |


No comments:
Post a Comment