Today's sneak peeks include two new 4x6 stamp sets and a new 6x6 paper pack for Christmas. Let's jump right in!
Card No. 1: My first card combines both new stamp sets called Santa Claus Lane and Scenic Route. I started by stamping my house border using the Scenic Route stamps and then inked up the tree borders, masking off parts of my neighborhood scene so that the extra hillsides blended together at the treeline. I then used some Windsor & Newton masking fluid with a paint brush which had be protected with some liquid dish soap on the bristles. I painted in the masking fluid over the trees, houses and snow to protect my white cardstock.
When the masking fluid was dry, I inked up my background using Broken China, Salty Ocean, Mermaid Lagoon, Chipped Sapphire and Black Soot distress inks working from light to dark near the top edges. This gives my town the appearance that it's glowing. When I was done, I flicked on droplets of water with a stiff paint brush that I ran my finger across and then watered down some picket fence distress ink on a clear block which I also flicked on. After everything was dry, I rubbed off the masking fluid with my finger, getting any stubborn spots off with my adhesive eraser. I then set to work coloring the trees and houses with my Copic Markers.
For my reindeer I colored and fussy cut images from our Gleeful Reindeer Stamps and added the Santa, Sleigh and bag of toys from our new Santa Claus Lane Stamps. I then heat embossed my sentiment with white embossing powder in the leftover space in the center. This wasn't a fast card to make so it will definitely be going to someone special, but it was really fun to create and I adore how it turned out.
Card No. 2: Up next is an indoor scene using all the adorable companion images from the Santa Claus Lane set. There are so many fun opportunities for scene building! The only extra images that didn't come with the set are the wreath which I borrowed from our Christmas Icons Stamps and the windows from our new Sweet Treats House Add-on dies which I will be featuring more on Friday. For my "wallpaper" I used a striped print from our new Subtle Grey Tones 6x6 Paper (also shared more later this week) which was the perfect backdrop that adds interest without visually competing with the rest of my scene.
To finish my card, I used a woodgrain print for my floor from our Amazing Argyle 6x6 Paper pack and a simple red scalloped border to ground the scene using our Stitched Scalloped Dies.
Card No. 3: Up next was a super fast card to create using a background from our new Very Merry 6x6 Paper Pack. I used the same Santa and reindeer from my first card, but this one was so much easier to put together because the paper with the glowing moon doesn't require any fancy ink blending to achieve. I finished off my card with a sentiment from the Santa Claus Lane set which I arranged on my MISTI to match the curve of the snow. I then added two hearts from our Heart Droplets Mix-- I love that the smaller heart was the perfect size to act as Rudolph's red glowing nose.
I should note that this card is actually a custom size. I cut my background to be 4.5" wide x 5.5" high. I just wanted to have a little more space on either side of the reindeer and sleigh so I figure this one will need to be put into a large envelope or have a custom envelope made (or better yet, just included in a box with the gift so I don't need to worry about the envelope at all).
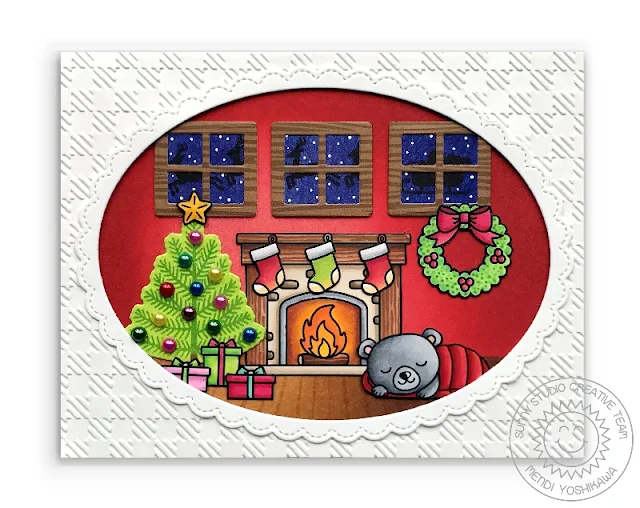
Card No. 4: For my next card I wanted to create a cozy Night Before Christmas type scene with a glowing fireplace. I was looking for a critter to put in front of the fireplace and when I came across this little bear snuggled up in a sleeping bag from our Critter Campout Stamps I was ecstatic. I thought he looked so cute--almost like he fell asleep waiting to see Santa.
For my scene, I used many of the same components as I used in my second card, but this time I put three windows across from our Sweet Treats House Add-on dies which allowed me to stretch across them the silhouette of Santa and his reindeer going by using our Here Comes Santa Stamps. You may notice this set only comes with three reindeer (or six if they are doubled up) so I masked off my first image with a post it note before stamping it a second time slightly offset to add another reindeer.
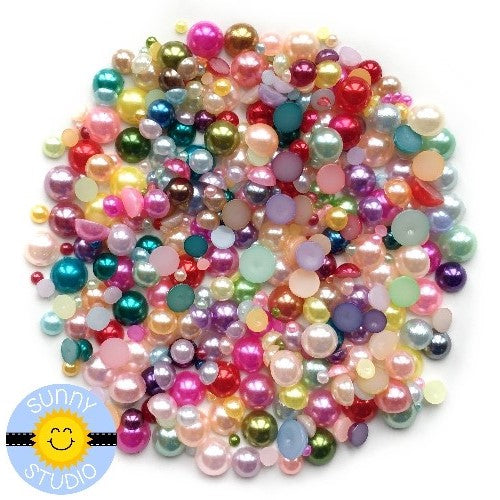
To create a bit of a glow radiating out from the fireplace, I inked the center of my background wall using Abandoned Coral distress ink, working out towards the edges with Festive Berries and Fired Brick distress ink. This time rather than adding ornaments to my tree from the stamp set, I added some pearls from our Rainbow Pearls mix.
To finish off and frame my scene, I cut an oval from white cardstock using our Stitched Oval dies. I then ran the panel through my machine using our new Buffalo Plaid Embossing Folder (featured more later in the week) and topped it with a stitched scalloped oval from our Fancy Frames Oval dies.
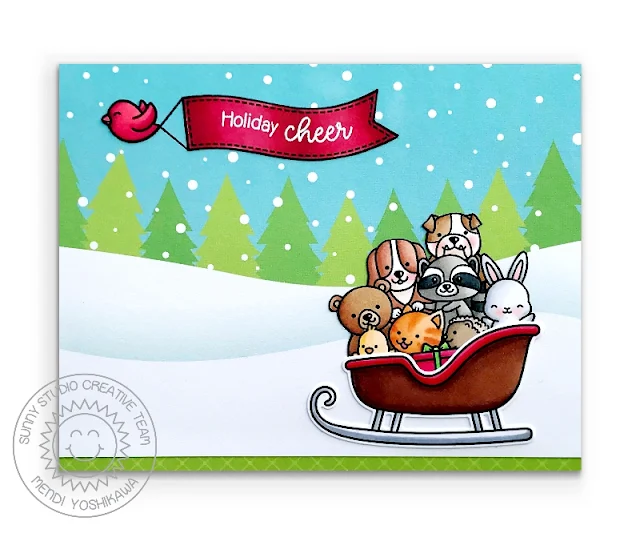
Card No. 5: For this next card I wanted to pile the sleigh from our Santa Claus Lane set with various animals and I realized I could do it with a lot less effort simply by using our Cruising Critters Stamps and just cutting off the car portion. To hide the edge of the car, I simply added a little Christmas gift from the set and no one will ever be the wiser. ;)
My background once again is one of the patterned papers from our new Very Merry 6x6 Paper pack. I just adore how fun and easy these are to use! The strip along the bottom is also one of the many versatile tone-on-tone prints from this new paper set. For my sentiment I used the phrase "Holiday Cheer" from our new Scenic Route Stamps, pairing it with the banner from our Plane Awesome Stamps and a birdie from our A Bird's Life Stamps.
Card No. 6: Next up is a card with Santa up on the rooftop. The Santa Claus Lane set includes a chimney for additional scene building options. You can use one of the two Santa's to go in the chimney upright, but I thought it might be cute to have him going in head first with his legs up in the air.
To create my starry / snowy sky I did a watercolor wash on some watercolor paper and then used a white Sharpie paint pen to draw in some stars once it had dried. For my roof, I used our Stitched Scalloped Dies, alternating two different colors of black cardstock and offsetting the scallops. Blacks can vary so much between brands so I just used it to my advantage to keep some definition between the layers. I then used five strips of lights from the stamp set to transition between the roof and house, using a horizontal stripe from our Very Merry Paper pack to give the look of lap siding. Finally I used those same windows again from our Sweet Treats House Add-on to create my glowing windows. I was really struggling for a good place to put my sentiment, but in the end a speech bubble came to my rescue from our Comic Strip Speech Bubble dies.
Card No. 7: For my last card of the day, I used all the same components that I used for my first card, this time focusing on the snowy hillsides from our Scenic Route Stamps. After I had all my stamped pieces in place, I heat embossed my sentiment onto my solid cardstock background using white embossing powder, before filling in the rest of the background with snowflakes using a white Sharpie paint pen. To span the larger distance between Santa and the reindeer, I used a piece of baker's twine tied into a bow which was cut with a extra long tail on one side to string over to Santa's hand, which was adhered with a little bit of liquid glue.
Well, that wraps up today's sneak peeks. I'm so happy you've joined me! If you missed it, make sure to check out our Birthday blog hop post HERE for a chance to win one of eighteen $25 Gift codes to our online store. I've enjoyed reading all your sweet comments and there's still lots of time to hop along to see all the cool ideas.
Plus over on our Birthday blog hop post I share a few more details about our Holiday release promos shown below. :)
 A Bird's Life Stamps Shop at: Sunny Studio |
Christmas Icons Dies Shop at: Sunny Studio |
Christmas Icons Stamps Shop at: Sunny Studio |
 Gleeful Reindeer Dies Shop at: Sunny Studio |
 Gleeful Reindeer Stamps Shop at: Sunny Studio |
 Stitched Scallop Dies Shop at: Sunny Studio |
 Versafine Onyx Black Ink Shop at: Sunny Studio |
 Fancy Frames- Ovals Shop at: Sunny Studio |
 Amazing Argyle 6x6 Paper Shop at: Sunny Studio | |
 Here Comes Santa Stamps Shop at: Sunny Studio |
 Stitched Oval Dies Shop at: Sunny Studio |
 Cruising Critters Stamps Shop at: Sunny Studio |
 Plane Awesome Stamps Shop at: Sunny Studio | |
 Comic Strip Speech Bubble Dies Shop at: Sunny Studio |
 Subtle Grey Tones Paper Shop at: Sunny Studio |
 Buffalo Plaid Embossing Shop at: Sunny Studio |
 Sweet Treats House Add-on Shop at: Sunny Studio | |
 Heart Droplets Mix Shop at: Sunny Studio |
 Rainbow Pearls Shop at: Sunny Studio |
 VersaMark Watermark Ink Shop at: Sunny Studio |


Wow, Mendi! What awesome cards! And so many of them! Great products in this release.
ReplyDeleteI love this release, so many cute things and these cards are amazing!
ReplyDeleteThese cards are just too Stinkin' CUTE!!!!!
ReplyDeleteOh my, these are FABULOUS!!! I love them!!!
ReplyDeleteThese cards are wonderful! I love all the sweet scenes. :)
ReplyDeleteMendi, such adorable cards and wonderful showcasing of your new products! I especially like the first card with Santa and his reindeer traveling through the evening sky - you did a lovely job creating the night sky and your coloring overall is gorgeous! Jolly well done!
ReplyDeleteI love these cards, they're beautiful!
ReplyDeleteGreat cards!! My favorites are 4 and 5. It would be so fun to ride in a sleigh in the snow like these cute critters are doing! Then it would be time to relax and get warm by the cozy fireplace you designed in the other card's scene. :) Sounds like the perfect winter's day to me! :)
ReplyDeleteDARLING LITTLE scenes and coloring!!!!!!!!!!
ReplyDeleteThese products create the most festive holiday scenes! Thanks for sharing this inspiration with these fun products.
ReplyDeleteAwesome samples! Great sneak peek! Love all the scenes, and the Santas are so cute!
ReplyDeleteAbsolutely love these cards. Wonderful new stamps.
ReplyDeleteThank you so much for the inspiration.
T x
If these don't make you smile, I don't know what will. So cute!
ReplyDeleteOh gosh this is by far the most excited i've been all week! I am so loving these beautiful cards and the stamps and dies are gorgeous!
ReplyDeleteHugs,
Jo
Very festive !! I love these cards!
ReplyDeleteWhat fun cards! Love them all!
ReplyDeleteCUTENESS GALORE :)
ReplyDeleteLOVE them ALL, especially the slimline with Santa and his reindeer filling the inky sky - WOW!