Hi
everyone, Eloise
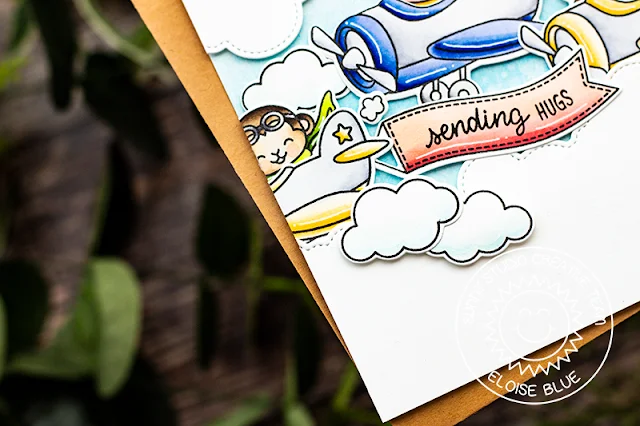
here and today I’m using the Plane
Awesome Stamp Set and Fluffy
Cloud Border Dies to create a ‘Sending Hugs’ card.
I
started off with stamping out my images
and colouring them in with Copic Markers. I then cut
them out and also cut some Fluffy
Cloud Border’s out as well from plain white cardstock.
(Copic
Markers Used: YR30, Y21, Y32, Y35 / YR20, YR21, YR23, YR24, YR27 / R00, R30,
R32, R35 / B61, B23, B66, B69 / B0000, B000, 0 / YG01, YG03, YG25, YG67 / W00 /
C00, C0, C1, C3 / N0, N2, N4, N6 / E40, E41, E42, E43, E44, E47, E49)
Once
all my images were cut out, I cut one of the planes in half, so I’d have three
planes but didn’t have to colour three.
I then took a piece of watercolour paper and ink blended some Tumbled Glass Distress Ink on it. I then flicked on some water and dried it off with a heat tool. I then added foam tape to the back of my cloud pieces and adhered it on the top and bottom of my watercolour panel. I also added foam tape to the backs of my images and adhered them into place as well.
I then took a piece of watercolour paper and ink blended some Tumbled Glass Distress Ink on it. I then flicked on some water and dried it off with a heat tool. I then added foam tape to the back of my cloud pieces and adhered it on the top and bottom of my watercolour panel. I also added foam tape to the backs of my images and adhered them into place as well.
For
my sentiment, I used the banner I coloured and cut before and stamped the
‘Sending Hugs’ on top. I then added more foam tape and adhered it underneath one
of the planes. I finished off with adding white details to the images and that
completed my card for today.
Thanks so much for stopping by today and I’ll see you next time.
---------------------------------------------------
Thanks so much for stopping by today and I’ll see you next time.
---------------------------------------------------
Hello everyone, Leanne here! I have a fun interactive card to share today which features images from Plane Awesome. The little plane and its adorable pilot take flight with help from the Sliding Window die.
This interactive
card was so easy to make but still big on wow factor thanks to the cute
airplane and pilot that appear to fly through the clouds when the sliding
window is opened.
I used patterned
paper from Summer Splash and Surprise Party 6x6 paper pads for the sliding window frame and reveal
panel. I found the weight of the patterned paper to be sturdy enough for
this type of interactive card.
With the sliding
window closed, I adhered the airplane and clouds. I made sure to not add
adhesive above the fold line. The clouds above that line are adhered to the
back of the plane and pilot. I also stamped the greeting which is from
the Plane Awesome set.
I
kept the reveal panel simple and only added a stamped sentiment overtop the
pattern paper. I wanted as much of the rainbow pattern to show as possible. It's such a pretty pattern and gives a bright colorful surprise when the
window is opened.
While we didn't get a chance to participate in a crafty fundraiser in the past few weeks due to being overwhelmed here behind the scenes, our hearts still go out to those affected by Hurricane Dorian and we wanted to help. With your sweet support we donated $2000 to Convoy of Hope this past week to help feed Hurricane victims. Thank you for being such a giving community.
Sunny Studio Supplies Used:
 Sliding Window Dies Shop at: Sunny Studio |
 Summer Splash 6x6 Paper Shop at: Sunny Studio |
 Surprise Party 6x6 Paper Shop at: Sunny Studio |
 Plane Awesome Stamps Shop at: Sunny Studio |
 Plane Awesome Dies Shop at: Sunny Studio |
 Fluffy Clouds Border Dies Shop at: Sunny Studio |


No comments:
Post a Comment