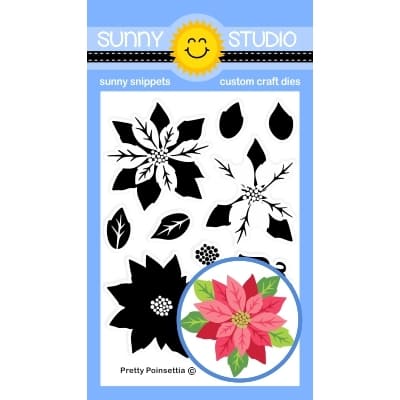
Hello crafty friends! It's Rachel here, and I have a Christmas shaker card to share with you today featuring the beautiful Pretty Poinsettia layering clear stamps set. I combined this set with the gorgeous Frilly Frames Quatrefoil Die Set to add both texture and interest to my background. The nice thing about this card is that it's super easy to re-create because there is only stamping, die cutting, and gluing involved and no coloring.
To start, I first stamped out three separate poinsettias using some Pinkfresh Studio Ink. The colors I used (in this order) were Passion Fruit, Candy Apple, and Espresso. I like using a dark brown ink when layering stamps with red ink, because I feel like the color really helps the image to pop and still appears as a dark red instead of a brown. I only used three of the layering stamps when creating my poinsettias. Following this, I used the Pretty Poinsettia Die Set to cut them out. Next, I die cut some holly leaves using the holly die that comes in the new Woolen Mitten Dies. There are also holly dies in the Winter Greenery Die Set (which I also used for the red foliage).
I set aside my florals to work on my background and adhered the back of my cutout to a 4.25" x 5.5" piece of clear acetate with liquid adhesive. Next, I attached some 1/4" wide foam adhesive tape to the back frame of my frilly quatrefoil cutout and then added some shimmery shaker embellishments to the inside of this piece. I then adhered a 4.25" x 5.5" piece of light gray card stock over the back of my card to hold in my embellishments. Once my shaker base was finished, I then heat embossed my sentiment on a 1.5" x 5.75" piece of clear heavy-duty vellum with some Liquid Platinum Fine Detail Embossing Powder. I wrapped this strip around the middle of my card and attached the folded tabs to the back of my panel prior to adhering my card to a top-folding A2 sized card base. Lastly, I added my florals to the front of my card with either 3D foam adhesive tape or liquid adhesive depending on which pieces I wanted to add dimension or not.
Thanks
so much for taking the time to stop by today! If you liked this card and want
more card making inspiration, please feel free to check out my INSTAGRAM FEED.
Wishing
you all a lovely day!
Sunny Studio Supplies Used:
 Frilly Frames Quatrefoil Shop at: Sunny Studio |
 Winter Greenery DIes Shop at: Sunny Studio |
 Pretty Poinsettia Stamps Shop at: Sunny Studio |
 Pretty Poinsettia Dies Shop at: Sunny Studio |


No comments:
Post a Comment