Here's all the Copics I
used to color the images: YR01, YR02,
YR0, RV10, RV02, RV13, R32, R35, R39, BG10, BG32, BG34, E41, E43,
E70, E71, E74, E77
This card is A2 size. I added texture to the panel of teal card stock with the Quilted Hearts embossing folder. I die cut the Fancy Frames Rectangle Dies to highlight my image cluster. I backed the frames with vellum to mute the background panel. I felt the images stood out better with the vellum behind them. I added a greeting that's part stamped and part die cut. The stamped part I white heat embossed on some chocolate brown card stock and trimmed into thin strips. I die cut the Sweet word from pink glitter card stock.
This card is A2 size. I added texture to the panel of teal card stock with the Quilted Hearts embossing folder. I die cut the Fancy Frames Rectangle Dies to highlight my image cluster. I backed the frames with vellum to mute the background panel. I felt the images stood out better with the vellum behind them. I added a greeting that's part stamped and part die cut. The stamped part I white heat embossed on some chocolate brown card stock and trimmed into thin strips. I die cut the Sweet word from pink glitter card stock.
Once I had all the
images and greeting in place, I thought this card could use just a bit of extra
embellishment. I decided to add a few red hearts. These cute little
hearts can be found in the Red & Pink Clay Heart Confetti
mix.
-----------------------------------------------------------
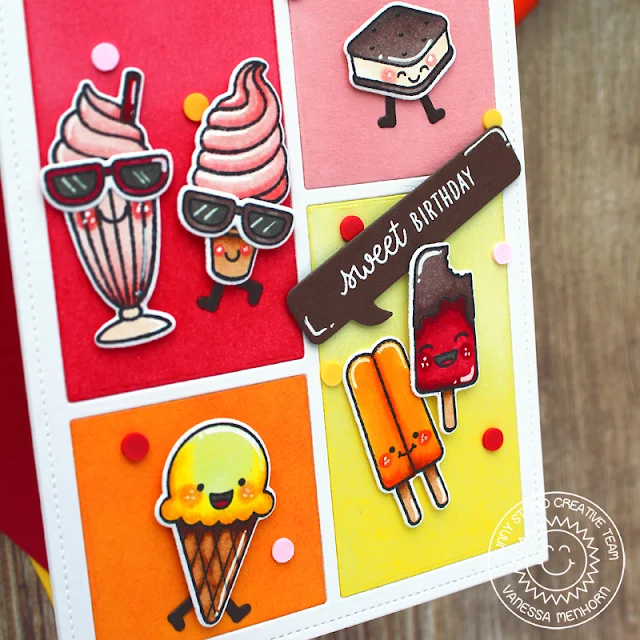
Hello to you! Vanessa here with a funny card using Summer Sweets. These treats are so sweet and I wanted to give them more "personality":
-----------------------------------------------------------
Hello to you! Vanessa here with a funny card using Summer Sweets. These treats are so sweet and I wanted to give them more "personality":
I first die-cut the Comic Strip Speech Bubbles Die from
white cardstock and inked the inside parts with red, pink, orange and yellow
inks before adhering the pieces to the card. Now I stamped all the images,
colored the elements with Copics, die-cut everything with the matching dies and
adhered all the parts to the card, popping-up some with foam tape.
I then stamped and heat-embossed the sentiment onto dark brown cardstock, heat-embossed it with white embossing powder, die-cut the speech bubble from it and adhered it to the card. Finally, I added Birthday Cake Dot Sprinkles to finish the card off.
I then stamped and heat-embossed the sentiment onto dark brown cardstock, heat-embossed it with white embossing powder, die-cut the speech bubble from it and adhered it to the card. Finally, I added Birthday Cake Dot Sprinkles to finish the card off.
For today's card, I used the following products:
Summer Sweets + matching dies (popsicles, sandwich,
sundae, milk shake, faces, sentiment)
Cruisin' Cuisine + matching dies (ice
cream cone)
Sealiously Sweet + matching dies (sunglasses)
Fast Food Fun (laughing
faces)
Breakfast Puns Dies (legs)
Comic Strip Speech Bubbles Die (frame,
speech bubble)
Birthday Cake Dot Sprinkles
I hope this card made you smile today! Thanks for stopping by, see you on Thursday!
I hope this card made you smile today! Thanks for stopping by, see you on Thursday!
Sunny Studio Supplies Used:
 Sweet Word Die Shop at: Sunny Studio |
 Breakfast Puns Dies Shop at: Sunny Studio |
 Fancy Frames- Rectangles Shop at: Sunny Studio |
 Fast Food Fun Stamps Shop at: Sunny Studio |
 Quilted Hearts Embossing Shop at: Sunny Studio |
 Comic Strip Speech Bubble Dies Shop at: Sunny Studio |
 Cruisin' Cuisine Stamps Shop at: Sunny Studio |
 Cruisin' Cuisine Dies Shop at: Sunny Studio |
 Sealiously Sweet Stamps Shop at: Sunny Studio | |
 Sealiously Sweet Dies Shop at: Sunny Studio |
 Summer Sweets Stamps Shop at: Sunny Studio |
 Summer Sweets Dies Shop at: Sunny Studio |


No comments:
Post a Comment