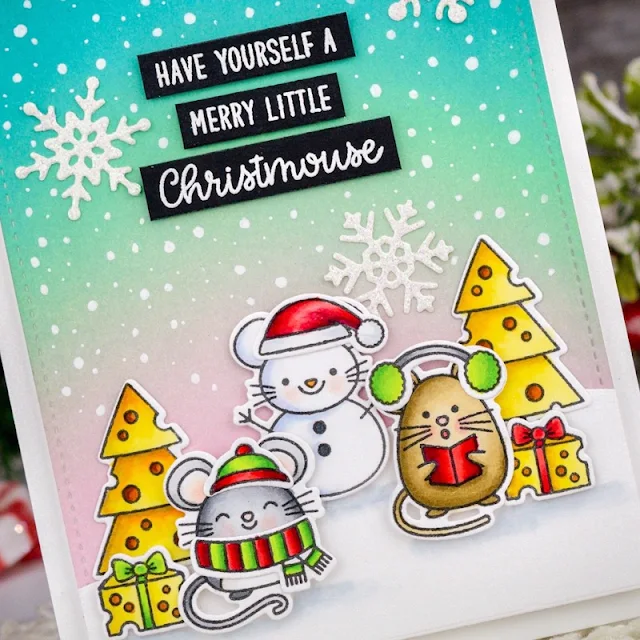
I colored these festive mice with Copic Markers before using
the coordinating dies to
die-cut them. I used glue to attach the scarf and hats. For the background, I
blended Spun Sugar, Cracked Pistachio, and Peacock Feathers Distress Oxide inks
onto white card stock. I trimmed the panel with the stitched Frilly Frames Retro Petals rectangle,
then attached it to a card base with foam adhesive.
To finish the card, I added a white card stock hill and trees to the
panel, then used foam squares to add the presents and mice. I stamped and white
heat-embossed a sentiment onto black card stock, trimmed the words, and used
thin foam squares to add them to them to the card. I added die-cut snowflakes
from the Layered Snowflake Frame Die,
and finished the card by adding snow with a white gel pen.
I hope I have helped with ideas for this sweet Merry Mice stamp set. Thanks so much for stopping by!
--------------------------------------------------
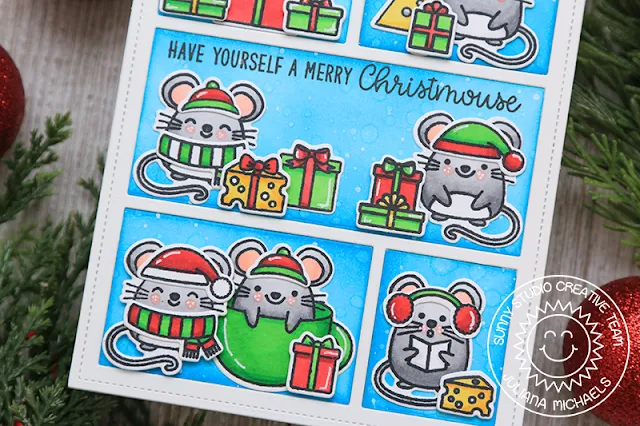
Hello Sunny Studio Friends! It's Juliana here and today I'm sharing a card featuring the Merry Mice Stamp Set. I couldn't help but include as many of these adorable images as possible to create a cute little "Christmouse" scene.
As always, I began by stamping and coloring a bunch of the
images from the Merry Mice
Stamp Set. I also added in some extra presents from the Santa
Claus Lane Stamp Set. Did you notice the mouse in the present? That present is
from the Happy
Owlidays Stamp Set. I also added an extra hat from the Alpaca
Holiday Stamp Set. Once all of the coloring was completed, I die cut
the images using the coordinating die sets.
Because I wanted to create a little scene ... almost like a little mouse house, I used the comic strip frame from the Comic Strip Everyday Dies. I cut this from white Bristol Paper. I then took the negative pieces left over from die cutting and inked those with Salty Ocean Distress Oxide, splattered them with a bit of water and dabbed that dry to activate the ink. I then splattered a little bit of watered down white acrylic paint to give the look of falling snow.
I then went about layering the images and creating a scene inside each of the openings. I then completed the card by stamping the sentiment in the center section.
Thanks so much for stopping by today! I hope you enjoyed this bit of inspiration using the Merry Mice Stamp Set.
Sunny Studio Supplies Used:
 Comic Strip Everyday Dies Shop at: Sunny Studio |
 Alpaca Holiday Stamps Shop at: Sunny Studio |
 Alpaca Holiday Dies Shop at: Sunny Studio |
 Happy Owlidays Stamps Shop at: Sunny Studio |
 Happy Owlidays Dies Shop at: Sunny Studio |
 Frilly Frames Retro Petals Dies Shop at: Sunny Studio |
 Santa Claus Lane Stamps Shop at: Sunny Studio |
 Santa Claus Lane Dies Shop at: Sunny Studio |
 Merry Mice Stamps Shop at: Sunny Studio | |
 Merry Mice Dies Shop at: Sunny Studio |
 Layered Snowflake Frame Shop at: Sunny Studio |


Both cards are super cute! I just received my order with the Merry Mice stamp set, so I really love the inspiration today.
ReplyDeleteThese are Adorable!!!
ReplyDelete