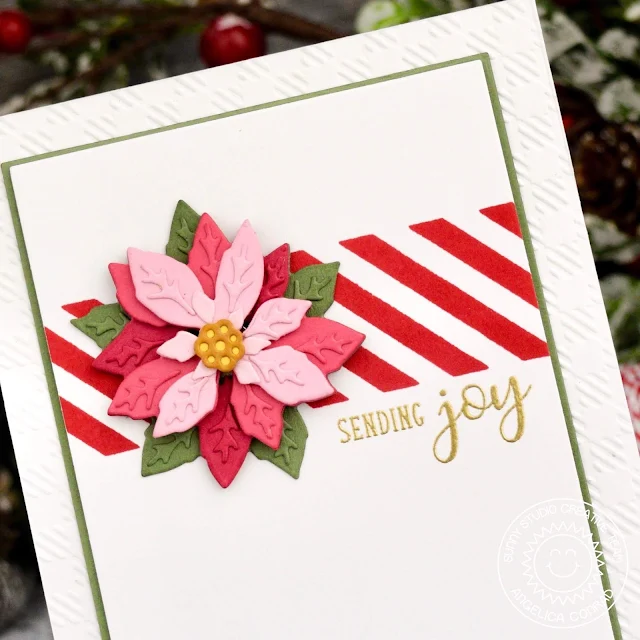
I used the stripe stamp from the Background Basics stamp set to
add red stripes, then stamped and gold heat-embossed a sentiment from the Petite Poinsettias stamp set.
I trimmed the panel down, and added the positive magnet to the back of the
panel with Scor Tape. I used thin foam squares to attach the panel to a cactus
green panel. I used the new Buffalo Plaid Embossing Folder to
emboss white card stock, and attached it to a card base. I added the stamped
panel with Scor Tape to the card base to finish the card.
Now the recipient has a pretty Poinsettia that can be kept out
when it's time to put the Christmas cards away! I hope I have given you ideas
on ways to use this die. That's all that I have for today. Thanks for stopping
by!
------------------------------------------------------
Hello Sunny Studio Friends! It's Juliana here and today I'm excited to share my first Christmas card of the season! I'm featuring the Sunny Studio Layered Poinsettia Die paired with the Christmas Garland Frame Die and the Woodgrain Embossing Folder for a slightly rustic design.
I began by die
cutting a mix of red, green and yellow cardstock using the Layered
Poinsettia Die. After all the die cutting, I lightly inked the edges using
Vintage Photo Distress Ink and an ink blending tool. Using a fine tipped liquid
adhesive applicator, I adhered all of the layers together. I found it helpful
to refer to the instructions that come with the die to help line up all the
layers. I repeated this twice to have a flower for each corner of my card.
Next, I took a
piece of green cardstock and die cut it using the tree garland frame from the Christmas
Garland Frame Die. This die is super intricate and I highly recommend using
a metal shim to get a clean cut with your manual die cutting machine.
I knew I wanted
to achieve a slightly rustic feel, so I cut a piece of white cardstock to 4.25
x 5.5 inches and embossed it with the Woodgrain
Embossing Folder. I then adhered the tree garland frame on top of this. For
the sentiment, I die cut a piece of yellow cardstock using the Merry Christmas
phrase from the Christmas
Garland Frame Die. I adhered this to the center of the framed piece. I then
adhered the poinsettia die cuts using double sided foam adhesive. For further
embellishment, I added some berries using the red pearls from the Rainbow
Pearls.
Thanks so much for stopping by today! I hope you enjoyed the slightly rustic
style Christmas Card featuring the Layered
Poinsettia Die, Christmas
Garland Frame Die and Woodgrain
Embossing Folder.
Sunny Studio Supplies Used:
 Petite Poinsettias Stamps Shop at: Sunny Studio |
 Background Basics Stamps Shop at: Sunny Studio |
 Buffalo Plaid Embossing Shop at: Sunny Studio |
 Woodgrain Embossing Shop at: Sunny Studio |
 Layered Poinsettia Dies Shop at: Sunny Studio |
 Christmas Garland Frame Shop at: Sunny Studio |


Really Beautiful!!!!
ReplyDeleteI second that... BEAUTIFUL!!! I've seen other poinsettia die sets from other companies and this one is by far the nicest!
ReplyDelete