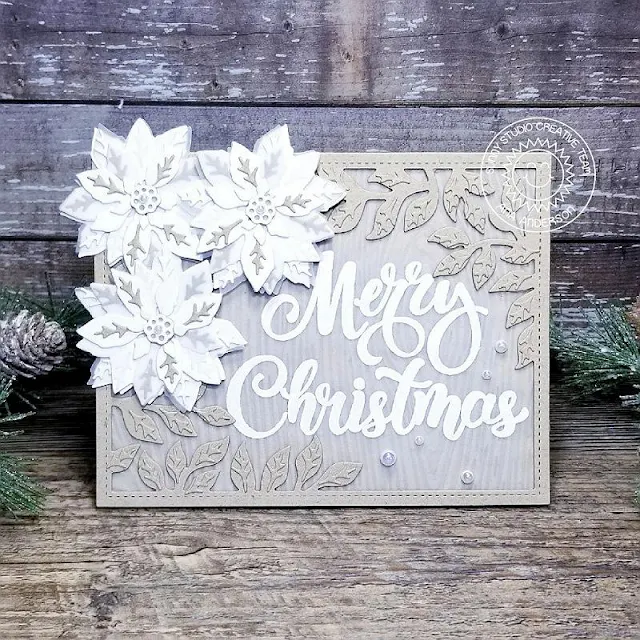
Hello friends! It’s Ana here today with a rustic Christmas
card featuring gorgeous Layered Poinsettia Die set as well as Woodgrain Embossing folder from the new holiday release.
To create the rustic background I die cut kraft cardstock twice
with Botanical Backdrop die and
layered them together using liquid glue. I dry embossed another piece of kraft
cardstock with Woodgrain Embossing folder.
I stamped Merry Christmas sentiment (from Season’s Greetings Stamps)
with VersaMark Watermark ink and
white heat embossed it on a piece of vellum.
I adhered sentiment vellum piece to woodgrain panel, then added the botanical backdrop die cut on top and placed the completed background panel under large acrylic block. I die cut the poinsettia pieces from white cardstock and vellum, layered them together, adding kraft and white veins to the layers.
I die cut additional veins from kraft cardstock and adhered them to the leaves of the botanical backdrop background. To finish the card I embellished it with white pearls.
Thank you so much for taking the time to stop by today. Until next week, I wish you happy crafting!
----------------------------------------------
Hello crafty friends and happy Wednesday! Franci here with you today and I'm happy to share a cute little DIY project made with the new Layered Poinsettia die. I love this new set so much! Here I created 2 poinsettia pins and mounted them onto little tags so they could be perfect little handmade gift or you can use them as tags on to your Xmas presents.
I die cut the tiny Scalloped Tag Square die twice out of the new Subtle Grey Tones 6x6 paper and white cardstock, I stamped the "to and from" included in the Season's Greetings stamp set on the back and I glued them together. I also added some green ribbon and some silver twine at the top.
I colored some white cardstock by sponging some Abandoned Coral, Candid Apple and Picked Raspberry distress inks + Twisted Citron Distress inks Oxide, Shabby Shutters and Olive Crush distress inks and die cut all the different Poinsettia elements.
I assembled each flower and glued everything together with liquid glue, then I mounted my pin on the back and secured with hot glue. Finally I punched a little hole in each tags and attached my pins.
Hope you like them and thank you so much for stopping by today!
Sunny Studio Supplies Used:
 Botanical Backdrop Die Shop at: Sunny Studio |
 Subtle Grey Tones Paper Shop at: Sunny Studio |
 Woodgrain Embossing Shop at: Sunny Studio |
 Season's Greetings Stamps Shop at: Sunny Studio |
 Layered Poinsettia Dies Shop at: Sunny Studio |
 Scalloped Tags-Square Shop at: Sunny Studio |


Spectacular!! I have never made that comment before but the white and Kraft is....
ReplyDelete