Hi
friends, Eloise here and today I’m using the Christmas
Garland Frame Dies along with Season’s
Greetings Stamp Set to create a Christmas Card.
I
started off with die cutting the Christmas
Garland Frame die from white cardstock. I had to use a metal shim
for this to make sure I got a nice clean cut. I repeated this step with a piece
of green cardstock and then also die cut out some berries from the set too out
of red cardstock.
I then took a piece of watercolour cardstock and ink blended some Evergreen Bough, Peacock Feathers and Cracked Pistachio onto the bottom half of the piece and faded up to white. I then flicked on some water and dried it off with a heat tool to create the water splotch effect. Once the background was done, I stamped down the large ‘Season’s and Greeting’s sentiment with black ink from Season’s Greetings. I then clear heat embossed over it to make sure I didn’t smudge it.
I then took a piece of watercolour cardstock and ink blended some Evergreen Bough, Peacock Feathers and Cracked Pistachio onto the bottom half of the piece and faded up to white. I then flicked on some water and dried it off with a heat tool to create the water splotch effect. Once the background was done, I stamped down the large ‘Season’s and Greeting’s sentiment with black ink from Season’s Greetings. I then clear heat embossed over it to make sure I didn’t smudge it.
I
then cut apart the white frame die cut and adhered half of it at the bottom of
my card panel and then a small strip at the top. I also cut apart some of the
green pine needles and adhered them around my card on top of the white, just
for a bit of variation. I added foam tape onto the red berries and adhered them
in place too.
Thanks so much for stopping by today and I’ll see you all next week.
-------------------------------------------------
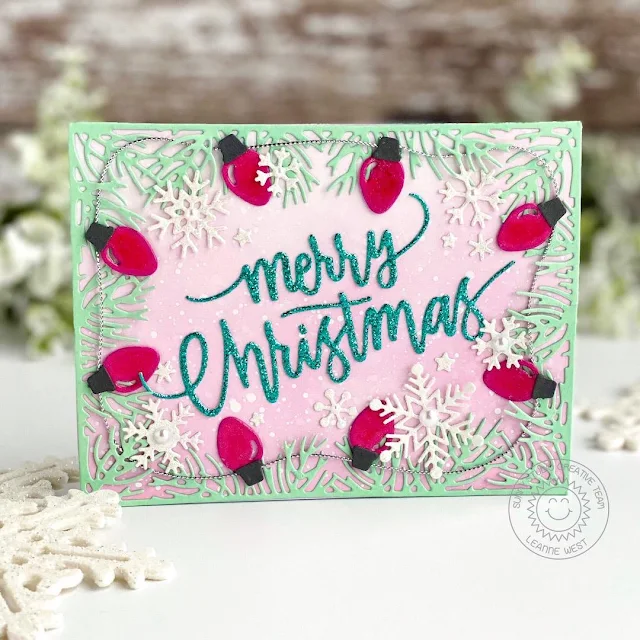
Hello everyone, Leanne here! I have a festive holiday card to share today. I've relied upon lots of die cutting to create this design.
I decided to go with a non
traditional Christmas color palette of pink, teal, and mint green. This
card is A2 size and I started by creating the ink blended background using Spun
Sugar Distress Oxide ink. I then generously splattered the background with
thinned white acrylic paint. I used the Christmas Garland Frame to die cut the pine sprig border.
I decorated the pine border with die cut lights and
snowflakes. The mini light bulb die is a freebie with an order from the
Sunny Studio shop. I added Glossy Accents to the bulbs for a nice shiny
finish. The snowflakes were cut out with a die from the Snowflakes Circle Frame set.
To give the lights a more realistic look, I added some thin silver metallic
twine to connect them.
For the greeting,
I die cut Merry Christmas from Tonic Studios Turquoise Lake Glitter Card and added to
the center of the card front with liquid adhesive. To finish off the
card, I adhered some little pearl embellishments to the center of the snowflakes.
Sunny Studio Supplies Used:
Sunny Studio Supplies Used:
 Season's Greetings Stamps Shop at: Sunny Studio |
 Snowflake Circle Frame Shop at: Sunny Studio |
 Christmas Garland Frame Shop at: Sunny Studio |


No comments:
Post a Comment