To start, I stamped and colored
images for my cards and cut them with coordinating dies.
For my first card I created the
background blending Distress Inks in Mowed Lawn, Twisted Citron, Peacock
Feathers and Salty Ocean, then die cut it with Frilly Frames Retro Petals die to create
outline stitching.
To make the trees, I repeated the inking process and used Woodland Borders Die set to die cut the trees as well the hill on my background panel. I created stitched cloud border with new Fluffy Could Border dies. I white heat embossed the sentiments and added lightly inked clouds.
To make the trees, I repeated the inking process and used Woodland Borders Die set to die cut the trees as well the hill on my background panel. I created stitched cloud border with new Fluffy Could Border dies. I white heat embossed the sentiments and added lightly inked clouds.
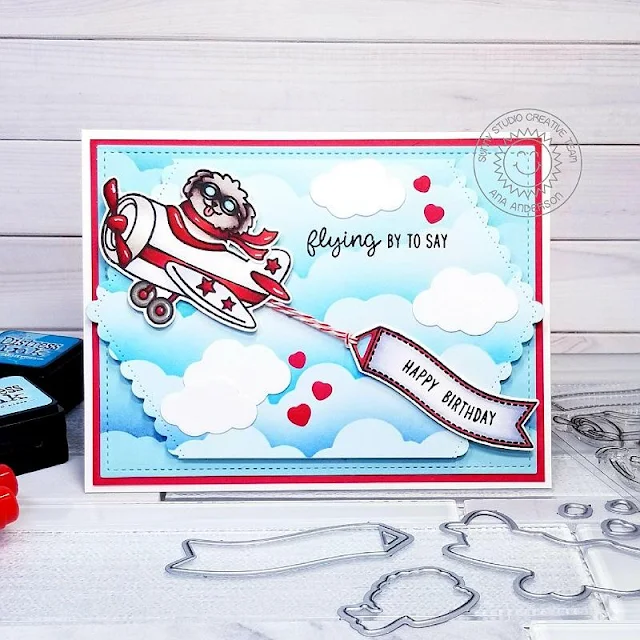
For the second card, I created 3 cloud stencils using Fluffy Cloud Border dies and inked two panels with Tumbled Glass, Broken China, Salty Ocean and Faded Jeans Distress Inks.
I used Fishtail Banner II dies for the front cloud panel and Frilly Frames Retro Petals die for the stitching on the back panel. After adhering the images, I added hearts and clouds die cuts from the Plane Awesome die set.
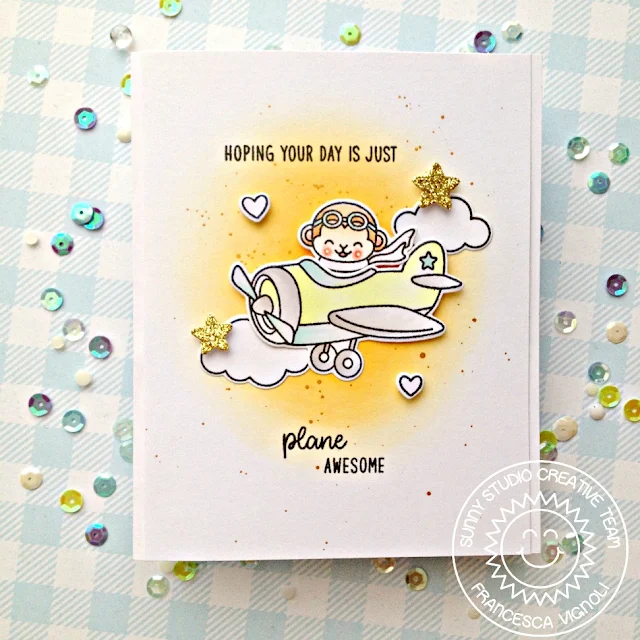
My third and final card was crated with Fluffy Clouds Border dies, stencils I made earlier with the dies and Distress Inks in Mustard Seed and Wild Honey.
I stamped the sentiments to both clouds, adhered them to the top and bottom of the background panel using foam tape then added little Plane Awesome critter flying around in the middle.
I really hope you liked the three cards I have shared today and love these adorable Plane Awesome cuties as much as I do!
Thank you for stopping by today and I hope you have a wonderful day!
-----------------------------------------------------
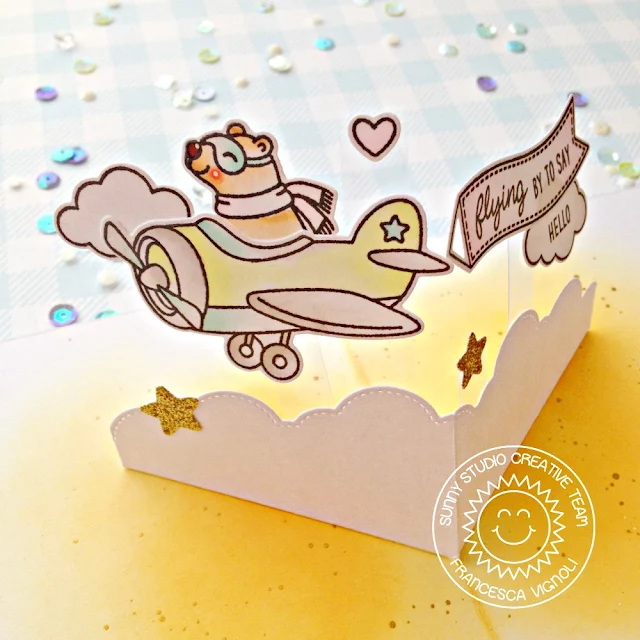
Happy Wednesday friends! Franci here with you today with a fun interactive card showcasing the Plane Awesome set.
I kept the front simple cause there's a surprise element on the inside so I just cut a panel of white cardstock, I colored it with some Distress ink, added some watercolors splatters and let it dry completely. I did the same with the inside of the card so they could match perfectly.
I stamped, colored and die cut all the images and I also die cut some stars using the little die that's free with every order at the Sunny Studio shop out of some sparkle gold cardstock. I glued all the images on to the panel and adhered it to the front of my card.
For the inside I die cut a cloudy border, using the Fluffy Cloud Border dies, out of a stripe of white cardstock, I folded it in half, then cut and score all the sides at an angle to create my interactive element.
I glued all the images to the cloud using little stripes of acetate and this really make them floating in the center of my card! I glued the cloud bottom flaps to the inside of my card and finally added some more stars.
Hope you like my card and thank you so much for stopping by today!
Sunny Studio Supplies Used:
 Fishtail Banner II Dies Shop at: Sunny Studio |
 Woodland Borders Dies Shop at: Sunny Studio |
 Plane Awesome Stamps Shop at: Sunny Studio |
 Plane Awesome Dies Shop at: Sunny Studio |
 Fluffy Clouds Border Dies Shop at: Sunny Studio |
 Frilly Frames Retro Petals Dies Shop at: Sunny Studio |


Gorgeous coloring on these fun cards.
ReplyDeleteSupercute adorable cards with beautiful colouring.
ReplyDeleteGreetings Miranda
WOW!!!! Top notch cards!👍👍
ReplyDeleteAdorable cards ! Make one happy instantly and i loved that pop-up !
ReplyDelete