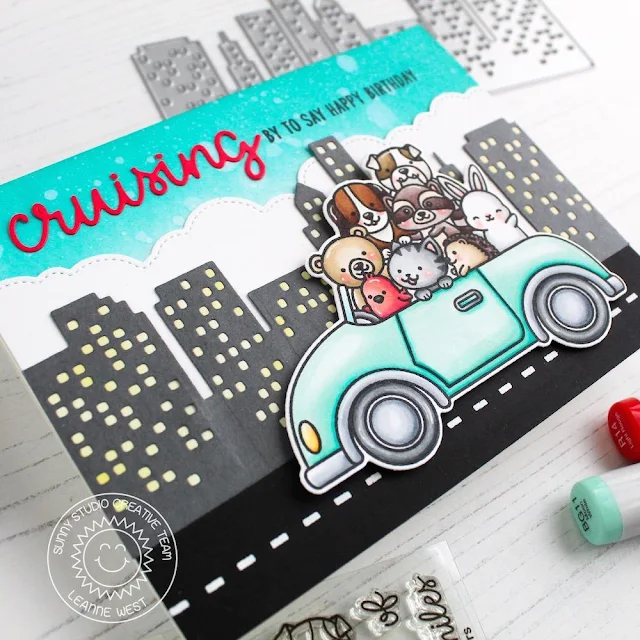
Let’s break it down layer by
layer. First I blended some Peacock Feathers Distress Oxide Ink onto the
top of the card base for the sky layer. Next I cut out a cloud border
with the Fluffy Clouds Border Die and adhered to the card front. For
the city buildings I used the Cityscape Border Die. I cut this layer out of grey card stock and
backed it pale yellow. I then added it onto the card while allowing the top of
the clouds to be visible.
Next I created the road with
a strip of black card stock and white heat embossed the dashed line. The dashed
line is stamp included in the Cruising Critters stamp set. I Copic colored the car
of critters and cut out with the coordinating Cruising Critters die set. I cut out a channel for the slider part along
the top edge of the road and centered lengthwise. Since the car is pretty
good size, the slider channel gets hidden underneath while still allowing the
car to slide from one side to the other.
Lastly, I added a greeting
that is part die cut and part stamped. The “cruising” was created with a die
from the coordinating Cruising Critter die set. I built the second half of the greeting
with stamps from Cruising Critters.
--------------------------------------------------------
Hello friends, Eloise here and today we are using the brand-new Cruising Critters Stamp Set. I’m creating a birthday card with this set and pulling in the Oceans of Joy Stamp Set for a balloon to make it more birthday themed.
Sunny Studio Supplies Used:
--------------------------------------------------------
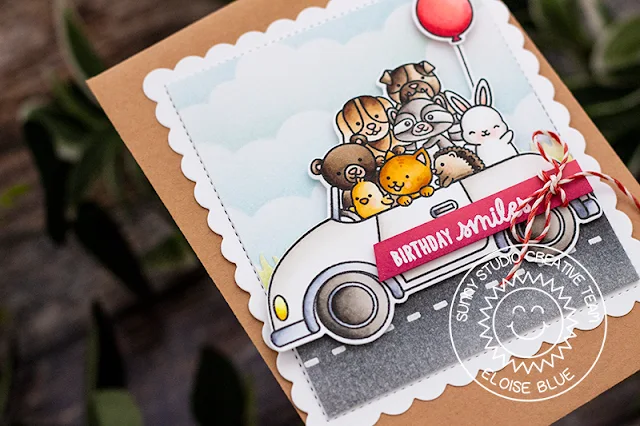
Hello friends, Eloise here and today we are using the brand-new Cruising Critters Stamp Set. I’m creating a birthday card with this set and pulling in the Oceans of Joy Stamp Set for a balloon to make it more birthday themed.
To
start off I stamped out the image from Cruising
Critters and Oceans
of Joy and coloured them in with Copic Markers. Once they were
coloured, I cut them out.
(Copic Markers Used: Y00, Y11, Y15, Y19 / YR30, YR21, Y23, YR23 / R00, R30, R20 / 0 / YR21, YR23, YR24, YR27 / W2, W3, W5, W7 / W00, W0, W1 / C0, C1, C3, C5 / E50, E51, E53, E55, E57, E59 / E41, E42, E43, E44, E47, E49 / YR12, YR15 / R32, R43, R35, R46)
(Copic Markers Used: Y00, Y11, Y15, Y19 / YR30, YR21, Y23, YR23 / R00, R30, R20 / 0 / YR21, YR23, YR24, YR27 / W2, W3, W5, W7 / W00, W0, W1 / C0, C1, C3, C5 / E50, E51, E53, E55, E57, E59 / E41, E42, E43, E44, E47, E49 / YR12, YR15 / R32, R43, R35, R46)
For
my background, I used the new Frilly
Frames Hexagon Dies and used partial die cutting to make it a little
shorter. I then took a piece of watercolour cardstock cut it down to fit inside
and ink blended some blue clouds over the background. I then cut down a
rectangle to the same width but 1 ¼” high and stamped the small lines that
create the road. I white heat embossed them and then ink blended over the piece
with Black Soot Distress Ink. I also cut down another piece and used the Sunny
Sentiments Die Set for the grassy border and die cut it. I ink
blended some green ink over the piece as well. I then adhered all three pieces
together and then onto the scallop frame.
I
then added foam tape onto the backs of all my images and adhered them into
place. I took a pink piece of cardstock, cut a small strip and white heat
embossed the ‘Birthday Smiles’ sentiment on it. I took a little bit of darker
pink ink and ink blended it at the bottom of the piece. I added more foam tape
onto the back and adhered it over the car image. I tied a small piece of coral
hemp cord onto the side of the sentiment for added texture.
Thanks so much for stopping by today and I’ll see you next week.
Thanks so much for stopping by today and I’ll see you next week.
Sunny Studio Supplies Used:
 Oceans of Joy Dies Shop at: Sunny Studio |
 Oceans of Joy Stamps Shop at: Sunny Studio |
 Sunny Sentiments Dies Shop at: Sunny Studio |
 Cruising Critters Stamps Shop at: Sunny Studio |
 Cruising Critters Dies Shop at: Sunny Studio |
 Cityscape Border Dies Shop at: Sunny Studio |
 Fluffy Clouds Border Dies Shop at: Sunny Studio |
 Frilly Frames Hexagon Dies Shop at: Sunny Studio |


Your shipping is so wonderful and fast!!! I ordered the new release right away and I got an email saying it was in my mail box! Can't wait to get home...thx for the inspiration today!
ReplyDeleteSuper cute!!!
ReplyDelete