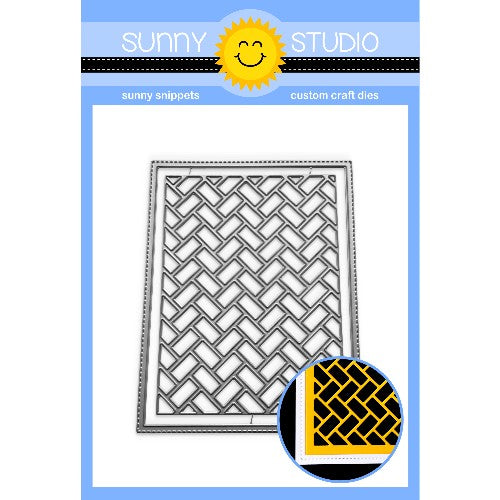
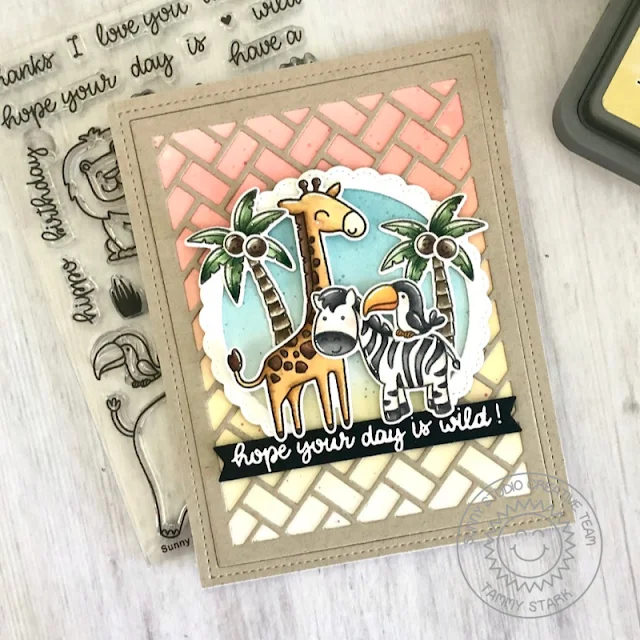
Hi crafty friends! Tammy here with a fun card featuring the Frilly Frames Herringbone from the brand new release. I also used the new Savanna Safari Stamps, one
of my favorites, to create a sweet little jungle scene.
To
begin, I cut a piece of Bristol smooth cardstock, A2 sized, and ink blended it
with Abandoned Coral and Scattered Straw Distress Oxide inks. I splattered some
water and some thinned Abandoned Coral ink onto my background with a paintbrush
for some interest, and set aside to dry.
Next, I stamped, colored my images from the Savanna Safari and Tropical Scenes (palm trees) stamp sets. I added highlights to my colored images with a white gel pen, and die cut with the Savanna Safari Dies and Tropical Scenes Dies.
Next, I die cut an A2 sized piece of kraft paper using the Frilly Frames Herringbone Die. I poked out all of the herringbone pieces, and it left me with this beautifully intricate frame that I layered on top of my inked panel.
Next, I die cut a white frame three times using the Fancy Frames Circle Dies. I inked a circle to put behind the circle frame with Broken China, Tumbled Glass, and Scattered Straw Distress Oxide inks. I arranged my little scene, and the critters were then all attached with foam tape for dimension. I tucked the trees from Tropical Scenes behind the critters to create a fuller scene and fill in any sparse areas.
To complete my card, I stamped the sentiment onto a black cardstock strip, heat embossed it with white embossing powder, and attached to my card front. The completed panel was then attached to an A2 white card base.
Thanks so much for stopping by today ... see you next time!
---------------------------------------------------------
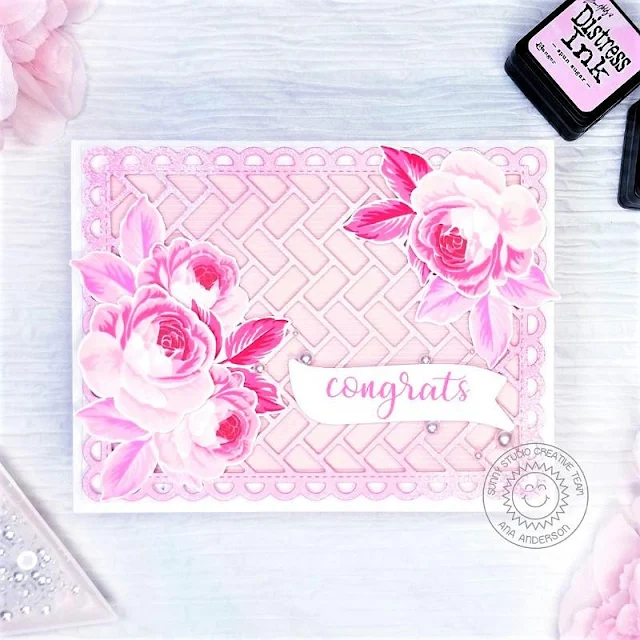
Hi friends! Ana here today with a feminine congrats card showcasing Frilly Frames Herringbone dies from the new summer release! I needed a congrats card for our friend’s daughter who just graduated from college. She is a big lover of pink and also loves flowers, especially roses, so I combined those into my design for today’s card.
I started by die cutting a piece of pink cardstock with Frilly Frames Lattice dies (which gave my frame
the scallops) then inserted Frilly Frames Herringbone die and die cut the
center. I love that all Frilly Frames and Fancy Frames dies work so well
together and you can mix and match creating many different designs.
After die cutting the frame, I inked the edges with Pink Raspberry distress ink then added white pigment ink with a sponge to create some texture and interest, then added foam tape to the back to create dimension. I backed my die cut Herringbone frame with a piece of the same pink cardstock and a layer of striped vellum.
After die cutting the frame, I inked the edges with Pink Raspberry distress ink then added white pigment ink with a sponge to create some texture and interest, then added foam tape to the back to create dimension. I backed my die cut Herringbone frame with a piece of the same pink cardstock and a layer of striped vellum.
I stamped the roses and leaves from Everything’s Rosy stamp set in pink and red
colors and die cut them with coordinating dies. Next, I stamped the word
congrats (from Everything’s Rosy set) on Banner Basics die cut and adhered the
roses and the sentiment to the background. Finally, I embellished with White pearls and my card was
finished!
I love how girly this card turned out! The Herringbone frame really stands out and looks so gorgeous and classy! Thank you for spending some time with us today, I will see you next week!
Don't forget, there's still time to take advantage of our special offer on shipping through May 31st when you shop at our store HERE.
Sunny Studio Supplies Used:
 Fancy Frames-Circle Dies Shop at: Sunny Studio |
 Everything's Rosy Stamps Shop at: Sunny Studio |
 Everything's Rosy Dies Shop at: Sunny Studio |
 Frilly Frames Lattice Dies Shop at: Sunny Studio |
 Banner Basics Stamps Shop at: Sunny Studio |
 Banner Basics Dies Shop at: Sunny Studio |
 Savanna Safari Stamps Shop at: Sunny Studio |
 Savanna Safari Dies Shop at: Sunny Studio |
 Tropical Scenes Stamps Shop at: Sunny Studio | |
 Tropical Scenes Dies Shop at: Sunny Studio |
 Frilly Frames Herringbone Shop at: Sunny Studio |


No comments:
Post a Comment