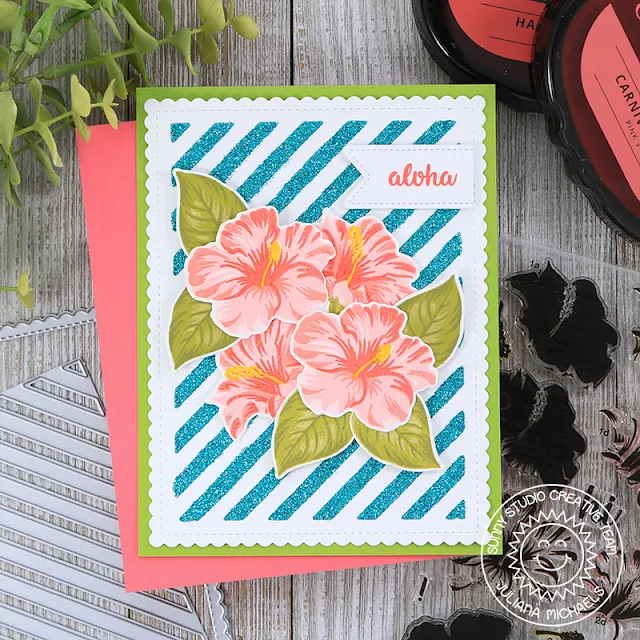
As always, I started with some stamping. I stamped the
various layers of the hibiscus using the gorgeous Premium Hybrid Inks by
Scrapbook.com. For the flowers I used the Pink Group which consists of Ballet
Slipper, Pink Lemonade, Carnival Pink, Havana Red and for the center I used
Daffodil. When using layering stamps, I sometimes find it easier to line up the
layers if I stamp the smallest piece first. With these flowers, I stamped the
stamen first and then started with the largest flower image and the lightest
ink color and progressed through the flower. When I do it this way, I always
seem to get things to line up better. To finish off the stamping, I used Pear,
Guacamole and Olive for the leaves. Once all the stamping was complete, I die
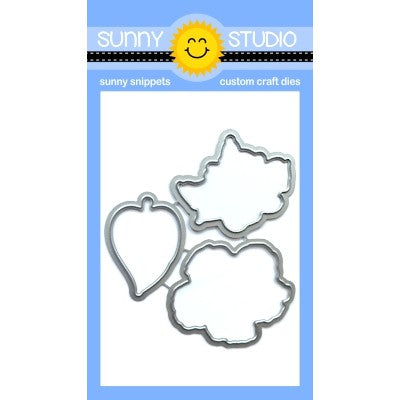
cut the images using the Hawaiian
Hibiscus Dies.
Now it's time to add the extra sparkle I mentioned. I die
cut a piece of the white cardstock using the inside die from the Frilly
Frames Striped Die to create a mask. I placed this on top of another piece
of white cardstock and held it in place with Therm O Web Purple Tape. Using the
using the Deco Foil Stencil Pal I applied a layer of Therm O Web Glitz Glitter
Gel in Turquoise Sea. I then lifted up the mask and allowed the gel to dry.
While it was drying I die cut another piece of white cardstock, this time using
the outside die from the Frilly
Frames Striped Die. Once the gel was dry, I adhered these piece together
and then adhered both of them to a piece of green cardstock.
With the background finished, I then created a cluster
design with the Hawaiian Hibiscus images. I used double sided foam tape to
adhere them to the card front. To complete the card, I stamped Aloha using the
Havana Red Ink onto a banner die cut using the Fancy
Frames Rectangle Dies.
Thanks so much for stopping by today. I hope you enjoyed this bit of inspiration using the Hawaiian Hibiscus Stamp Set. See you next time!
Thanks so much for stopping by today. I hope you enjoyed this bit of inspiration using the Hawaiian Hibiscus Stamp Set. See you next time!
---------------------------------------------------------
Hi friends! Angelica here with a new card to share today. I have always loved Sunny Studio Stamps layered stamps, and the new Hawaiian Hibiscus stamp set is no different. The details in this set are amazing!
Hi friends! Angelica here with a new card to share today. I have always loved Sunny Studio Stamps layered stamps, and the new Hawaiian Hibiscus stamp set is no different. The details in this set are amazing!
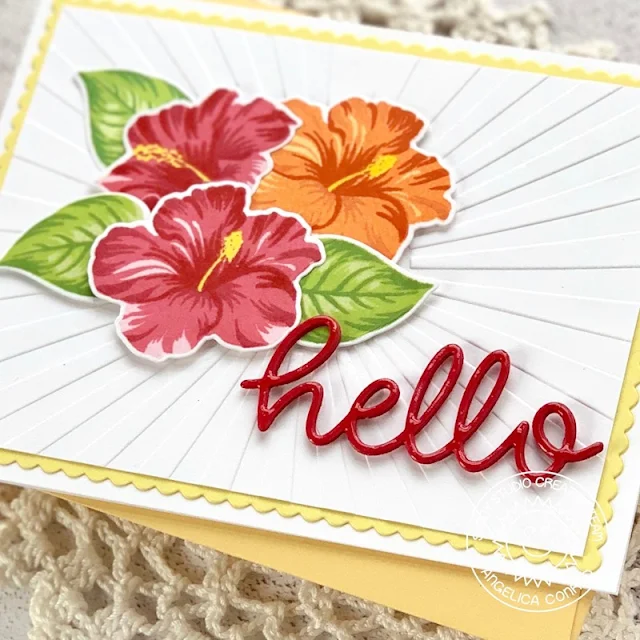
I started off with
the stamping process. I used a stamp platform so I could make several flowers
and leaves quickly. Each flower has four layers to stamp, and a small Style
stamp (the yellow pollen stem in the middle), and the leaves have three layers.
After I finished stamping, I used the coordinating dies to cut them out.
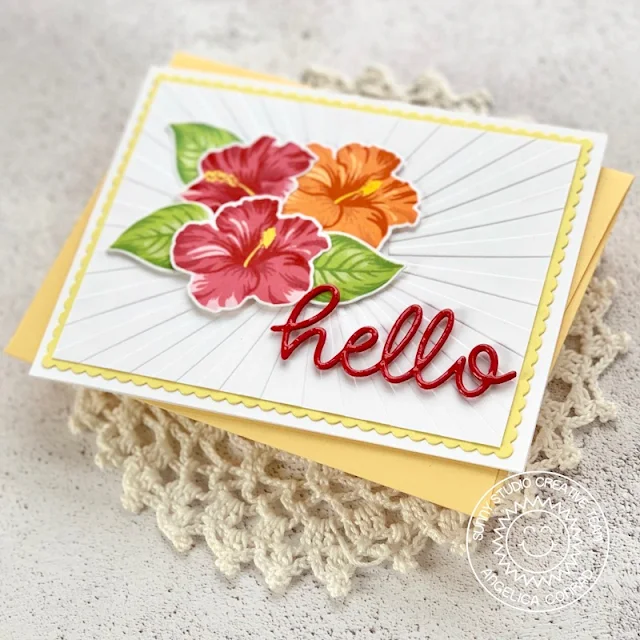
For a simple
background, I die cut yellow card stock with the scalloped Rectangle from
the Frilly Frames Stripes Dies, and embossed white card stock with the Sunburst Embossing folder.
I added the panels to an A2 size card base with double-sided adhesive. I picked
out a few flowers and leaves for my bouquet, and attached them to the card with
adhesive foam squares. I used the Hello Word die to die-cut my sentiment. My final touch was adding Crystal
Glaze to the word after attaching it to the card.
I love how this
card turned out. It’s so simple, yet the colors are so vibrant! I hope I have
given you ideas on how to use this stamp set. That’s all I have for today.
Thanks for stopping by!
Sunny Studio Supplies Used:
Sunny Studio Supplies Used:
 Fancy Frames- Rectangles Shop at: Sunny Studio |
 Hello Word Die Shop at: Sunny Studio |
 Sunburst Embossing Shop at: Sunny Studio |
 Frilly Frames Stripes Die Shop at: Sunny Studio |
 Hawaiian Hibiscus Stamps Shop at: Sunny Studio |
 Hawaiian Hibiscus Dies Shop at: Sunny Studio |


Beautiful!!!
ReplyDelete