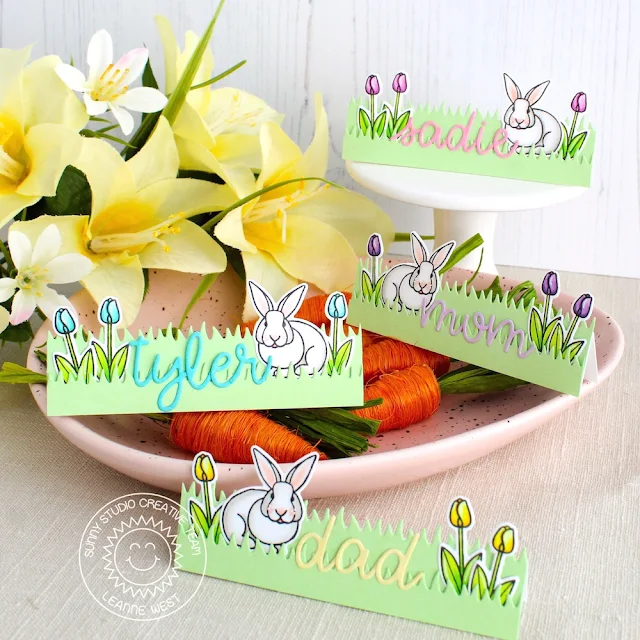
To personalize the cards, I used the Loopy Letters dies to add the names. To save time, you could write the
name directly on there, but my handwriting is terrible so I opted for nice and
neat die cut letters. I used colored card stock that coordinated with
the tulip color on each card. I think these are a fun but easy way to
dress up any table setting and make it a little more special!
------------------------------------------------------------
Hello friends, Eloise here and today I’ll be creating a card using the Spring Greetings Stamp Set.
------------------------------------------------------------
Hello friends, Eloise here and today I’ll be creating a card using the Spring Greetings Stamp Set.
I
started off with stamping out the bunnies and flowers from the Spring
Greetings Stamp Set. I coloured them in with Copic Markers and cut
them out.
(Copic
Markers Used: RV10, RV13, RV25, RV19 / R000, R00, R30, R21, R22 / YG01, YG03,
YG07, YG09 / E40, E41, E42, E43, E44 / 0, N0, N2, N4)
For
my background, I took some blue watercolours and water-coloured some stripes
onto some watercolour paper. I dried it off with a heat tool and cut down the
panel to 3 3/4” x 5 1/8”. I added foam tape onto the backs of my images and
adhered them into the centre. I realized something was missing so I took the Sunny
Sentiments Dies and cut the grassy border from some Dots & Stripes Pastels patterned paper. I added double layer of foam and adhered it over
the top of my scene.
For
the sentiment, I took “Spring Greetings” and stamped it in black under my
scene. Lastly, I adhered the entire panel onto some Flirty Flowers patterned paper and my card was complete.
Thanks for stopping by today and I’ll see you next week!
Thanks for stopping by today and I’ll see you next week!
Sunny Studio Supplies Used:
 Sunny Sentiments Dies Shop at: Sunny Studio |
 Loopy Letters Dies Shop at: Sunny Studio |
 Flirty Flowers 6x6 Paper Shop at: Sunny Studio |
 Dots & Stripes Pastels 6x6 Paper Shop at: Sunny Studio |
 Spring Greetings Stamps Shop at: Sunny Studio |
 Spring Greetings Dies Shop at: Sunny Studio |


No comments:
Post a Comment