Hi everyone! Lexa here
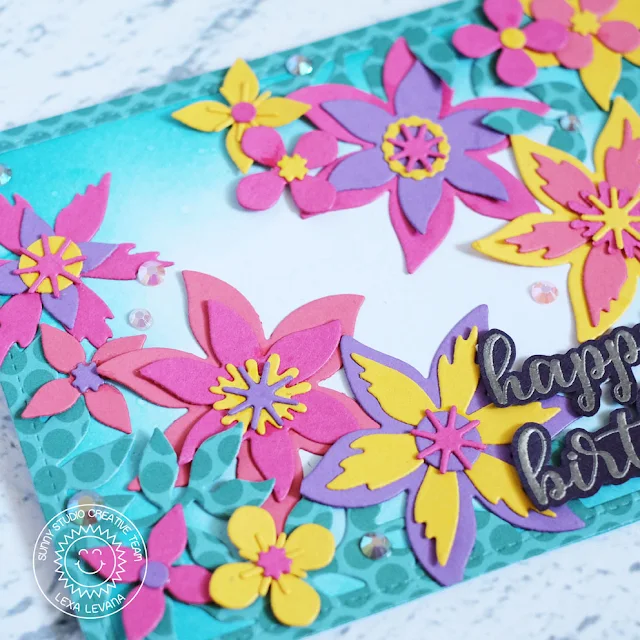
today with a birthday card highlighting Botanical
Backdrop Dies. This set comes with leafy stitched frame and
endless layered flowers to play with. Let's get started right away!
First, I blend Peacock Feather Distress Ink all around the edges.
Then I die cut the leafy frame on a matching teal patterned paper from Polka-dot
Parade Paper.
I decided to use four color combination for the flowers, which are pink, fuchsia, purple and yellow. Using the flower dies, I randomly die cut bunch of flowers and layer them together one by one. It was so much fun.
I decided to use four color combination for the flowers, which are pink, fuchsia, purple and yellow. Using the flower dies, I randomly die cut bunch of flowers and layer them together one by one. It was so much fun.
After I finished with the flowers, I arrange and adhere them on my
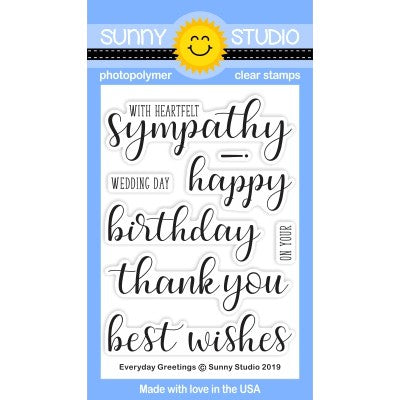
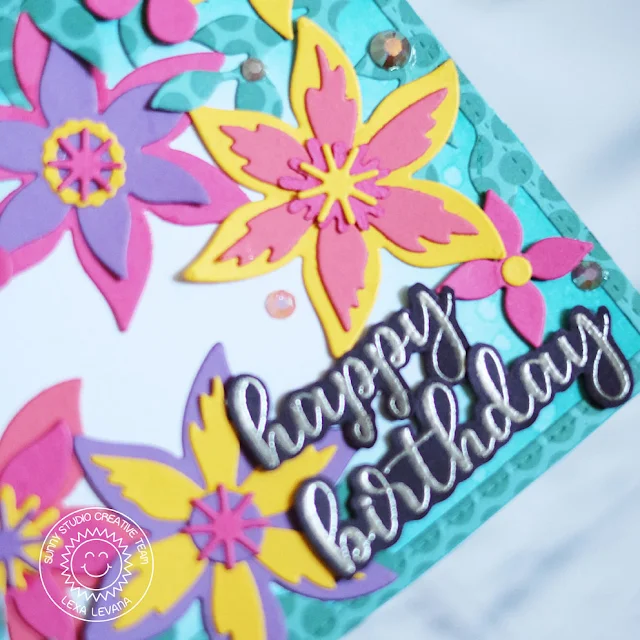
card using glue and foam tapes for dimensions. I use "happy birthday"
from my favorite Everyday Greetings Stamp for the
sentiment, I silver embossed it on an eggplant color paper so it will pop up
more. Last but not least, I add pink jewels from Pretty Pink Posh to add some
sparkles.
Thank you so much for stopping by today! I hope you all like my card and have an amazing day.
Thank you so much for stopping by today! I hope you all like my card and have an amazing day.
--------------------------------------------------------
Hello friends! It's
Rachel here and I am sharing two cards today that feature the gorgeous Botanical Backdrop Die.
For my first card, I created a
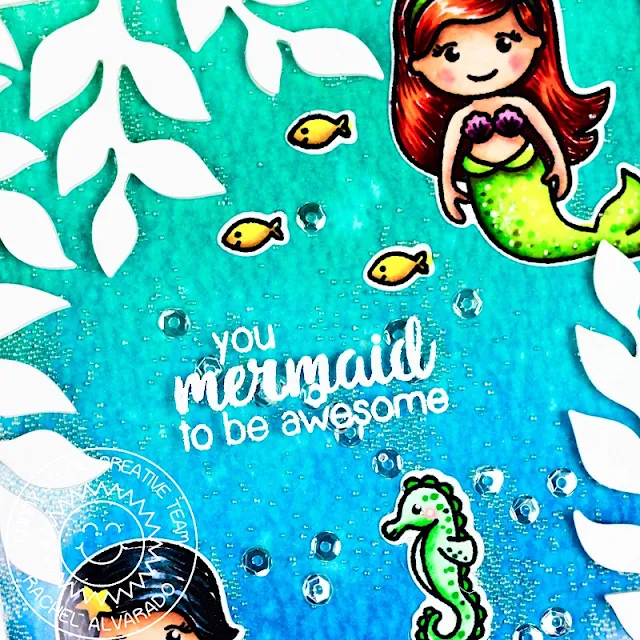
fun shaker card and combined the Botanical Backdrop Die with the cute Magical Mermaids Stamp Set. I thought
that the leafy frame could pass as some ocean foliage and nicely frame a little
underwater scene. I colored all of my images with Copic Sketch Markers
and used the coordinating dies to cut them
out.
For the underwater background, I blended some Distress Inks (Peacock Feathers, Mermaid Lagoon, Wilted Violet, and Dusty Concord) onto a sheet of Ranger White Watercolor Paper. I then spritzed this panel lightly with water, blotted it dry with a paper towel and then set it aside to completely dry.
For the underwater background, I blended some Distress Inks (Peacock Feathers, Mermaid Lagoon, Wilted Violet, and Dusty Concord) onto a sheet of Ranger White Watercolor Paper. I then spritzed this panel lightly with water, blotted it dry with a paper towel and then set it aside to completely dry.
Once my background was
ready, I added some 3D Foam Adhesive Tape around the edges and added my
embellishments. I heat embossed my sentiment with Super Fine Detail White
Embossing Powder onto a sheet of Heat Resistant Acetate. Once I attached
the acetate, I then glued the final frame onto the outside of the card.
For my second card, I
didn't do any stamping at all. I simply die cut my images and lightly
blended them with some ink. I used the Colorbox Ocean Ink for the green/blue tint and the Colorbox Lemonade Ink for the small yellow flowers.
I added a sheet of the Gingham Pastels Paper Pack to the
background and then adhered a 3D version of the sentiment "Hello" by die cutting it 5 times.
I hope you enjoyed my cards today! Wishing you all the best weekend!
I hope you enjoyed my cards today! Wishing you all the best weekend!
Sunny Studio Supplies Used:
 Magical Mermaid Dies Shop at: Sunny Studio |
 Magical Mermaid Stamps Shop at: Sunny Studio |
 Hello Word Die Shop at: Sunny Studio |
 Polka-dot Parade 6x6 Paper Shop at: Sunny Studio |
 Gingham Pastels 6x6 Paper Shop at: Sunny Studio |
 Botanical Backdrop Die Shop at: Sunny Studio |
 Everyday Greetings Stamps Shop at: Sunny Studio |


I love the botanical dir, bit I wish their was a stamp set to go with it!!!!
ReplyDeleteBeautiful cards!!!
ReplyDeleteBeautiful cards! The flower card is stunning!
ReplyDelete