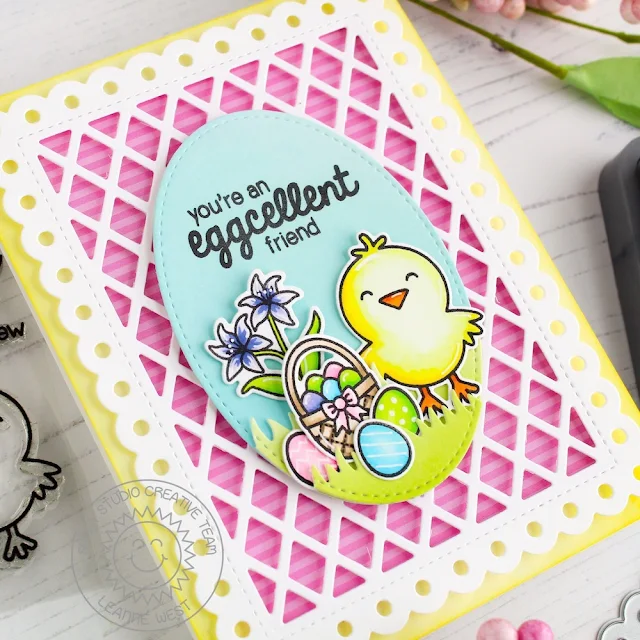
I started with an A2 sized white card base. I sponged on
some Squeezed Lemonade Distress Oxide ink all around the outside edge of the
card front. To create the decorative background, I used the outer die
from Frilly Frames Polka Dot and inner die from Frilly Frames Lattice. I backed the lattice with a striped pattern
paper from the Dots & Stripes Pastel paper
pack. I then adhered it to the card
base with foam tape.
I die cut an oval to build my scene on using the third largest
from the Stitched Oval dies. I created the grass using a die from Sunny Sentiments. I built my little spring scene with images from A Good Egg and Easter Wishes which I Copic colored and cut out using the coordinating
dies. I used a white gel pen to add some pattern detail to the eggs. I stamped a sentiment from A Good Egg to finish it off and adhered the
oval scene to the center of the lattice with foam tape.
I hope you enjoyed this spring inspired card. I’m really getting into the springtime spirit and will have a fun Easter project to share with you next week. See you then!
I hope you enjoyed this spring inspired card. I’m really getting into the springtime spirit and will have a fun Easter project to share with you next week. See you then!
---------------------------------------------------------
Hello friends, Eloise here and today I’ll be using the Frilly
Frames Die Set as well as the Love
Monkey Stamp Set to create a birthday card.
I started off with stamping out my images and colouring
them in with Copic Markers. I then die
cut them all out. While I had my die cutting machine out, I cut the Frilly
Frames from white cardstock and also used a rectangle die to cut out
the centre.
(Copic Markers Used: R00, R30, R20, R21 / Y000, Y00, Y02, Y04 / Y11, Y13, Y15, Y19 / YG01, YG03, YG07, YG09 / E40, E70, E71, E74 / E41, E42, E43, E44 / E51, E53, E55, E57)
(Copic Markers Used: R00, R30, R20, R21 / Y000, Y00, Y02, Y04 / Y11, Y13, Y15, Y19 / YG01, YG03, YG07, YG09 / E40, E70, E71, E74 / E41, E42, E43, E44 / E51, E53, E55, E57)
I used the Flirty
Flowers Paper Pad and cut down one of the blue pieces. I added foam
tape onto the back of the frame and adhered it at an angle onto the patterned
paper. I added foam and flat adhesive onto the images and adhered them into the
frame.
For my sentiment, I stamped out the ‘Swinging by to say
it’s your birthday’ sentiment onto the bottom of the card with black ink.
That finished up my card for today, I hope you enjoyed and I’ll see you next week.
That finished up my card for today, I hope you enjoyed and I’ll see you next week.
Sunny Studio Supplies Used:
 A Good Egg Dies Shop at: Sunny Studio |
 A Good Egg Stamps Shop at: Sunny Studio |
 Easter Wishes Dies Shop at: Sunny Studio |
 Easter Wishes Stamps Shop at: Sunny Studio |
 Sunny Sentiments Dies Shop at: Sunny Studio |
 Stitched Oval Dies Shop at: Sunny Studio |
 Flirty Flowers 6x6 Paper Shop at: Sunny Studio |
 Dots & Stripes Pastels 6x6 Paper Shop at: Sunny Studio |
 Love Monkey Stamps Shop at: Sunny Studio | |
 Love Monkey Dies Shop at: Sunny Studio |
 Frilly Frames Lattice Dies Shop at: Sunny Studio |
 Frilly Frames Polka-Dot Shop at: Sunny Studio |


No comments:
Post a Comment