Hello there and happy Wednesday!
Franci here with
you today, with a little Spring themed treat box :)
I
looove these little cuties from the Chubby
Bunny set, they are super adorable and perfect for Easter/Spring
time, I can't help smiling every time I look at them! I decide to create a fun
project today cause I needed a little treat box/ party favor idea and I'm so
happy about how it turned out!
First of all I die cut the Sliding Window die twice out of lilac cardstock and I cut the "scored" sides with my trimmer. I also die cut the little window included in the set out of only one of the 2 pieces and from the side that does not have little tab attached.
First of all I die cut the Sliding Window die twice out of lilac cardstock and I cut the "scored" sides with my trimmer. I also die cut the little window included in the set out of only one of the 2 pieces and from the side that does not have little tab attached.
I glued my little box together and added
a little strip of green patterned paper from the Flirty
Flowers paper to create the grass for my bunnies to stand on. I
stamped, colored and die
cut all the images, added some details with a white gel pen and
glued them down to the grass. I think you could also add a little piece of
acetate behind the window so your critters have more stability.
Finally I die cut a little banner using the Fancy Frames Rectangle dies out of white cardstock and I stamped a "Hello Spring" sentiment, I glued it down too and added a little clear bag with lots of candies :) It's cute, isn't it?!
Can't wait to create more and also try to modify this to make also a little shadow box! Hope you like it too and thanks for stopping by today, have a lovely day!
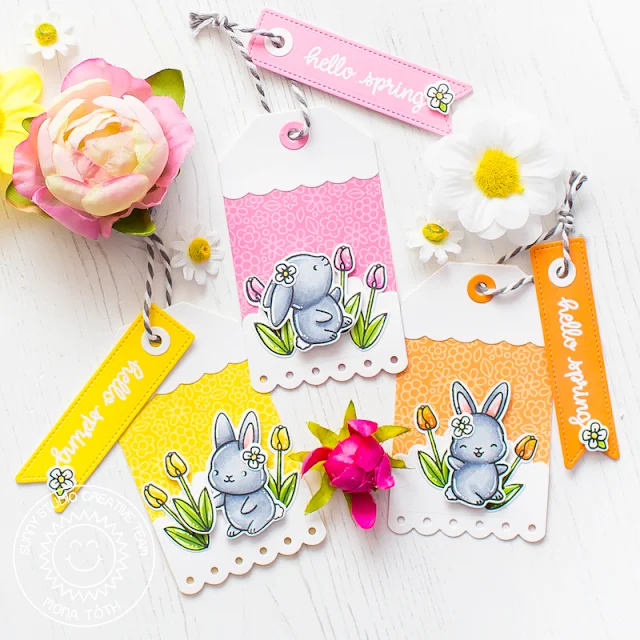
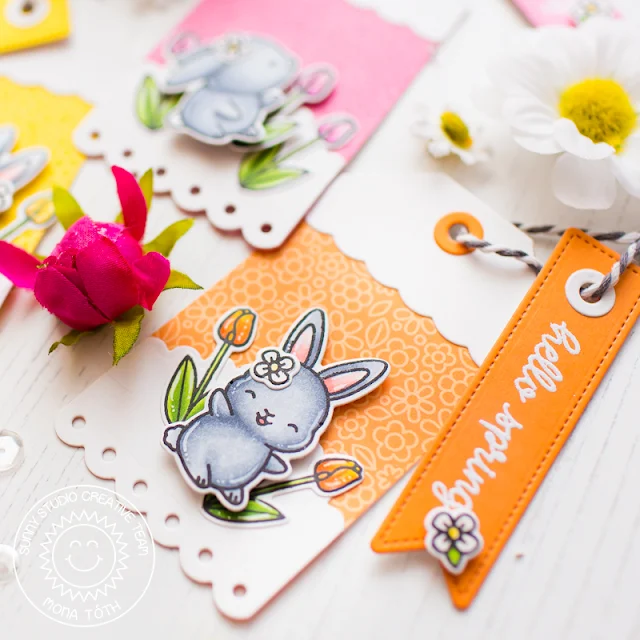
Hi crafty friends! It's Mona here, today I am showing you a pretty, but easy tag tutorial, featuring the Chubby Bunny Stamp Set.
I started the cardmaking with Stamping
and Coloring. I stamped the cute bunny images from the Chubby Bunny
Stamp Set and I also stamped
tulip images from the Spring
Greetings Stamp Set.
I colored the images with Copic markers.
(Used colors: 0, C0, C1, C3, C5, R20, R22 E0000; Y11, Y15, Y19; YR14, YR07; RV06, RV11, RV34, YG 01, YG03, YG17;)
(Used colors: 0, C0, C1, C3, C5, R20, R22 E0000; Y11, Y15, Y19; YR14, YR07; RV06, RV11, RV34, YG 01, YG03, YG17;)
When I was done I started the Die-cutting process. I
used the Build a Tag #2
Dies, the Fishtail
Banner II Dies and the cute banner from the Fancy
Frames Rectangle Dies and I made die-cuts.
You will need the following pieces for one tag, so if you want to make more like me you can chose more colors.
There is one more step before you adhere everything together. I wanted to add more dimension to the tags so I run them through my Die-cut machine with the Fishtail Banner II Dies.
There is one more step before you adhere everything together. I wanted to add more dimension to the tags so I run them through my Die-cut machine with the Fishtail Banner II Dies.
In the end I added my heat embossed
sentiment to the banner and put my tag together. Thank you very much for reading through my post, I hope
that you have enjoyed it and I have inspired you! If you like my creations
let's be friends on
Instagram.
:)
Sunny Studio Supplies Used:
 Fishtail Banner II Dies Shop at: Sunny Studio |
 Fancy Frames- Rectangles Shop at: Sunny Studio |
 Sliding Window Dies Shop at: Sunny Studio |
 Build-A-Tag #2 Dies Shop at: Sunny Studio |
 Flirty Flowers 6x6 Paper Shop at: Sunny Studio |
 Chubby Bunny Stamps Shop at: Sunny Studio |
 Chubby Bunny Dies Shop at: Sunny Studio |
 Spring Greetings Stamps Shop at: Sunny Studio |
 Spring Greetings Dies Shop at: Sunny Studio | |


No comments:
Post a Comment