Hello there! Franci here with
you today and I'm super excited to share some new release inspiration! I
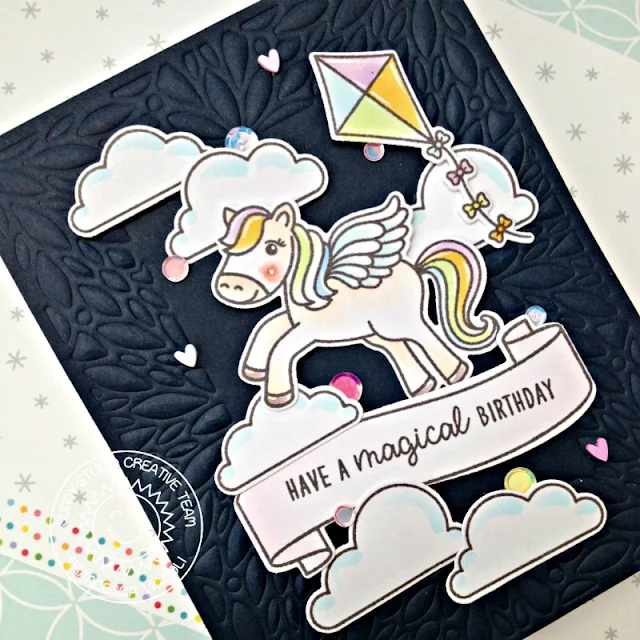
made a card featuring a bunch of new products and ... it's a magical one!
First
of all I created my card base out of white cardstock, then I cut a piece of dark
blue cardstock to size and embossed it with the new Blooming Frame die, using my die cutting machine and an embossing mat. I glued
it down to the front of my card and moved on to my images.
I
stamped, colored with Copics and die cut lots of images from these sets: Prancing Pegasus set + coordinated dies, Banner Basics + coordinated dies, Spring Showers set + coordinated dies.
I also added some details to all the images with a white gel pen, created my design and glued everything down with liquid glue and foam adhesive. Finally I added some embellishments from the Iridescent Pastel confetti and the Pink and Purple Heart confetti mix to finish my design.
It's such a happy and girly card, hope you like it and thanks a lot for stopping by today!
Hello crafty friends! It’s Ana here today with a birthday card showcasing brand new gorgeous Blooming Frame Dies and amazing Spring Fling Paper pack!
I had so many ideas for this beautiful Blooming Frame (I am sure
I will be using it again very soon) however I went with a rainbow birthday card
idea since I just couldn’t resist this delicious paper!
To create the card, I die cut the Blooming Frame from heavy weight white cardstock and backed it with a piece of Spring Fling paper. I masked the frame petal part and added splatter to the white background in the center with coordinating rainbow colors using Distress Oxide inks mixed with water.
Out of leftover patterned paper, I die cut 8 flowers using a flower die, and out of white cardstock I die cut 8 white flower centers and Happy Birthday sentiment three times. I stacked the sentiment die cuts and adhered them together with liquid glue creating dimension.
The flower, flower center and the sentiment dies are all
included in Blooming Frame die set! Once the rainbow
splatter was dry, I adhered the sentiment to the center and added flowers in
the four corners, popping a few up with foam tape.
To embellish the card, I added glitter drops to each flower center and several around the sentiment, and Wink of Stella to the petals and the sentiment for some extra sparkle and shine!
Thank you so much for spending time with us today! I will see you next week and until then I wish Happy Crafting!
To embellish the card, I added glitter drops to each flower center and several around the sentiment, and Wink of Stella to the petals and the sentiment for some extra sparkle and shine!
Thank you so much for spending time with us today! I will see you next week and until then I wish Happy Crafting!
Sunny Studio Supplies Used:
 Banner Basics Stamps Shop at: Sunny Studio |
 Banner Basics Dies Shop at: Sunny Studio |
 Prancing Pegasus Stamps Shop at: Sunny Studio |
 Prancing Pegasus Dies Shop at: Sunny Studio |
 Spring Showers Stamps Shop at: Sunny Studio |
 Spring Showers Dies Shop at: Sunny Studio |
 Blooming Frame Die Shop at: Sunny Studio |
 Spring Fling Paper Shop at: Sunny Studio |


No comments:
Post a Comment