Hello Sunny
Studio friends! It's Juliana here and
today I have a spring themed card to share with you featuring the Spring
Showers Stamp Set.
I began by
stamping the images from the Spring
Showers Stamp Set. I then colored them with Copic Markers and die cut them
using the coordinating Spring Shower
Dies. I used colored pencils to add more detail to the hair and a white gel
pen for highlights on the kite and umbrella.
For the background, I die cut a 3.75 x 5” piece of white cardstock using the Staggered Circle Die. I then backed it with a piece of yellow paper from the Spring Fling Paper Pad. I then layered the entire piece onto another piece of white cardstock die cut using the Fancy Frames Rectangle Die.
For the background, I die cut a 3.75 x 5” piece of white cardstock using the Staggered Circle Die. I then backed it with a piece of yellow paper from the Spring Fling Paper Pad. I then layered the entire piece onto another piece of white cardstock die cut using the Fancy Frames Rectangle Die.
I then went
about adhering each of the Spring Shower images using double sided foam
adhesive, making sure to leave a space to stamp the sentiment. For a fun touch,
I added a bit of black thread to the kite to act like a string.
I hope you enjoyed the bit of inspiration featuring the Spring Showers Stamp Set. Thanks so much for stopping by today!
-----------------------------------------------
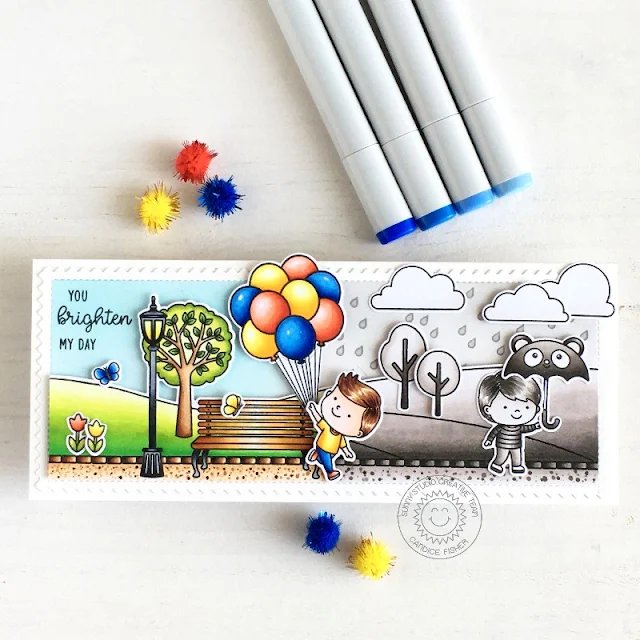
Hello crafty friends! Candice with you again and I have an unique card for you today highlighting the Spring Showers stamp set! I love the contrast as he runs and changes the grey to color!
- Spring Showers stamps & coordinating dies
- Floating By stamps & coordinating dies
- Spring Scenes stamps & coordinating dies
- Frilly Frames Chevron dies
I began my card with an 8 1/2 3 1/2 card base that fits
perfectly into a standard size envelope. For the background, I first created the pointed edge frame using the partial
die cut method and then taped off the edges and inked the left side with
tumbled glass and the right side with hickory smoke. On the grey side, I
stamped some raindrops using the hickory
smoke and stamped the sentiment in the top left
corner.
Next, I stamped the the long hill scene,
repeating the bricks on either side and extended the hills using a Copic
friendly marker and cut out using the coordinating dies. I then stamped
the trees, balloons, boys, umbrella, clouds, flowers
& butterflies, colored them with Copic markers and used the coordinating dies
listed above.
To put the card together, I used foam tape on the hill scene along with all the other accessories. Thank you so much for visiting today!
To put the card together, I used foam tape on the hill scene along with all the other accessories. Thank you so much for visiting today!
Sunny Studio Supplies Used:
 Fancy Frames- Rectangles Shop at: Sunny Studio |
 Staggered Circles Die Shop at: Sunny Studio |
 Frilly Frames Chevron Die Shop at: Sunny Studio |
 Floating By Stamps Shop at: Sunny Studio |
 Floating By Dies Shop at: Sunny Studio |
 Spring Scenes Stamps Shop at: Sunny Studio |
 Spring Scenes Dies Shop at: Sunny Studio |
 Spring Showers Stamps Shop at: Sunny Studio |
 Spring Showers Dies Shop at: Sunny Studio | |
 Spring Fling Paper Shop at: Sunny Studio |


These are too cute!
ReplyDeleteThank you so much Lori!
Delete