Awww
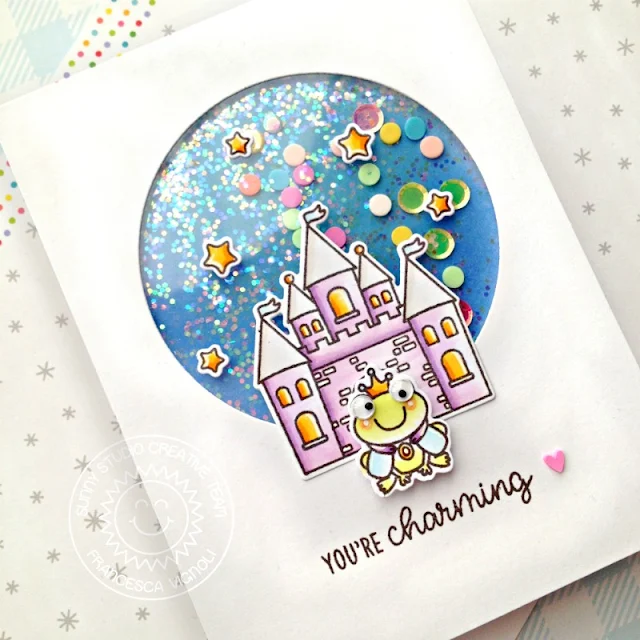
I'm so totally in love with this card! The dreamy castle is so pretty and that
royal toad is the cutest ever! I started by making my card base out of
white cardstock and cut out a matching panel. I inked the front of my card
with Distress inks and cut out a window opening on my white panel.
I stamped all my images, colored them with Copics and die cut them with their coordinated dies. I added some details with a white gel pen and some googly eyes to my toad. I also stamped my sentiment at the bottom and then moved on choosing my shaker embellishments.
I stamped all my images, colored them with Copics and die cut them with their coordinated dies. I added some details with a white gel pen and some googly eyes to my toad. I also stamped my sentiment at the bottom and then moved on choosing my shaker embellishments.
I
built my shaker with acetate and foam adhesive and I glued all my images on top
with a combo of liquid glue and more foam adhesive. I love how all the shaker
embellishments go together so nicely (inside my window there are chunky
glitters, iridescent pastel confetti and birthday cake dot sprinkles).
Awww I can't stop playing with it, so cute! Hope you like my card as much as I do and thank you so much for stopping by today! Have a lovely day.
--------------------------------------------------------
Awww I can't stop playing with it, so cute! Hope you like my card as much as I do and thank you so much for stopping by today! Have a lovely day.
--------------------------------------------------------
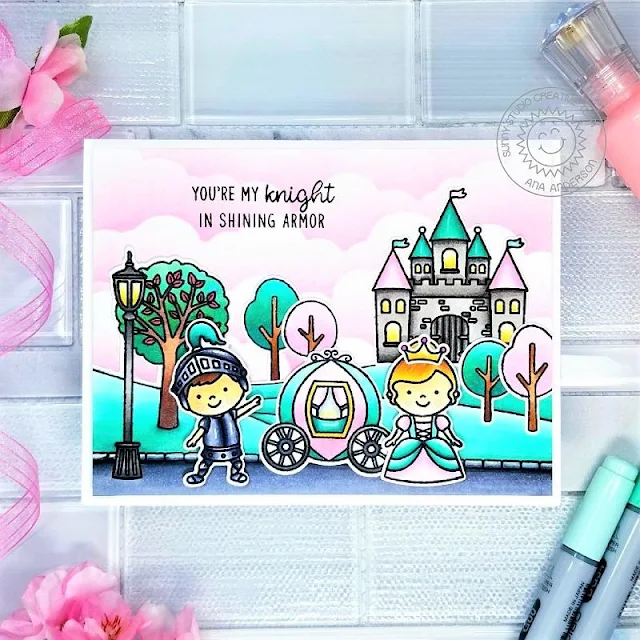
Hello crafty friends! Ana here today sharing a card
featuring Enchanted stamps and coordinating dies, as well as Spring Scenes stamps and dies.
I started with creating the sky – using my beloved homemade
cloud stencils (made with Fluffy Clouds Border dies) and Worn Lipstick
distress ink.
I stamped the images from Enchanted and Spring Scenes stamp sets next. I masked the bench from Spring Scenes and created a bit of a different scene. I love that with simple masking you can change the look of your background. Where the bench was masked, I had a small gap between the hills on each side, so I connected them with Copic fine liner.
I stamped the images from Enchanted and Spring Scenes stamp sets next. I masked the bench from Spring Scenes and created a bit of a different scene. I love that with simple masking you can change the look of your background. Where the bench was masked, I had a small gap between the hills on each side, so I connected them with Copic fine liner.
I colored all my images with Copic markers, and once they were
colored, I cut them with coordinating dies. I stamped the sentiment with
VersaFine Onyx black ink and adhered all imaged to the background panel.
I am just so in love with this fairy tale stamp set – it is so perfect for creating all those adorable magical scenes! Thank you so much for visiting with us today! I hope you have a wonderful day!
I am just so in love with this fairy tale stamp set – it is so perfect for creating all those adorable magical scenes! Thank you so much for visiting with us today! I hope you have a wonderful day!
Sunny Studio Supplies Used:
 Fluffy Clouds Border Dies Shop at: Sunny Studio |
 Enchanted Stamps Shop at: Sunny Studio |
 Enchanted Dies Shop at: Sunny Studio |
 Spring Scenes Stamps Shop at: Sunny Studio |
 Spring Scenes Dies Shop at: Sunny Studio |


No comments:
Post a Comment