Hello crafty
friends! It's Juliana here and today
I'll be sharing how the Frilly
Fames Eyelet Lace Die can be used for both embossing and die cutting to
create a beautiful background for a card.
I began by
stamping and coloring all the images from the Pink
Peonies Stamp Set with Copic Markers. I then die cut them using the coordinating
dies. Once this was finished I set them to the side to work on the
background.
To create the embossed design, I took a piece of white cardstock and used the inside die from the Frilly Fames Eyelet Lace Die to emboss it. By using a silicone mat with your die cutting machine you can achieve this look. I recommend referring to the instruction manual for your manual die cutting machine on how to do this. Once the paper was embossed, I then die cut it using a simple stitched rectangle die. I then took the outside die from the Frilly Fames Eyelet Lace Die and used it to die cut a piece of white cardstock. Next, I layered these piece together and mounted them both to a piece of colored cardstock that coordinated with my colored images.
To create the embossed design, I took a piece of white cardstock and used the inside die from the Frilly Fames Eyelet Lace Die to emboss it. By using a silicone mat with your die cutting machine you can achieve this look. I recommend referring to the instruction manual for your manual die cutting machine on how to do this. Once the paper was embossed, I then die cut it using a simple stitched rectangle die. I then took the outside die from the Frilly Fames Eyelet Lace Die and used it to die cut a piece of white cardstock. Next, I layered these piece together and mounted them both to a piece of colored cardstock that coordinated with my colored images.
With the
background complete, I then began arranging the stamped images and adhered them
with double sided foam tape for a bit of depth and dimension. I finished off
the card by stamping Happy Birthday from the Floating
By Stamp Set.
I hope you enjoyed learning that you can use your dies for embossing as well as die cutting. Don't you just love learning how to stretch your supplies? Thanks so much for stopping by today!
---------------------------------------------------------
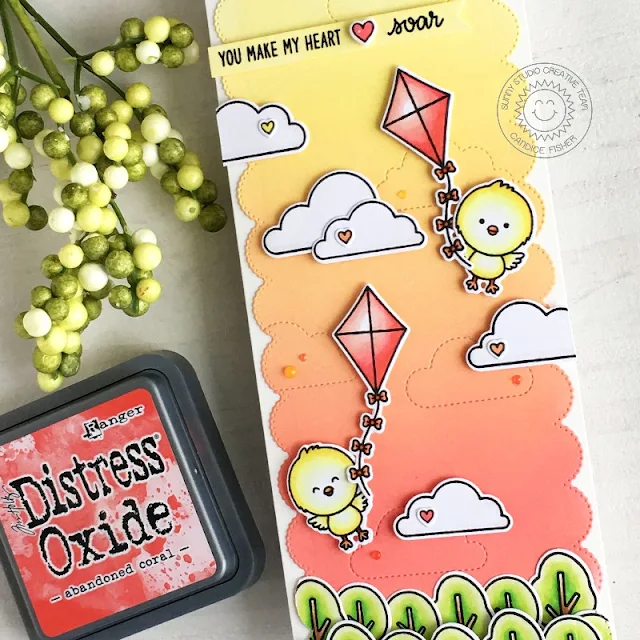
Happy Friday friends! It's Candice back with you today using the new Frilly Frames Eyelet Lace die in a fun way! Because of the scalloped edge I can use it to create a slimline panel, a perfect way to extend my dies!
I used these Sunny Studio Stamps products for
my card:
- Frilly Frames Eyelet Lace dies
- Chickie Baby stamps & coordinating dies
- Spring Showers stamps & coordinating dies
- Spring Scenes stamps & coordinating dies
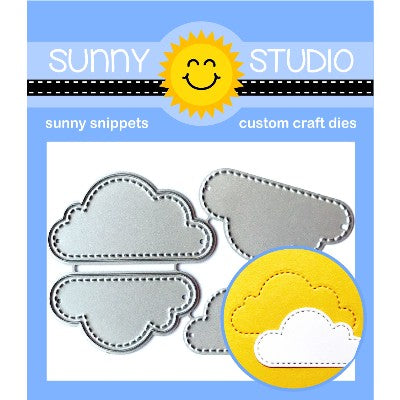
- Fluffy Clouds dies
- Hogs & Kisses stamps & coordinating dies
- Plane Awesome stamps
I began my slimline by creating an 8 1/2 x 3 1/2 card base which
is a perfect size for your standard envelopes. To create the slimline panel using the new Frilly Frames Eyelet Lace die,
I first run it through the die cutting machine, stopping just before you cut
the bottom. Then you measure how high you want the frame to be and flip
it and do the same to the other side, making sure you have lined it up fitting
into the scalloped and stitched cuts. I then measured on the card front
how wide I wanted it and repeat the steps above until you have the frame! It is easier done than explained!
For the background, I first added the stitched clouds and then inked with abandoned coral, dried marigold & squeezed lemonade oxide inks. Next I stamped the chicks, kites, clouds, trees, & hearts, colored with copic markers and used the coordinating dies listed above to cut them out.
I layered one row of the trees on a scrap piece of white cardstock and cut out the bottom using the eyelet frame die adhering with foam tape over another layer of trees on the inked panel.
To put the card together, I added hearts to the clouds and
adhered with foam tape trimming the edges with scissors. The chicks and kites
were also put on the card with foam tape around the clouds.
For the sentiment, I first heat embossed in black on a banner, leaving space for the heart and inked over with squeezed lemonade to match the sky. I adhered with foam tape and added a few nuvo drops in red, orange and yellow.
I hope you are inspired to try creating slimline frames, I have done it with a few of Sunny Studio's frilly frames, and find the scalloped and straight edges line up perfectly! Thank you so much for stopping by!
Sunny Studio Supplies Used:
 Fluffy Clouds Dies Shop at: Sunny Studio |
 Plane Awesome Stamps Shop at: Sunny Studio |
 Hogs & Kisses Stamps Shop at: Sunny Studio |
 Hogs & Kisses Dies Shop at: Sunny Studio |
 Chickie Baby Stamps Shop at: Sunny Studio |
 Chickie Baby Dies Shop at: Sunny Studio |
 Floating By Stamps Shop at: Sunny Studio |
 Pink Peonies Stamps Shop at: Sunny Studio |
 Pink Peonies Dies Shop at: Sunny Studio | |
 Spring Scenes Stamps Shop at: Sunny Studio |
 Spring Scenes Dies Shop at: Sunny Studio |
 Spring Showers Stamps Shop at: Sunny Studio |
 Spring Showers Dies Shop at: Sunny Studio | |
 Frilly Frames-Eyelet Lace Shop at: Sunny Studio |


No comments:
Post a Comment