Hi
friends, Eloise
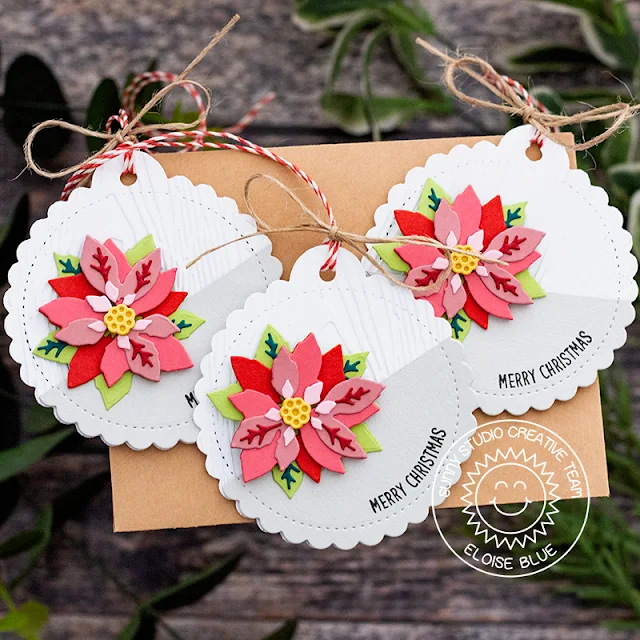
here and today I’m using the Layered
Poinsettia’s Die Set to create some Christmas Tags. I used the Scalloped
Tag Circle Dies for the base and also used the Woodgrain
Embossing Folder for some added texture and the Merry
Mice Stamp Set for the sentiment.
I
started off with die cutting out all my layers of the poinsettia
die from different shades of cardstock. I then layered them together
and adhered them. While I was die cutting, I also cut out three Scalloped
Circle Tags from white cardstock and also grey cardstock and then
ran the white ones through with the Woodgrain
Embossing Folder.
Next
I cut down the grey pieces a little to create a diagonal look, added foam tape
onto the bottom and adhered them onto my white tags at the bottom. I then
adhered the poinsettia’s with foam tape too. For the sentiment I used the Merry
Mice Stamp Set, curved the ‘Merry Christmas’ in my MISTI and stamped
it with black ink onto the bases of the tags. Lastly, I tied two types of twine
through the tops of each of the tags.
Thanks so much for stopping by today, I hope you enjoyed these tags and I’ll see you next week.
--------------------------------------------------
Hi crafty friends, Leanne here! I have another card to share that features the Layered Poinsettia. If you recall, my card from last week combined the poinsettia and buffalo plaid. I really loved that look so I have used that combination again for this week. I've used a very traditional color palette with some glittery accents for a more elegant design.
I started with an A2 sized
card base. I cut a panel of white card stock about a quarter inch smaller than
A2 dimensions. I added some black paint splatters then layered it on top of
some black glitter card stock with foam tape. I created a red and black
plaid strip using a stamp from the Background Basics set. I adhered this strip towards the left
side. I stamped out some pine boughs from the Christmas Trimmings set. I created the Layered Poinsettia using dark green card stock for the bottom
layer and white for all the petals. I used a light green ink pad with a
sponge dubber to add shading to the larger petal edges and completely color the
tiny petals.
Before adhering the pine
boughs and poinsettia, I heat embossed the greeting in silver. The Merry
Christmas greeting also comes from the Christmas Trimming set. To finish off the card, I
frosted the poinsettia petals with Nuvo White Blizzard Glitter Drops and
scattered a few dots of Nuvo Sliver Crystals Glitter Drops.
Sunny Studio Supplies Used:
Sunny Studio Supplies Used:
 Background Basics Stamps Shop at: Sunny Studio |
 Christmas Trimmings Stamps Shop at: Sunny Studio |
 Christmas Trimmings Dies Shop at: Sunny Studio |
 Woodgrain Embossing Shop at: Sunny Studio |
 Merry Mice Stamps Shop at: Sunny Studio |
 Layered Poinsettia Dies Shop at: Sunny Studio |
 Scalloped Tags-Circle Shop at: Sunny Studio |


No comments:
Post a Comment