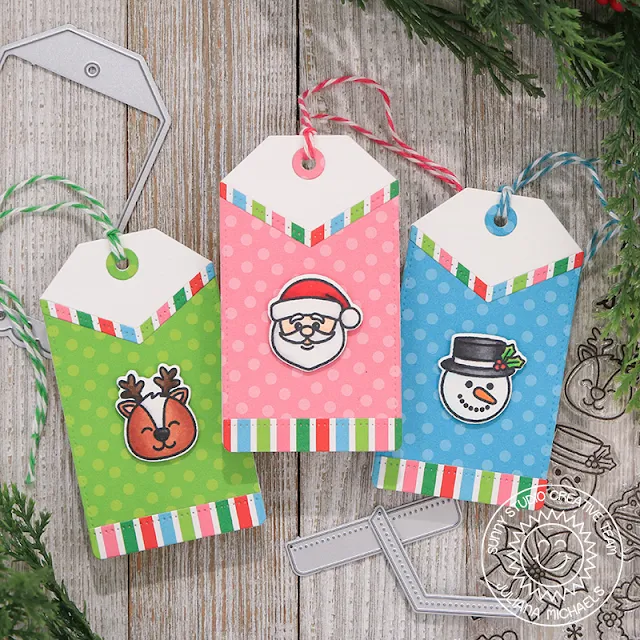
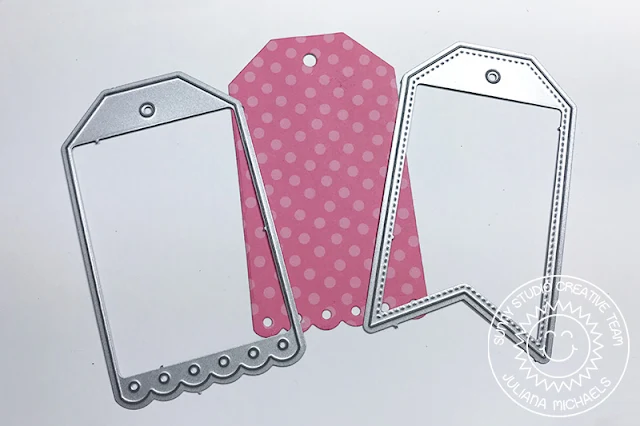
For these tags, begin by creating the tag base. Cut 3 pieces of patterned paper from the Holiday Cheer 6x6" paper pad using the scalloped edged die from Build-A-Tag #2. Use this same die to cut 3 more tags from white cardstock and set them to the side.
Next, take the other tag die in the Build-A-Tag #2 set and position it as shown in the photo on top of the tags you just cut.
Make sure you line the die up so that it doesn't cut off the bottom scalloped edges. You are using this die to cut the “V” in the top of the tag. This will create the top of your sweater.
Take the straight edge and angled dies from the Build-A-Tag #1 set and die cut a piece of the striped patterned paper from the Holiday Cheer 6x6 paper pad. This will become the trim on your sweaters.
Once you have all of the pieces die cut. You can begin to assemble the tags. Adhere the “V” cut piece on top of the solid white die cut tag.
Next, adhere the trim to the bottom of the tag making sure to cover the scallops. Then adhere the trim along the “V” edge at the top of the tag.
The final step is to decorate your Ugly Christmas Sweater
Tags using some of the fun images from the Christmas Icons stamp set. I probably
could have gone a bit uglier, but I stuck with one image for each tag and
colored them with Copic markers.
So, how would you decorate your Ugly Christmas Sweater Tags? I hope you enjoyed today's project and thanks so much for joining me today!
Sunny Studio Supplies Used:
Christmas Icons Dies Shop at: Sunny Studio |
Christmas Icons Stamps Shop at: Sunny Studio |
 Holiday Cheer 6x6 Paper Shop at: Sunny Studio |
 Build-A-Tag #1 Dies Shop at: Sunny Studio |
 Build-A-Tag #2 Dies Shop at: Sunny Studio |


No comments:
Post a Comment