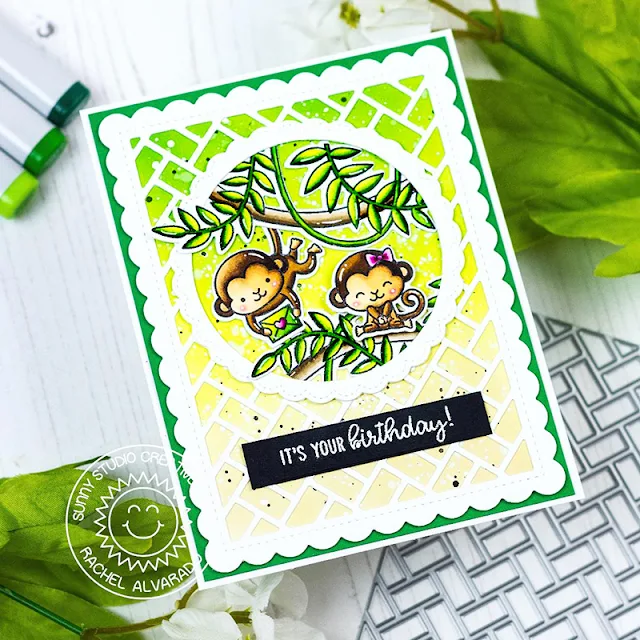
Hello crafty friends! It's Rachel here and I am sharing a birthday card today that
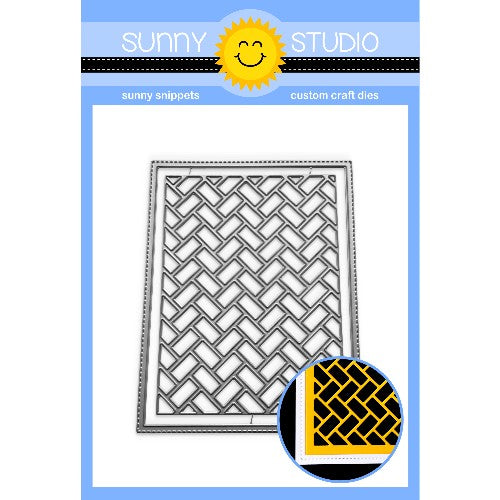
features the Frilly Frames Herringbone Die Set.
I combined this set with the Frilly Frames Hexagon Die Set because I wanted a scalloped edge to go with my design.
I used images from both the Love Monkey and Tropical Scenes Stamp Sets. All of my images were stamped with Memento Tuxedo Black Ink and colored them with Copic Markers. I used the coordinating dies to cut them out.
For my
background, I blended some Antique Linen, Twisted Citron, and Mowed Lawn
Distress Oxide Inks. I splattered this blend with both water and diluted white,
green, and brown paints for some added interest. To create my circle frame in
the center, I used a basic circle die to cut a circle in the top center of my
herringbone design and then used the Fancy Frame Circle Die Set to
cut a scalloped circular frame from white card stock. Lastly, I heat embossed
my sentiment (from both the Love Monkey and Savanna Safari stamp sets) onto a strip of black card stock using Fine Detail White Embossing
Powder.
Thanks so much for stopping by! Have a wonderful weekend!
------------------------------------------------------
Hello my crafty friends! Candice back today with you sharing a card using the Frilly Frames Herringbone Frame as a stencil!
Thanks so much for stopping by! Have a wonderful weekend!
------------------------------------------------------
Hello my crafty friends! Candice back today with you sharing a card using the Frilly Frames Herringbone Frame as a stencil!
I used a few Sunny Studio products to create my card:
- Frilly Frames Herringbone dies
- Cruising Critters stamps & coordinating dies
- Spring Fling Paper Pack
- Rainbow Droplets
For the background, I trimmed a piece of pattern paper from
the Spring Fling Pack to
fit my card base of 5 x 6 1/2. I then die cut a stitched frame from
thick black cardstock with a strip fitting into the bottom for the road.
I die cut the herringbone from sturdy cardstock and used this as my stencil to create the brick wall background. I taped the herringbone stencil over Bristol Smooth paper and inked with tea dye & antique linen, fading as I went up.
I die cut the herringbone from sturdy cardstock and used this as my stencil to create the brick wall background. I taped the herringbone stencil over Bristol Smooth paper and inked with tea dye & antique linen, fading as I went up.
Next, I stamp the car full of cuties,
colored them with copic markers and used the coordinating dies to
cut them out. To put the card together, I glued the stenciled background into
the frame and added the road along the bottom, using a white gel pen to add the
lines. I then adhered the car with foam tape
and stamped the sentiment in the top corner with Versafine black ink. I added a
few droplets to finish
the card!
Thank you so much for visiting today!
Sunny Studio Supplies Used:
Sunny Studio Supplies Used:
 Fancy Frames-Circle Dies Shop at: Sunny Studio |
 Love Monkey Stamps Shop at: Sunny Studio |
 Love Monkey Dies Shop at: Sunny Studio |
 Cruising Critters Stamps Shop at: Sunny Studio |
 Cruising Critters Dies Shop at: Sunny Studio |
 Spring Fling Paper Shop at: Sunny Studio |
 Savanna Safari Stamps Shop at: Sunny Studio |
 Tropical Scenes Stamps Shop at: Sunny Studio |
 Tropical Scenes Dies Shop at: Sunny Studio | |
 Frilly Frames Herringbone Shop at: Sunny Studio |


No comments:
Post a Comment