Saturday, December 2, 2023

Guest Designer Spotlight: Cards with Debby van Diepen

Hi all! It is Debby here! I am super excited to be here on the Sunny Studio blog as a guest designer! I have made two cards for today. One slimline card and one shaker card, all with Christmas and winter vibes! 

Sunny Studio Stamps: Holiday Hugs & Woolen Mitten Holiday Cards by Debby van Diepen

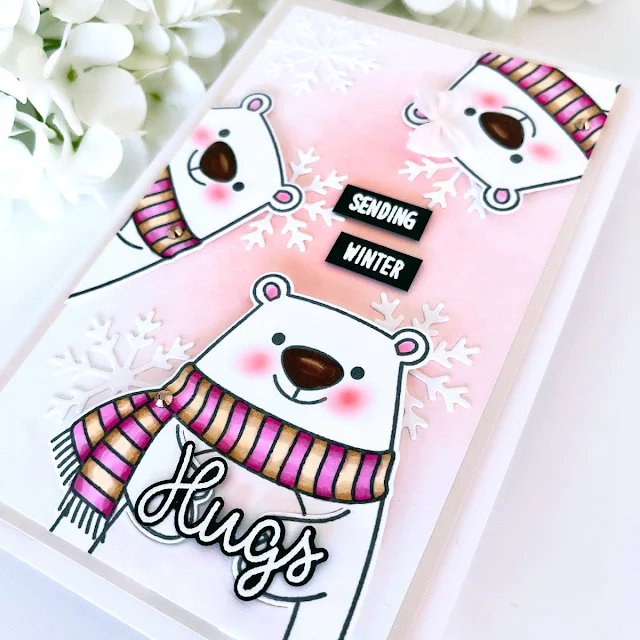
I will start with the slimline card. For this card, I used the Holiday Hugs stamp and matching die setI started stamping the bear three times and colored them with Spectrum Noir Markers. Now my coloring skills with alcohol markers aren't that great, but this bear was easy to color. Mostly because I left the bears white (ha-ha). 

Sunny Studio Stamps: Holiday Hugs & Woolen Mitten Holiday Cards by Debby van Diepen

I created a slimline white card base. On this, I placed a craft card panel with double-sided foam tape. The white card panel with the bears was softly inked with pink Distress Oxide ink. I glued a few of the snowflakes over the top from the Woolen Mitten die set

Sunny Studio Stamps: Holiday Hugs & Woolen Mitten Holiday Cards by Debby van Diepen

For the bears, I arranged them in fun angles so it looks like they are peeking. I cut off the overhanging parts with my scissors and used double-sided foam tape to give them a little pop. I white heat embossed the words onto black cardstock and placed them on the card panel. To finish this card I glued a few gems and a little pink bow. 

Sunny Studio Stamps: Woolen Mitten Holiday Card by Debby van Diepen

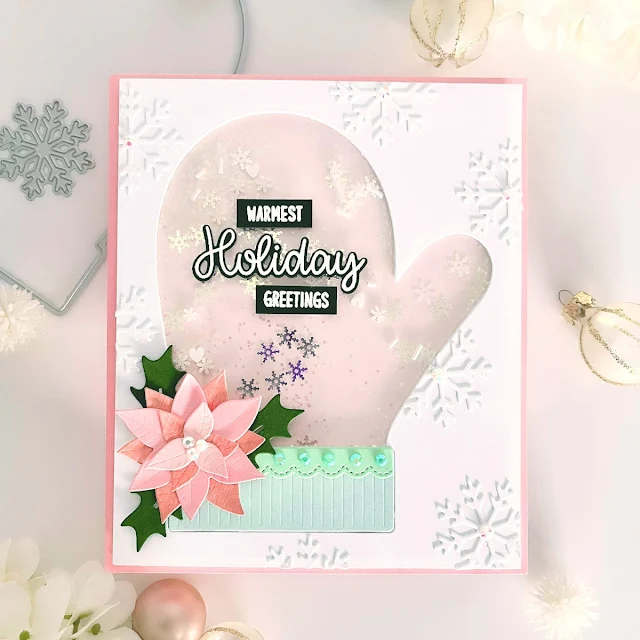
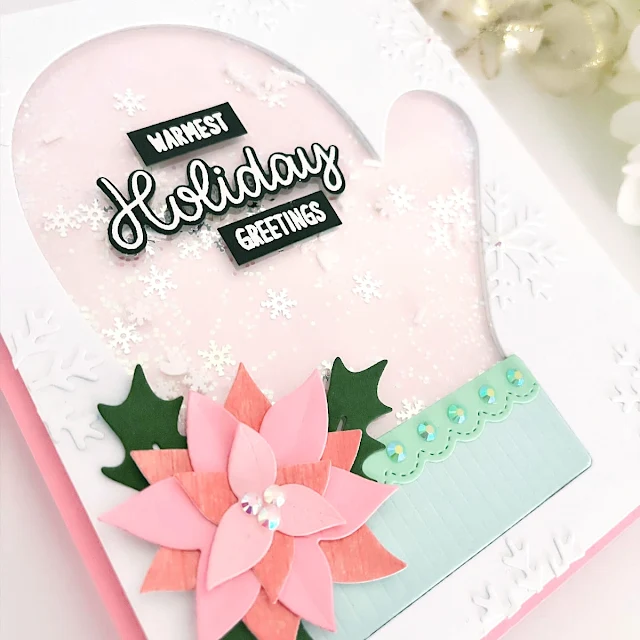
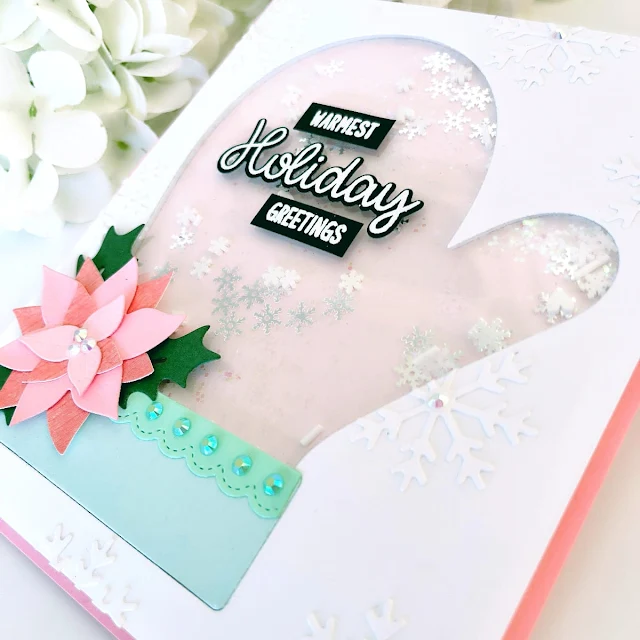
For the shaker card, I used the Woolen Mitten die setInstead of using the cutout piece of the mitten, I used the cardstock with the negative part. I then glued a piece of clear acetate at the back of the cardstock. I also die-cut the mitten out of a piece of white craft fun foam and glued this piece on the acetate.

Sunny Studio Stamps: Woolen Mitten Holiday Card by Debby van Diepen

I filled the mitten with sparkles and sequins and glued a super soft pink cardstock at the back. Now the shaker part is ready. I glued the bottom of the mitten in mint on the acetate along with the poinsettia. I love all the layers!

Sunny Studio Stamps: Woolen Mitten Holiday Card by Debby van Diepen

The sentiment is from the Holiday Hugs stamp set and is heat-embossed with white on black cardstock. For a little more interest I glued a few white snowflakes on the white card panel. I placed the card panel on a pink card base with double-sided foam tape. And for the finishing touch and more sparkle, I glued a few gems here and there. 

A big thanks for joining me today and I hope this will give you inspiration to create! 

Sunny Studio Supplies Used:
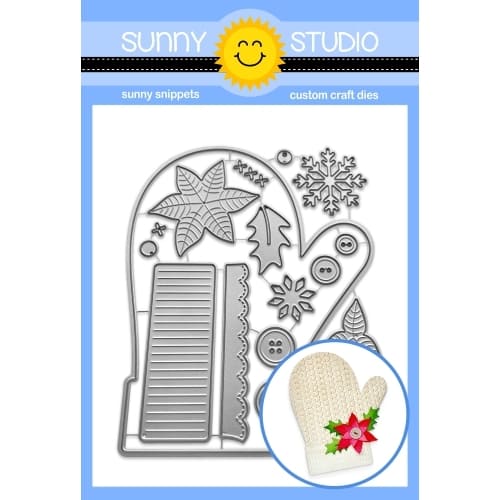
Woolen Mitten Dies
Woolen Mitten Dies
Shop at:
Sunny Studio
Holiday Hugs Stamps
Holiday Hugs Stamps
Shop at:
Sunny Studio
Holiday Hugs Dies
Holiday Hugs Dies
Shop at:
Sunny Studio

Friday, December 1, 2023

Holiday Express Card with Tina

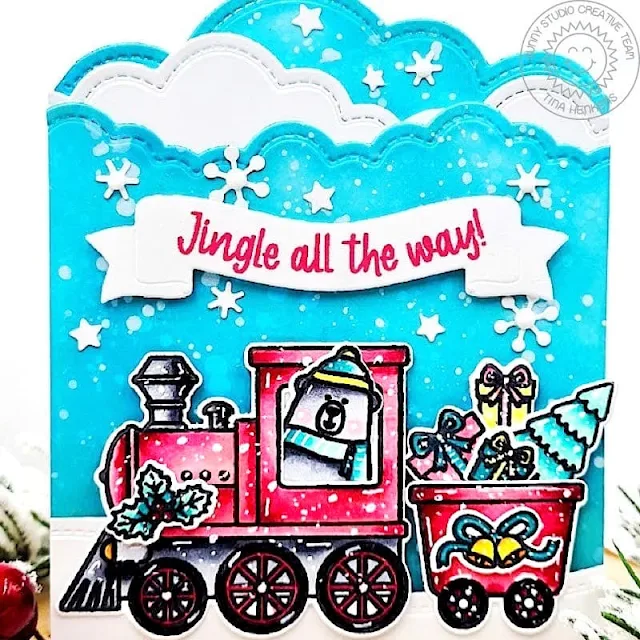
Hello crafty friends, Tina here with a card that is featuring the adorable Holiday Express stamp and die set. This set is of course perfect for your Christmas cards (as I show here today), but it can also be used for so many other occasions!

Sunny Studio Stamps: Holiday Express Holiday Card by Tina Henkens (featuring Snowflake Circle Frame Dies, Reindeer Games, Brilliant Banner Dies)

For this design I wanted to create a dreamy, snowy sky with several layers of clouds. I cut three panels of white card stock to an A2 size and die cut the top parts with a cloud die from my stash, similar to this oneNext, I inked up two panels with Distress Oxides Salvaged Patina and Peacock Feathers. I kept the third one white for extra interest and contrast.

I created a white card base slightly smaller than A2 size and started layering the cloud panels to figure out which height they needed to be. I cut the three panels to size and adhered them to my card base, making sure the white clouds were in the middle. And finishing the scene with a white snowbank which was mounted to the bottom of the card with foam tape.

Sunny Studio Stamps: Holiday Express Holiday Card by Tina Henkens (featuring Snowflake Circle Frame Dies, Reindeer Games, Brilliant Banner Dies)

Next, I selected which elements from the Holiday Express stamp set I wanted to use. There are several cute critters and an adorable Santa, today I went for the sweet polar bear! I stamped and cut the locomotive, car, tree, and some presents as well as a few decorations. For my Copic coloring I chose traditional Christmas colors and as always, I added white highlights and snowflakes with a gel pen. All the images were adhered to the scene using foam tape for dimension.

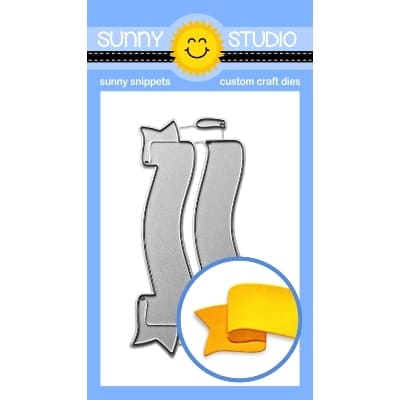
Lastly, I stamped a sentiment from Reindeer Games onto a white Brilliant Banner 1 with red die ink from my stash. That pop of color matches the train and car! A few snowflakes and stars from the Snowflake Circle Frame die were scattered around the sentiment. Some of them got embellished with a Pure White Jewel.

Thank you so much for visiting the blog, I can’t wait to see your creations with this fun set! Happy crafting!

Sunny Studio Supplies Used:

Holiday Express Stamps
Shop at:
Sunny Studio
Holiday Express Dies
Shop at:
Sunny Studio
Snowflake Circle Frame
Shop at:
Sunny Studio
Reindeer Games Stamps
Shop at:
Sunny Studio
Reindeer Games Dies
Reindeer Games Dies
Shop at:
Sunny Studio
Brilliant Banner 1 Dies
Shop at:
Sunny Studio

Thursday, November 30, 2023

Merry Mice Card with Marine

Hello crafty friends, Marine here, I'm thrilled to share with you the latest adventures of the mice family with this cute and festive slimline card featuring a bunch of images, including ones from Merry Mice. If you have missed their first adventures, here is a recap: they went apple picking during the Fall season here, were busy delivering presents here, and today is all about Christmas caroling, or should I say Christmouse caroling?!

Sunny Studio Stamps: Merry Mice Winter Themed Holiday Card by Marine Simon (featuring Balloon Rides, Harvest Mice, Feeling Frosty)

So I started off by creating a simple wintery landscape on a 8,5 x 3,5 inches Strathmore bristol smooth panel. On three quarters of the panel, I created snow hills using salvaged patina oxide ink and a hillside stencil from my stash. And at the very top, I created the sky using salvaged patina oxide ink again, with a little bit of peacock feathers oxide ink. I love to add texture to my backgrounds when I use oxide inks, so I mixed a little bit of peacock feathers oxide ink with water, and used a small brush to make splatters on the snowy hills. I did the same on the sky with a mix of blueprint sketch oxide ink and water. And the same again with a mix of white ink and water, but this time I made splatters all over the panel.

Sunny Studio Stamps: Merry Mice Winter Themed Holiday Card by Marine Simon (featuring Balloon Rides, Harvest Mice, Feeling Frosty)

Next I stamped all my images on 80lb Neenah solar white cardstock using an alcohol marker friendly black ink, cut them all using the matching dies and colored everything using once again my favorite color palette for this holiday season, which is red, light pink, aqua and green. Here is the detailed list of the stamp sets I used:

• Merry Mice - singing mice, mice (with the scarves), scarves, ear muffs, beanies, Santa hat, snowmouse

• Harvest Mice - mice (with the sweaters), sweaters

• Christmas Critters - mouse (in the balloon)

• Balloon Rides - hot air balloon, banners

• Feeling Frosty - trees

• Snowman Kisses - snowflakes

Sunny Studio Stamps: Merry Mice Winter Themed Holiday Card by Marine Simon (featuring Balloon Rides, Harvest Mice, Feeling Frosty)

I stamped my "Have yourself a merry little Christmouse" greeting from Merry Mice at the very bottom of my panel: "Have yourself a merry little" in black, and "Christmouse" in silver. Next I attached the images on my panel using 1mm and 2mm foam squares, and finally added highlights and details to the images and sky using a white gel pen. 

And that's it! I hope that you like this lovely and fun holiday card. Thanks so much for stopping by, and see you next time.

Sunny Studio Supplies Used:

Christmas Critters Stamps
Shop at:
Sunny Studio
Christmas Critters DIes
Shop at:
Sunny Studio
Feeling Frosty Stamps
Shop at:
Sunny Studio
Feeling Frosty Dies
Feeling Frosty Dies
Shop at:
Sunny Studio
Merry Mice Stamps
Merry Mice Stamps
Shop at:
Sunny Studio
Merry Mice Dies
Merry Mice Dies
Shop at:
Sunny Studio
Harvest Mice Stamps
Harvest Mice Stamps
Shop at:
Sunny Studio
Harvest Mice Dies
Harvest Mice Dies
Shop at:
Sunny Studio
Balloon Rides Stamps
Shop at:
Sunny Studio
Balloon Rides Dies
Balloon Rides Dies
Shop at:
Sunny Studio
Snowman Kisses Stamps
Shop at:
Sunny Studio
Snowman Kisses Dies
Snowman Kisses Dies
Shop at:
Sunny Studio

Wednesday, November 29, 2023

Cozy Christmas Card with Gladys

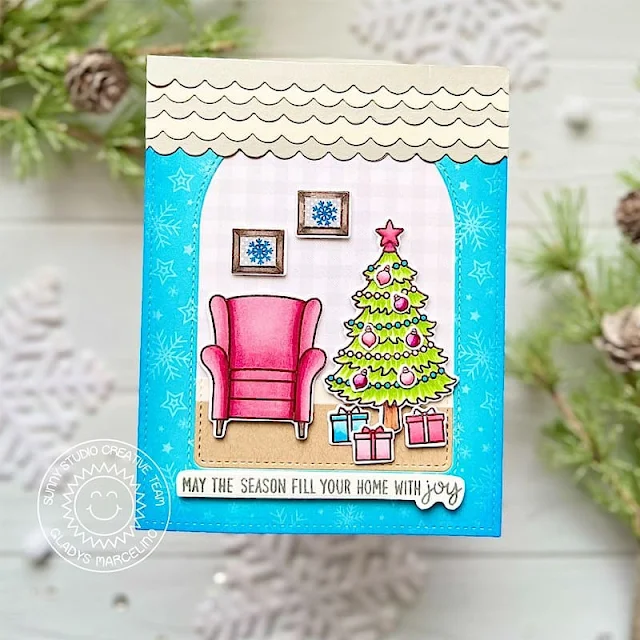
Hello crafty friends! Gladys here with a holiday card featuring the Cozy Christmas stamp set.

Sunny Studio Stamps: Cozy Christmas Holiday Card by Gladys Marcelino (featuring Stitched Arch Dies)

To start, I stamped the images from the Cozy Christmas set with alcohol friendly ink. I colored them using Copic markers then used the coordinating die to cut them out.

Next, I used an A2 size stitched rectangle die to cut the card panel out of the Joyful Holiday paper pack. I used two patterns, the blue snowflake background and gray plaid paper. I darken the edges of the blue paper using chipped sapphire distress oxide ink to add depth. Then I used the largest Stitched Arch die to cut the center creating a window for my scene.

Sunny Studio Stamps: Cozy Christmas Holiday Card by Gladys Marcelino (featuring Stitched Arch Dies)

To assemble the card, I cut a piece of kraft paper to ground the images. I backed the images with double side foam tape to give some dimension. I adhered all the elements within the arched panel. To add interest, I added scallops using the Sweet Treats House Add-On dies on the top panel to make it look like the roof top of the house. Finally, I stamped and adhered the sentiment to complete this cozy little Christmas scene.  

Thanks so much for stopping by the blog. Have a wonderful day!

Sunny Studio Supplies Used:

Sweet Treats House Add-on
Shop at:
Sunny Studio
Stitched Arch Dies
Stitched Arch Dies
Shop at:
Sunny Studio
Cozy Christmas Stamps
Shop at:
Sunny Studio
Cozy Christmas Dies
Cozy Christmas Dies
Shop at:
Sunny Studio
Joyful Holiday Paper
Shop at:
Sunny Studio

Tuesday, November 28, 2023

Feeling Frosty Card with Isha

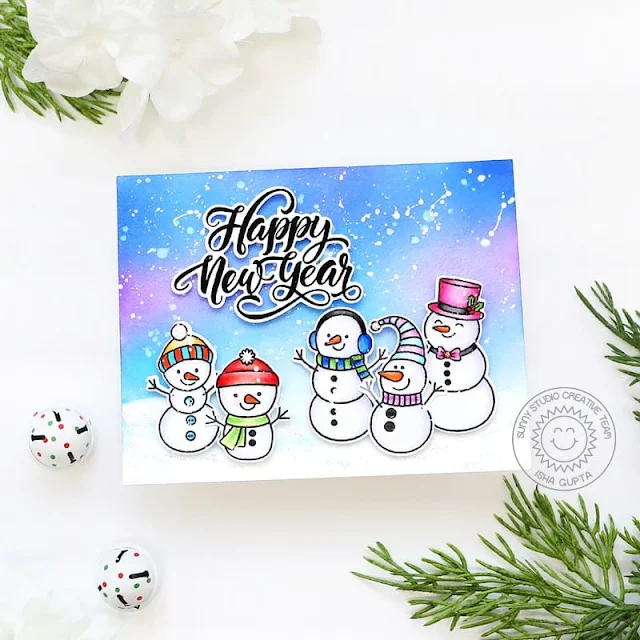
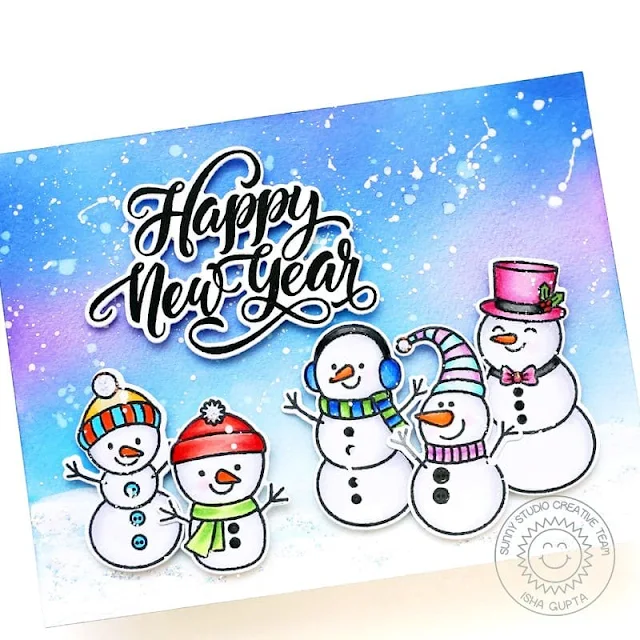
Hello everyone, Isha here and I am back with a fun and adorable card featuring the Feeling Frosty stamps and coordinating dies. We all need Christmas and new year cards and this design can be adapted to any. These snowmen are so adorable so I decided to have as many as I could on this card.

Sunny Studio Stamps: Feeling Frosty Holiday Card by Isha Gupta (featuring Season's Greetings)

I started by sponging distress oxide ink in wilted violet, salted ocean and blueprint sketch. Flick some water and white paint to this. Apply white paint for snowbanks and let this dry.

Sunny Studio Stamps: Feeling Frosty Holiday Card by Isha Gupta (featuring Season's Greetings)

Stamp the images from the Feeling Frosty stamp set, color and die-cut using coordinating dies. Stamp the sentiment from the Season's Greetings stamp set, die-cut using the coordinating dies.

Adhere the panel to a white card. Add the images and the sentiments using 3D foam. Add diamond stickles to part of the images and snowbanks.

Thank you for dropping by and have a nice day!

Sunny Studio Supplies Used:

Season's Greetings Stamps
Shop at:
Sunny Studio
Season's Greetings Dies
Shop at:
Sunny Studio
Feeling Frosty Stamps
Shop at:
Sunny Studio
Feeling Frosty Dies
Feeling Frosty Dies
Shop at:
Sunny Studio