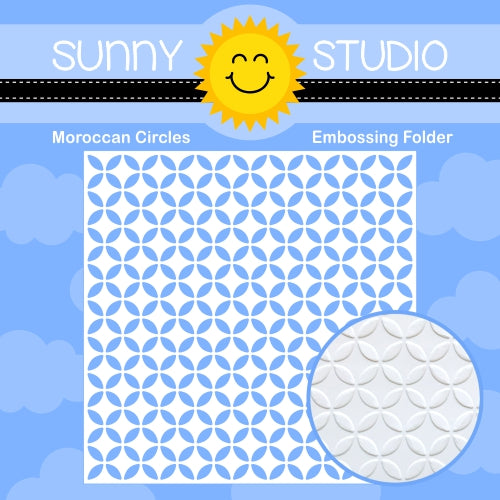
Hello and welcome! This is Mendi here today, popping in to share some Christmas cards featuring our Moroccan Circle Embossing Folder.
For my cards today, I was having fun experimenting with Tim Holtz Distress Embossing Glazes. I started by inking up a 6x6 white cardstock panel with Peacock Feathers Distress Inks before running the panel through my die-cutting machine with the Moroccan Circle Embossing Folder. I then pressed my Versamark Ink Pad directly to the surface, trying to coat the entire panel, before sprinkling it with Evergreen Bough distress embossing glaze. When I created the panel, I wasn't sure how I was going to use it, and I wanted to be able to crop it around any mistakes I might make. I love how the speckled glossy embossed background invokes the feeling of real handmade Moroccan tiles!I thought red would look so good against the teal green background, so I embellished my card with three layered Pristine Poinsettia Dies. Each flower is comprised of three stacked layers, twisted to show 9 petals in all. I used a paper piercer to poke a hole down the center and inserted a small red brad to hold the layers together tightly, before using a craft hammer to completely flatten the head of the brad. This gave me a smooth surface to adhere groupings of Red Zicron Jewels adhered with Multi Matte Medium, which dries clear. Our Winter Greenery Dies cut from a couple different shades of green cardstock were used as filler around the poinsettia flowers. I completed my card by heat embossing the "Enjoy the Beauty of the Season" sentiment from our Inside Greetings Christmas Stamps on a black pennant cut with the Notebook Photo Corners Dies.
I used our Winter Wreaths Stamps for the focal point of my card, embellishing it with the bow, mini layered poinsettias, berries, and extra bough image. I chose to stamp my wreath and evergreen sprigs onto green cardstock to help the die-cut images fill out and blend with the stamped images for a tone-on-tone look. I heat-embossed a simple "noel" greeting in the center of my wreath from the Classy Christmas Stamps and added a scalloped lace border from the Ribbon & Lace Border Dies. Lastly, I added some more mini Red Zicron Jewels to the center of each poinsettia for an extra touch of holiday shine.
That wraps up my projects for today. Thanks so much for hanging out with me. I hope I've inspired you to spread a little happiness by sending out a card to someone you love. 💛
Don't forget to check out the Prestine Poinsettia Dies, Winter Wreath Stamps, and Moroccan Circles Embossing Folder in our online shop, which are all currently on sale!
Supplies Used:
 Pristine Poinsettia Dies Shop at: Sunny Studio |
 Winter Greenery DIes Shop at: Sunny Studio |
 Winter Wreaths Stamps Shop at: Sunny Studio |
 Winter Wreaths Dies Shop at: Sunny Studio |
 Classy Christmas Stamps Shop at: Sunny Studio |
 Inside Greetings-Christmas Shop at: Sunny Studio |
 Ribbon & Lace Dies Shop at: Sunny Studio |
 Notebook Photo Corners Dies Shop at: Sunny Studio |
 Moroccan Circles Embossing Shop at: Sunny Studio |
 Hero Arts White Detail Shop at: Sunny Studio |
 VersaMark Watermark Pen Shop at: Sunny Studio |
 VersaMark Watermark Ink Shop at: Sunny Studio |
 Red Zircon Jewels Shop at: Sunny Studio |
 Multi Medium Matte Shop at: Sunny Studio |


No comments:
Post a Comment