Hi friends, Angelica here
sharing a birthday shaker card using the Best Fishes stamp set. Here’s how I put it
together.
The first step is making the
card front. On a sheet of Yupo paper, I moved Tim Holtz Turquoise and
Sailboat Blue alcohol inks around to resemble water. I worked from one
corner to the other, the path I knew my windows were going to be.
While the panel was drying, I made the inside panel that would be seen through the window. I smooshed watercolor paper into Distress Oxide inks that I had swiped onto my craft mat and sprayed with water. I did this three times, using my heat tool to dry the paper after each layer. Once my Yupo paper was dry, I die-cut the windows using the Staggered Circles Die.
While the panel was drying, I made the inside panel that would be seen through the window. I smooshed watercolor paper into Distress Oxide inks that I had swiped onto my craft mat and sprayed with water. I did this three times, using my heat tool to dry the paper after each layer. Once my Yupo paper was dry, I die-cut the windows using the Staggered Circles Die.
I stamped several images from the Best Fishes stamp set, and
pulled out a rainbow of Copic colors to color them with. I used the coordinating
dies to die-cut them out, then planned out my card front. After
moving the images around, I finally found the arrangement I wanted to use. I
always do this, then take a picture of it so I know how to assemble the images
when it’s time to complete the card.
To assemble the shaker element, I turned the Yupo paper over and
used 1/8 Scor tape and a sheet of acetate to close the windows. Next I took
thin strips of foam adhesive and wrapped them around each window, then on the
rest of paper for support. I added clear and pink confetti into the windows,
then carefully closed the back up with the watercolor background. I attached
the card front to a card base, then added the images with thin foam squares. I
stamped and white heat-embossed the sentiments using words from the stamp set.
My last step was trimming the sentiments into thin strips, and attaching them
to the card.
That's all that I have for today. Thanks for stopping by!
-------------------------------------------------
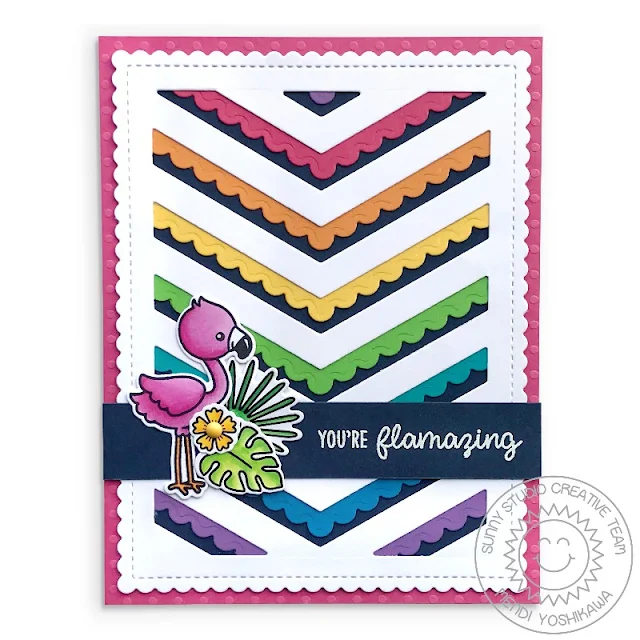
Hello there! Mendi here today filling in for Juliana with a card featuring our newest Frilly Frames Dies. I ran out of time during the sneak peek week to show how awesome the new Frilly Frames Chevron dies work together with both our Fishtail Banner die sets. For my card here I paired them with the scallop from our Fishtail Banner 2 and the straight edge banner on our original Fishtail Banner dies to create "strips" which I cut from a rainbow of cardstock colors.
I just adore how all our Frilly Frames can mix and match with each other. The chevron dies come with a ric rac edge, but I wanted to continue the scalloped theme so I paired the inside portion of the die with the outside portion of our Frilly Frames Stripes Die. I then backed them with a piece of navy cardstock.
I wanted to keep the rest of my card fairly simple to keep the attention on my rainbow chevron stripes so I colored a small grouping from our Fabulous Flamingo Stamps and dies, using Copic Markers and heat embossed a sentiment on some more of that same navy cardstock to ground my images.
I hope we've inspired you in your cardmaking. Thanks so much for stopping by and hanging with us today. :)
Sunny Studio Supplies Used:
 Fishtail Banner II Dies Shop at: Sunny Studio |
 Staggered Circles Die Shop at: Sunny Studio |
 Frilly Frames Chevron Die Shop at: Sunny Studio |
 Frilly Frames Stripes Die Shop at: Sunny Studio |
 Best Fishes Stamps Shop at: Sunny Studio |
 Best Fishes Dies Shop at: Sunny Studio |
 Fabulous Flamingos Stamps Shop at: Sunny Studio |
 Fabulous Flamingos Dies Shop at: Sunny Studio |


First, I LOVE THE ocean card!!!!!! It looks great having the fish come out of nooks and crannies, and caves (that's what it reminds me of, anyway). What a great look! And I really, really like the way the edges are used , and in so many colors. Your designer ladies are so imaginative, I am in awe...
ReplyDeleteI really like how both cards are so fun and brightly colored.
ReplyDelete