Sunday, December 27, 2020

Introducing New Snail Mail Mini Stamps

Hello there!  I hope you all had a wonderful holiday week! We are switching gears and transitioning from Christmas to Spring this week featuring a new mini love inspired set called Snail Mail.

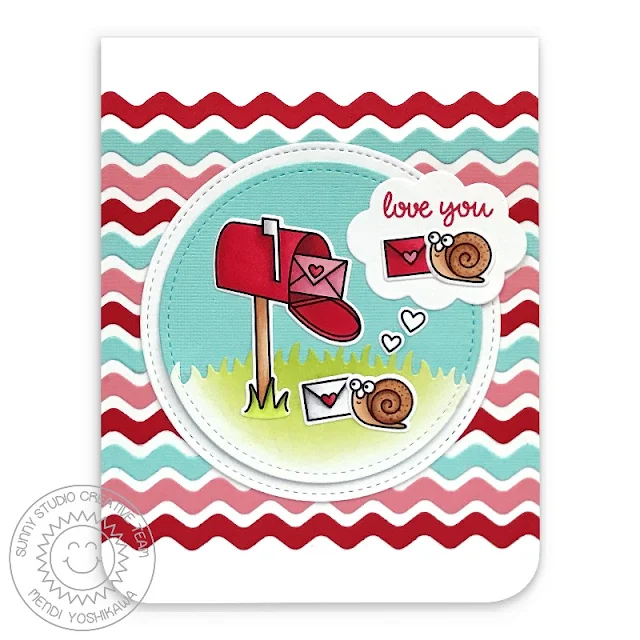
Card No.1: For my first card I started by creating a chevron striped background alternating red, pink and aqua stripes cut using our Ric Rac Border dies, using a clear ruler to keep them straight and centered on my card. I then cut two stitched circle mats (using dies that will be shared more next week) together with the grassy border from our Slimline Nature Border Dies. I colored the mailbox, snails and love letters with Copics from the new Snail Mail stamps. For my "love you" sentiment, I used a stamp from our Savanna Safari Stamps and mounted them onto a thought bubble from our Comic Strip Speech Bubbles dies.

Sunny Studio Blog: Valentine's Day Card (using Snail Mail, Stitched Circle Dies, Comic Strip Speech Bubbles & Ric Rac Border Dies)


Card No.2:  For my next card I just focused on the mailbox from the Snail Mail stamps, pairing it with the polar bear & "I love you" greeting from our Playful Polar Bear Stamps and the snow drift from the Slimline Nature Border dies. I inked behind them with some Picked Raspberry Distress ink and then framed my little scene using our Fancy Frame Square Dies which I die-cut from red cardstock. 

For my background I stamped our Cascading Heart Stamps first in pink and then offset my paper and stamped them with a second series in red. As a final touch I added the stitching to the edge of my card panel using our Slimline Basic Border dies and a small scalloped edge cut from our Classic Gingham Paper.Sunny Studio Blog: Valentine's Day Card (using Snail Mail, Playful Polar Bears & Cascading Hearts Stamps and Fancy Frames Square Dies)

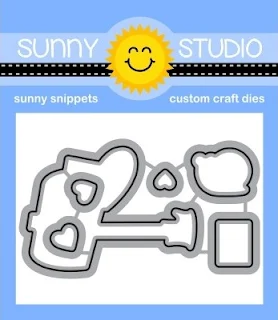
Here's a closer look at the new Snail Mail stamps and Snail Mail dies. While these are available in our store now, the rest of our Spring Release will be shared with our Sneak Peek Week next week and available to purchase on January 8th.

Sunny Studio Blog: Snail Mail 2x3 Mini Clear Photopolymer Valentine's Day Mailbox StampsSunny Studio Stamps: Snail Mail Metal Cutting Dies

I hope you will check back each day this week to see more fun ideas using this cute set by the rest of the team. :)


Other Sunny Studio Supplies Used:

Playful Polar Bears Stamps
Shop at:
Sunny Studio
Playful Polar Bears Dies
Shop at:
Sunny Studio
Cascading Heart Stamps
Shop at:
Sunny Studio
Ric Rac Border Dies
Ric Rac Border Dies
Shop at:
Sunny Studio

Classic Gingham 6x6 Paper
Shop at:
Sunny Studio
Comic Strip Speech Bubble Dies
Shop at:
Sunny Studio
Savanna Safari Stamps
Shop at:
Sunny Studio
Slimline Basic Borders
Shop at:
Sunny Studio

Fancy Frames-Square Dies
Shop at:
Sunny Studio
Slimline Nature Borders
Shop at:
Sunny Studio
Hero Arts Morning Glory Ink
Shop at:
Sunny Studio

Saturday, December 26, 2020

Guest Designer Spotlight: Penguin Pals Cards with Tammy Stark

Hi friends! Tammy here with a couple of cards I made with one of my favorite sets, Penguin Pals. While this set can certainly be used to make holiday cards, I love that it can be used to create winter themed cards, as well!

Sunny Studio Stamps: Penguin Pals Winter Scenes Slimline Dies Gleeful Reindeer Winter Themed Cards by Tammy Stark

I chose a cool color palette in pinks, and purples, with a pop of aqua, to create these fun cards...perfect for Winter birthdays!

Sunny Studio Stamps: Penguin Pals Winter Scenes Slimline Dies Winter Themed Cards by Tammy Stark

For my first card, I created a slimline birthday card. To begin, I cut a piece of Bristol smooth cardstock, using the rectangle die from the Slimline Scalloped Frame Dies. I ink blended the background with Milled Lavender, Seedless Preserves, and Black Soot Distress Oxide inks. Next, I splattered some white acrylic paint onto the background and white heat embossed some snowflakes to create a fun snowy sky. 

I stamped, colored with Copic markers, and die cut images from the following sets:
Penguin PalsCoordinating Dies
Winter Scenes StampsCoordinating Dies

Copic Colors: Aqua: BG49, BG13, BG11, BG10; Pink: R39, RV66, RV55, RV63, RV52; Green: G40, G21, G24, G28; Purple: V09, V17, V15, V12; Orange: Y35, YR04

Sunny Studio Stamps: Penguin Pals Winter Scenes Slimline Dies Winter Themed Cards by Tammy Stark

Next, I die cut some snowy hills using the Slimline Nature Borders Dies from white cardstock, inked the tops with Peacock Feathers Distress Oxide, and attached to my inked background. I then tucked the trees behind the hill, and trimmed to fit the width of my card before attaching it to a white Scalloped Frame Die. Lastly, I attached the colored images to my card, using foam tape for dimension, then stamped the sentiment from Penguin Pals in black ink along the bottom to complete it.

Sunny Studio Stamps: Penguin Pals Winter Scenes Slimline Dies Gleeful Reindeer Winter Themed Cards by Tammy Stark

To make this fun shaker card, I started by cutting a rectangle from white cardstock, then used the Stitched Arch Dies to cut out a window. Next, I attached a piece of acetate to the back of the white rectangle, covering the arch window. I applied foam tape around the opening and added some Majestic Mini Sequins and other jewels from my stash before attaching it to a piece of Bristol smooth cardstock, ink blended with Blueprint Sketch, Seedless Preserves, and Milled Lavender. Next, I attached my shaker to a piece of 4 1/4 X 5 1/2" purple patterned paper from the Gingham Jewel Tones 6 X 6 Paper.

I stamped, colored with Copic markers, and die cut images from the following sets:
Penguin PalsCoordinating Dies
Winter Scenes StampsCoordinating Dies
Gleeful ReindeerCoordinating Dies

Sunny Studio Stamps: Penguin Pals Winter Scenes Slimline Dies Gleeful Reindeer Winter Themed Cards by Tammy Stark

Lastly, I attached the colored images to my card, using foam tape on some for dimension. Next, I white heat embossed the sentiment from Penguin Pals onto a black sentiment strip and attached it to my card to complete it!

Thanks so much for stopping by! I hope you were inspired to create some winter themed cards of your own! Have a great day!

Sunny Studio Supplies Used:


Gleeful Reindeer Dies
Shop at:
Sunny Studio
Gleeful Reindeer Stamps
Shop at:
Sunny Studio
Gingham Jewel Tones 6x6 Paper
Shop at:
Sunny Studio
Stitched Arch Dies
Stitched Arch Dies
Shop at:
Sunny Studio
Slimline Nature Borders
Shop at:
Sunny Studio
Slimline Scalloped Frame
Shop at:
Sunny Studio
Penguin Pals Stamps
Penguin Pals Stamps
Shop at:
Sunny Studio
Penguin Pals Dies
Penguin Pals Dies
Shop at:
Sunny Studio
Winter Scenes Stamps
Shop at:
Sunny Studio
Winter Scenes Dies
Winter Scenes Dies
Shop at:
Sunny Studio

Friday, December 25, 2020

Surfing Santa Cards and Video Tutorial with Franci and Candice

Hi there and Merry Merry Christmas! I hope you're having a lovely day celebrating the Holidays and I wish you all the joy and happiness for 2021! It's Franci here with you and I'm so very happy to celebrate with you today, with a fun interactive card that features the Surfing Santa mini set.

Sunny Studio Stamps: Surfing Santa Catch A Wave Dies Tropical Themed Christmas Card by Franci Vignoli

Fun fact: for today's project I was actually inspired by the TV news! Yes, cause every year, the day after Christmas as I watch the news with my family I always see how Christmas was celebrated in the world and all our friends from Australia are always at the beach, surfing in Santa costumes! Lol.

Sunny Studio Stamps: Surfing Santa Catch A Wave Dies Tropical Themed Christmas Card by Franci Vignoli

So I created this super fun interactive card (but also simple to make, I promise!) and I can't stop playing with my little Santa who can actually surf and move into the ocean waves.

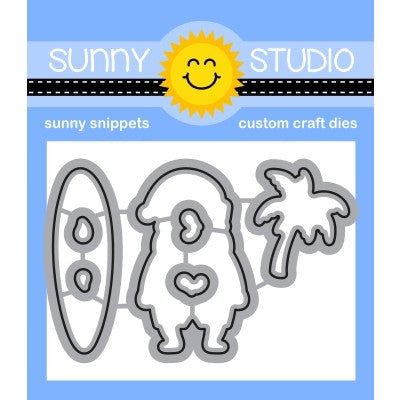
To create this card I used the Surfing Santa set, it's coordinated dies, the Catch a Wave Dies and some basic shape dies.

Please take a look at how I created my card below and enjoy!


------------------------------------------

Hello and Merry Christmas my crafty friends! Candice here! I hope you are enjoying your day with family! I have one last tropical Christmas card to share with you today!

Sunny Studio Stamps: Surfing Santa Tropical Scenes Slimline Dies Tropical Themed Christmas Card by Candice Fisher

I used these Sunny Studio products for my card:

I began my slimline with an 8 1/2 x 3 1/2 card base. For the background, I repeatedly stamped the palm tree silhouette with Orange Cream Altenew ink on orange cardstock and trimmed with the scalloped border die. I then heat embossed the sentiment in white on the bottom panel.

Sunny Studio Stamps: Surfing Santa Tropical Scenes Slimline Dies Tropical Themed Christmas Card by Candice Fisher

Next, I stamped all my tropical images from the sets listed above, colored them with Copic markers and used the matching dies to cut out. I lightly inked a sunset with dried marigold directly onto the card base and layered the images onto blue cardstocks, some cut from the wave die. I finished with some blue snowflakes, clear domes and Nuvo drops!

Thank you for stopping by today and enjoy the rest of your holiday!

Sunny Studio Supplies Used:

Catch A Wave Dies
Catch A Wave Dies
Shop at:
Sunny Studio
Sealiously Sweet Stamps
Shop at:
Sunny Studio
Sealiously Sweet Dies
Shop at:
Sunny Studio
Tropical Scenes Stamps
Shop at:
Sunny Studio
Tropical Scenes Dies
Shop at:
Sunny Studio
Slimline Basic Borders
Shop at:
Sunny Studio
Slimline Nature Borders
Shop at:
Sunny Studio
Surfing Santa Stamps
Shop at:
Sunny Studio
Surfing Santa Dies
Surfing Santa Dies
Shop at:
Sunny Studio

Thursday, December 24, 2020

Classy Christmas Cards with Vanessa and Anja

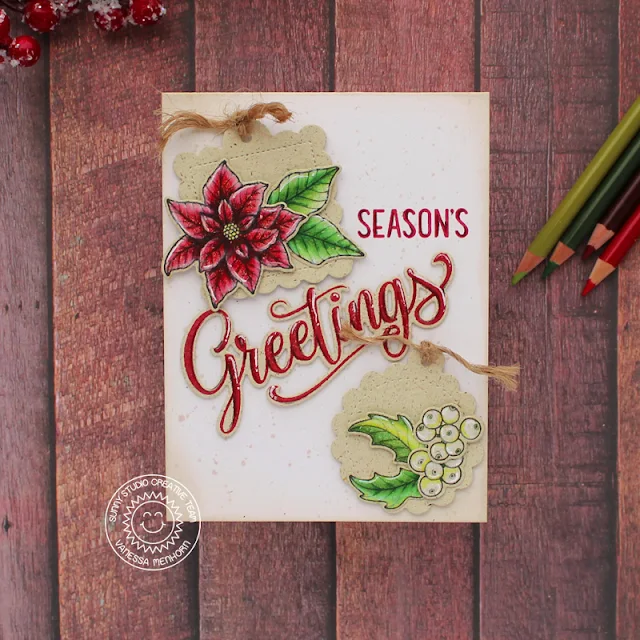
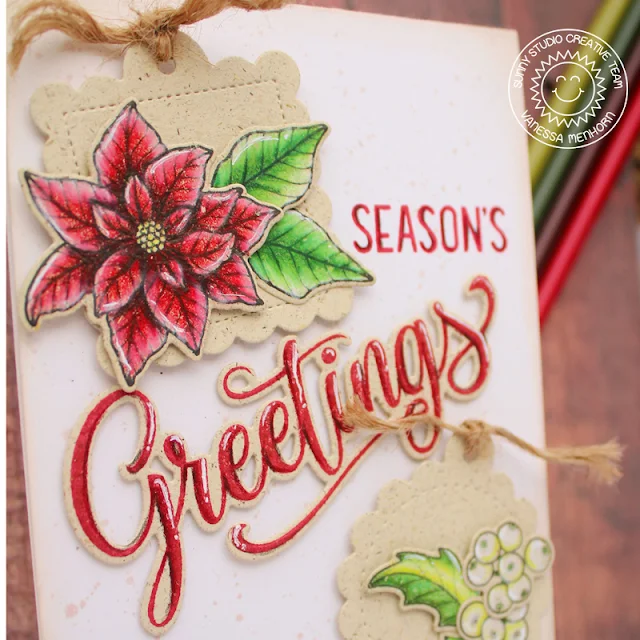
Hello to you! Vanessa here with a vintage style Christmas card using Classy Christmas.

Sunny Studio Stamps: Classy Christmas Season's Greetings Scalloped Tag Dies Christmas Cards by Vanessa Menhorn

For this card, I first inked the edges of a rustic cream card base with cream ink and applied ink droplets. Then I die-cut two tags from the package box of my favorite tea. I love the paper they use for the package and didn't want to throw it away. Now I stamped the images onto another piece of the paper and colored them with colored pencils. After adding highlights with a white gel pen, I die-cut the elements with the matching dies and arranged them onto the tags. 

Stamps and dies used today:
Classy Christmas stamps dies (images)
Season's Greetings stamps + dies (sentiment)
Scalloped Tag Square Dies (tags)

Sunny Studio Stamps: Classy Christmas Season's Greetings Scalloped Tag Dies Christmas Cards by Vanessa Menhorn

I tied-on rustic twine to the tags and adhered them with foam tape. Then I stamped the "greetings" with red ink, added shadows with the colored pencils and highlights with the white gel pen, die-cut the word and adhered it. Finally, I stamped "season's" onto the card.

I am wishing you and your loved ones a wonderful Christmas! Thank you for stopping by!

--------------------------------------------------

Hello everyone, Anja here today and since it is Christmas Eve, I have the matching card for you, showcasing the beautiful Classy Christmas Stamps.

Sunny Studio Stamps: Classy Christmas Christmas Card by Anja Bytyqi

I started off with a white A2 card base and adhered a navy blue cardstock panel which is slightly smaller. Next, I die cut a thin white frame to use as a decorative design element for my cluster of stamped images.

Sunny Studio Stamps: Classy Christmas Christmas Card by Anja Bytyqi

The images were stamped in Memento Tuxedo Black Ink and colored with Copic markers. For the tree branch sprigs I used three tones of green dye inks. I used the coordinating dies to cut everything out and arranged the images at the bottom of the card. Finally, I stamped the sentiment from the Merry Mice set in VersaMark Ink and heat embossed it with white embossing powder.

Thank you so much for stopping by! Wishing you all a very Merry Christmas!

Sunny Studio Supplies Used:

Season's Greetings Stamps
Shop at:
Sunny Studio
Season's Greetings Dies
Shop at:
Sunny Studio
Merry Mice Stamps
Merry Mice Stamps
Shop at:
Sunny Studio
Scalloped Tags-Square
Shop at:
Sunny Studio
Classy Christmas Stamps
Shop at:
Sunny Studio
Classy Christmas Dies
Shop at:
Sunny Studio