Tuesday, June 27, 2023

Fabulous Flamingos Card with Isha

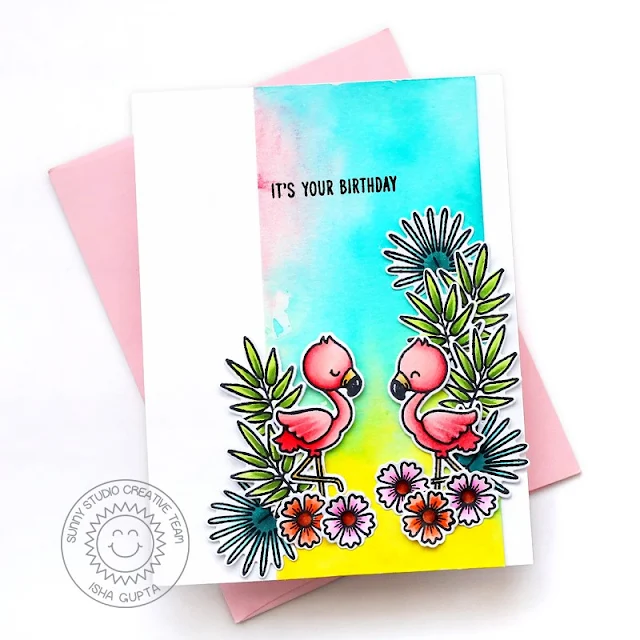
Hello everyone! Isha here today with a happy and fun CAS card featuring the Fabulous Flamingos stamps and coordinating dies. There are so many beautiful images in this stamp so I decided to highlight them and keep the rest of the card clean. I added a watercolor panel for some movement. 

Sunny Studio Stamps: Fabulous Flamingos Summer Themed Birthday Card by Isha Gupta

I started by creating a watercolor panel in fun and bright colors, let it dry. Next I stamped the images from the Fabulous Flamingos stamps onto copic friendly card, colored using copic markers and die-cut using the coordinating dies.

Sunny Studio Stamps: Fabulous Flamingos Summer Themed Birthday Card by Isha Gupta

Adhere the panel to a white cardbase. Next, stamp the sentiment. Now assemble the images to create a scene. Keeping the leaves different height gives added movement to the card.

Thank you for dropping by and have a nice day!

Sunny Studio Supplies Used:

Fabulous Flamingos Stamps
Shop at:
Sunny Studio
Fabulous Flamingos Dies
Shop at:
Sunny Studio

Monday, June 26, 2023

Slice of Summer Card with Bobbi

Hello friends, Bobbi here. It’s another summer day and this week I’m filling it with some fresh fruit from the Sunny garden of stamps! I’m using the Slice of Summer stamps and dies to create this fresh card.

Sunny Studio Stamps: Slice Of Summer Card by Bobbi Lemanski

To create my 5″ X 7″ card, I started with a card front panel cut from watercolor paper. I use Canson XL watercolor paper (blue pad). I hand colored a large pinkish-red heart using Kuretake Gansai Tambi watercolor paints. I added splattering in colors to match the fruit of the set – yellows, lime greens, pinks and reds. I wanted the background to be really organic looking and fresh… just like the fruit!

Sunny Studio Stamps: Slice Of Summer Card by Bobbi Lemanski

I stamped and cut the fruit following the layering guide on the Sunny Studio Stamps web page. It was a great reference to have while stamping the fruit. Like all layered stamping I do, I can’t help but add a few additional markings using Copics for greater shadows and white Gelly Roll pens for more highlights. However, with this set you really don’t need to because Sunny Studios has already included highlights and shadows within the layers. How cool is that?!

The fruit was attached, over the organic heart shape with one of the watermelon slices popped up using foam dots. Did you notice the bite out of one of the watermelon slices? I created the teeth marks using a scallop circle punch I had stash.


Sunny Studio Stamps: Slice Of Summer Card by Bobbi Lemanski

Okay, I’m going to be real with you now. I made a mistake in the lower right corner when stamping the sentiment. My paper shifted in my stamping tool and did not line up exactly with the first layer. Like all mistakes I make, I generally turn it into something I like even better. I tore the watercolor paper at the bottom and added a piece of pattern paper in a lime green sunburst pattern from the Classic Sunburst paper pack to the base and ended up loving the card even more! I stamped the phrase from the same fruit set again and added some white dots for a burst of energy to complete the card.

Thanks for stopping by today. If you want to see more ideas and inspiration from me, subscribe to my blog, BobbiHartDesign.com. I’ll send you updates on new posts! You can also find me on Instagram as @BobbiHartDesign and on Facebook as BobbiHartDesign.

Sunny Studio Supplies Used:

Slice of Summer Stamps
Shop at:
Sunny Studio
Slice of Summer Dies
Shop at:
Sunny Studio
Classic Sunburst Paper
Shop at:
Sunny Studio

Sunday, June 25, 2023

Birthday Cat Card with Cathy

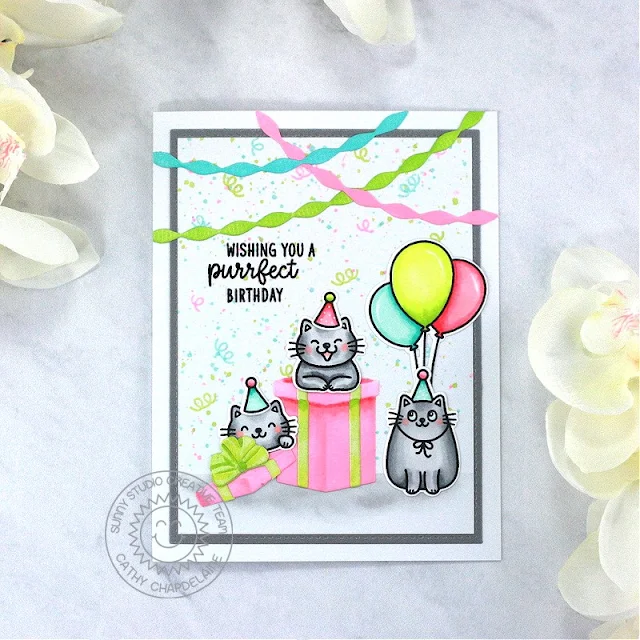
Hey friends! Cathy here today and these adorable little kitties are throwing the purrfect birthday party!

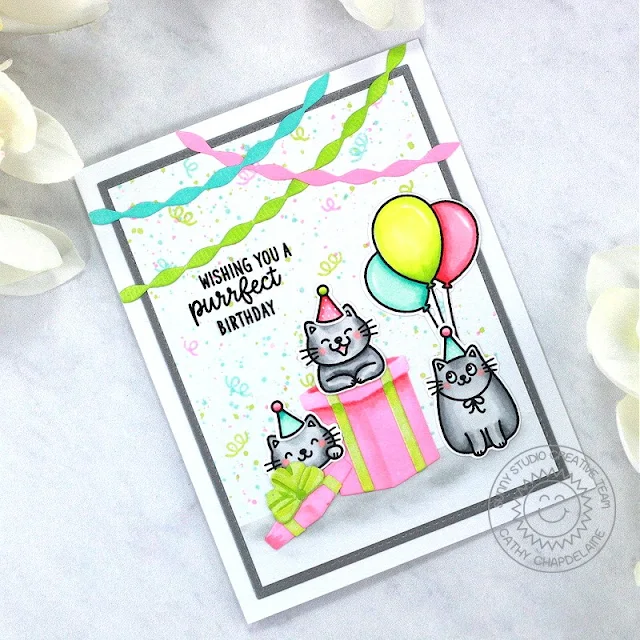
Sunny Studio Stamps: Birthday Cat Birthday Card by Cathy Chapdelaine (featuring Stitched Retangle Dies, Crepe Paper Streamers Dies, Perfect Gift Boxes Dies)

I chose a really simple design for this A2 card to really let these kitties take center stage. To start, I cut a piece of white cardstock 3 5/8” x 4 7/8”, placed a post-it note across the panel 3/4" from the bottom and lightly inked with Lost Shadow Distress ink. I covered the gray area with the post-it note and stamped confetti using stamps from the Birthday Cat Stamps on the rest of the panel in aqua, lime green and pink inks. For more festivity, I watered down a little of each ink and splattered the panel using paintbrushes.

Next, I heat embossed the sentiment from the Birthday Cat Stamps in black embossing powder 1 1/4” from the top of the panel. I die-cut a silver metallic cardstock using the largest Stitched Rectangles Dies, matted the panel on it and adhered it to the card front.

Sunny Studio Stamps: Birthday Cat Birthday Card by Cathy Chapdelaine (featuring Stitched Retangle Dies, Crepe Paper Streamers Dies, Perfect Gift Boxes Dies)

I die-cut 3 streamers from white cardstock using the Crepe Paper Streamers Dies and inked them with the same ink colors I used on the background. I adhered them across the top of the card and trimmed the excess from the edges.

To finish, I die-cut a gift box, ribbon and bow from white cardstock using the Perfect Gift Boxes Dies. I inked the box using Kitsch Flamingo Distress ink and added some depth with Copic markers. I also colored the ribbon and bow with Copics. I stamped the images on Neenah Classic Crest 80lb solar white cardstock, colored them with Copics and die-cut them using the coordinating dies.

I used the following stamps and dies:
Birthday Cat Stamps and Dies
Birthday Mouse Stamps and Dies (balloons)

I hope you enjoyed and thanks for stopping by today! For more inspiration, please visit my blog www.inkredibleadventures.com and you can also find me on Instagram as @cathy.chapdelaine.

Sunny Studio Supplies Used:

Stitched Rectangle Dies
Shop at:
Sunny Studio
Birthday Cat Stamps
Birthday Cat Stamps
Shop at:
Sunny Studio
Birthday Cat Dies
Birthday Cat Dies
Shop at:
Sunny Studio
Birthday Mouse Stamps
Shop at:
Sunny Studio
Birthday Mouse Dies
Birthday Mouse Dies
Shop at:
Sunny Studio
Crepe Paper Streamers Dies
Shop at:
Sunny Studio
Perfect Gift Boxes Dies
Shop at:
Sunny Studio

Saturday, June 24, 2023

Guest Designer Spotlight: Cards with Rachel Alvarado

Hello crafty friends! It's Rachel here from RachelAlvaradoDesigns.com, and I have two birthday card ideas to share with you today using some fun products from the latest Sunny Studio Stamps release.

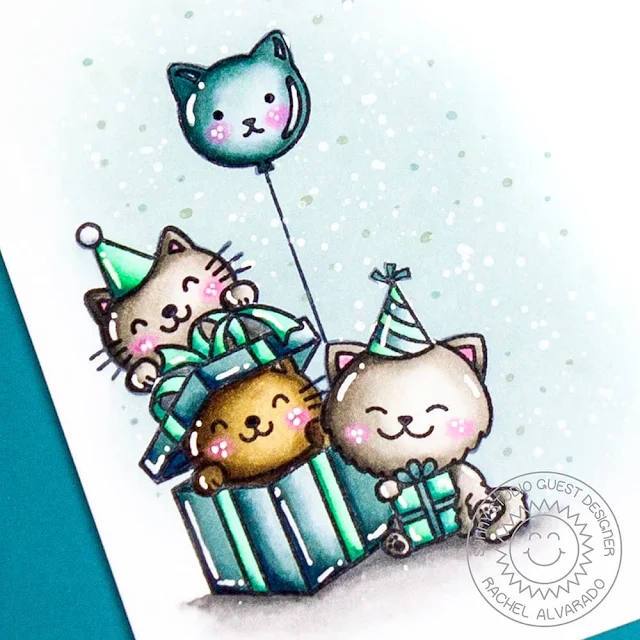
Sunny Studio Stamps: Birthday Cat Birthday Card by Rachel Alvarado

My first card is a one-layered, CAS card that features both the new Birthday Cats Stamp Set combined with the previously released Purrfect Birthday Set. I used a piece of Gina K. Designs Masking Magic Sheets to mask my images as I stamped so that it would appear that some of the images were behind one another, therefore giving my design the illusion of depth.

Sunny Studio Stamps: Birthday Cat Birthday Card by Rachel Alvarado

Once my images were all stamped and masked onto a 4.25" x 5.5" piece of Neenah Solar White 110lb Card Stock with Memento Tuxedo Black Ink, I then lightly blended a background area with some Speckled Egg Distress Oxide Ink. I added a few white ink spatters using some diluted Copic Opaque White Paint, and then added a few dark "spatters" with some Copic Markers. Once my background was finished, I then removed my masking pieces and colored my scene with Copic Markers (colors listed below).

Copic Colors Used:

  • Grays: W00, W1, W3, W5
  • Brown Cat: E41, E42, E43, E44
  • Greens: G00, G02, BG18
  • Blues: BG70, BG72, BG75, BG78
  • Shadows/Ground: T00, T2, T4
Sunny Studio Stamps: Birthday Cat Birthday Card by Rachel Alvarado

Once I was finished coloring, I added some white highlights with a Sakura Gelly Roll White Pen (size 10) and then stamped my sentiment from the 
Scrumptious Cupcakes Stamp Set in the upper righthand corner of my card with more Memento Tuxedo Black Ink.

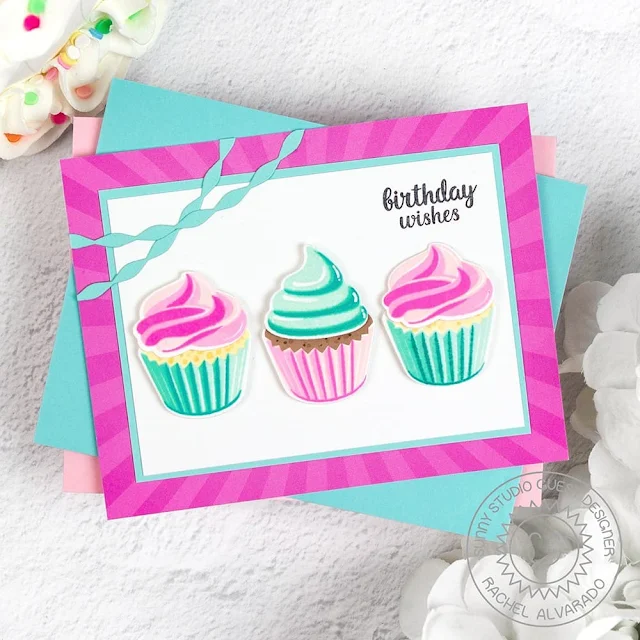
Sunny Studio Stamps: Scrumptious Cupcakes Birthday Card by Rachel Alvarado

For my second card, I created a super simple birthday card featuring the gorgeous Scrumptious Cupcakes Layering Stamp Set. I chose three shades of pink and three shades of teal to create all of my cupcakes today. It doesn't matter what colors you decide to use, but the layering images work best if you pick a light, medium, and a dark shade of whatever color you decide to use. For my cupcakes, I used (pinks) Pinkfresh Ballet Slippers, Sparkling Rose, and Bubble Gum Inks. For my teal colors, I used Altenew Mountain Mist, Volcano Lake, and Lagoon Inks. I also used Altenew Warm Sunshine for my yellow cake and Mocha for my chocolate cupcake.

Sunny Studio Stamps: Scrumptious Cupcakes Birthday Card by Rachel Alvarado

For my card base, I used a piece of pink patterned paper from the Classic Sunburst Paper Pad and layered it with some teal and white card stock pieces. I stamped my sentiment from the Daffodil Dreams Stamp Set and then added my cupcakes with some 3D foam adhesive squares for a pop of dimension. Lastly, I added two strands of paper streamers using the new Crepe Paper Streamers Dies.

Thanks so much for stopping by! I hope you enjoyed my cards today! If you want more inspiration, feel free to check out my INSTAGRAM FEED.

Sunny Studio Supplies Used:

Daffodil Dreams Stamps
Shop at:
Sunny Studio
Purrfect Birthday Stamps
Shop at:
Sunny Studio
Purrfect Birthday Dies
Shop at:
Sunny Studio
Classic Sunburst Paper
Shop at:
Sunny Studio
Birthday Cat Stamps
Birthday Cat Stamps
Shop at:
Sunny Studio
Birthday Cat Dies
Birthday Cat Dies
Shop at:
Sunny Studio
Scrumptious Cupcakes Stamps
Shop at:
Sunny Studio
Scrumptious Cupcakes Dies
Shop at:
Sunny Studio
Crepe Paper Streamers Dies
Shop at:
Sunny Studio

Friday, June 23, 2023

Everything's Rosy Card with Tina

Hello crafty friends, it’s Tina and today we are talking about lots of layering! First up I am creating gorgeous flowers with the layering stamp and die set Everything’s Rosy! The detail in these stamps is just amazing and you end up with such great realistic roses.

Sunny Studio Stamps: Everything's Rosy Thank You Card by Tina Henkens (featuring Frilly Frame Dies, Big Bold Greetings, Spring Greenery Dies, Scalloped Circle Mat Dies)

As always with layering stamps I used a trick I learned from Jennifer McGuire using the dies and a stamping tool. You start by die cutting the basic shapes, in this case the two roses and the clustered leaves. I cut each shape several times. You put the negative pieces of cardstock inside the stamping tool, so you can just pop in the basic shapes.

Next, I removed all the stamps from the plastic sheet they come on. You place the first drawing (the 1a image) onto the cut basic shape for perfect placement. I secure the plastic in place with some low tack tape. Next, I place the coordinating stamp onto the drawing and line it up with the lines of the image. Then you just pick up the stamp with the door of your stamping tool and remove the plastic, you’ll get perfect stamping each time! Repeat the same process for each layer. I always stamp more images than I need, giving myself some room to play with the design.

Sunny Studio Stamps: Everything's Rosy Thank You Card by Tina Henkens (featuring Frilly Frame Dies, Big Bold Greetings, Spring Greenery Dies, Scalloped Circle Mat Dies)

I created a white A2 card base and covered it with a pretty teal paper from the Sweater Weather paper pad. This ties in nicely with the teal inks I used on the leaves. I cut a white panel with the Frilly Frames Stripes Die and layered it on top of the teal one. Next, I added a white circle using the largest of the Scalloped Circle Mats 3.

Now it was time to lay down my roses and leaves, so I could see how much room I had left for a sentiment. I fiddled a bit with the placement and once I was happy, I could adhere the arrangement with liquid glue and dimensional foam tapes. As a little bonus, I added some white and teal leaves cut with the Spring Greenery dies.

I stamped the beautiful scripty ‘Thank You’ from the Big Bold Greetings in Versafine Onyx Black ink and cut it with the matching die. A few Chrystal Clear Jewels were scattered around the sentiment.

I hope you will create beautiful bouquets with these gorgeous, layered roses! Thank you for joining me and happy crafting!

Sunny Studio Supplies Used:

Everything's Rosy Stamps
Shop at:
Sunny Studio
Everything's Rosy Dies
Shop at:
Sunny Studio
Frilly Frames Stripes Die
Shop at:
Sunny Studio
Scalloped Circle Mat 3 Dies
Shop at:
Sunny Studio
Sweater Weather Paper
Shop at:
Sunny Studio
Spring Greenery Dies
Shop at:
Sunny Studio
Big Bold Greetings Stamps
Shop at:
Sunny Studio
Big Bold Greetings Dies
Shop at:
Sunny Studio