Thursday, February 22, 2018

Bold Balloons Dreamy Watercolored Background Card with Nancy

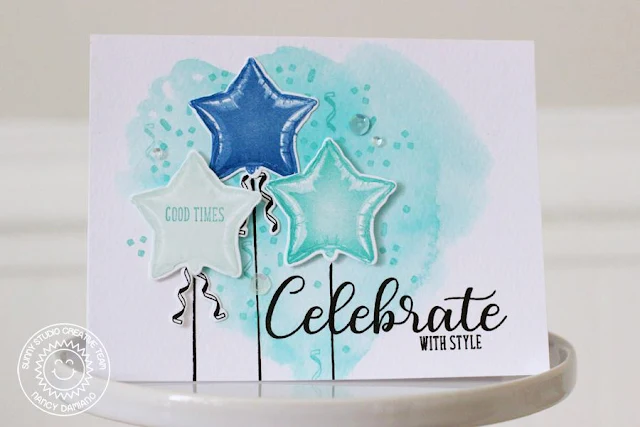
Hi there Sunny fans, Nancy here with a look at the Bold Balloons stamp and coordinating die set. Let's make a card that is equal parts bold and dreamy. How do we do that - by combining a watercolored background and a bold icon design.

Sunny Studio Stamps: Bold Balloons Dreamy Watercolored Background Card by Nancy Damiano

To create this card, start with a wash of watercolor using Distress Ink in Peacock Feathers. Next, stamp three star shaped balloons from the layered Bold Balloons stamp set. Use foam tape to give the far left and far right stars a little lift. 

Sunny Studio Stamps: Bold Balloons Dreamy Watercolored Background Card by Nancy Damiano

Remember to add the balloon string stamp before placing the stars. Glue the tiny streams to back of the stars. Finish off the card with a bold "celebrate" sentiment in black ink and a sprinkle of sequins.

​Creating bouquets of colorful birthday goodness is a snap with the Bold Balloons stamp set. Pick it up for your next round of birthday cards!

Sunny Studio Supplies Used:

Bold Balloons Stamps
Shop at:
Sunny Studio
Bold Balloons Dies
Bold Balloons Dies
Shop at:
Sunny Studio

Wednesday, February 21, 2018

Tiny Dancer Pretty Ballerina Trio Card with Franci

Hi there and happy wednesday! Franci here with you today with a cute girly card using the Tiny Dancers set. I used lots of Sunny Studio goodies all together so grab a cup of tea or coffee and take a look.

Sunny Studio Stamps: Tiny Dancer Fancy Frames Pretty Ballerina Trio Card by Franci Vignoli

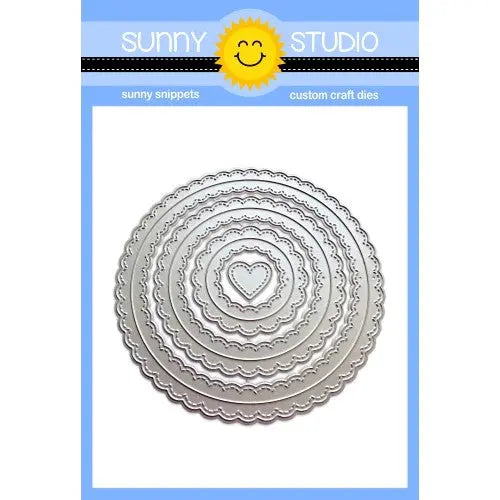
First, I stamped, colored and die cut all my images from the Tiny Dancers stamp set and coordinating diesThen I also die cut all the Fancy Frames Circles with the new dies out of some white cardstock. I created my card base and colored it by sponging some Distress ink on the top and bottom with a light hand.

Sunny Studio Stamps: Tiny Dancer Fancy Frames Pretty Ballerina Trio Card by Franci Vignoli

I assembled all of the elements and glued them down with liquid glue and foam tape. Then I used the Sparkle Word die to die cut the word out of some black cardstock and coated it with lot of Wink Of Stella. The effect is amazing in real life!! 

I stamped my sentiment and glued the "sparkle" down too. If you are wondering where that stylish "&" is from, you can actually find it in the Breakfast Puns set! Then I added some more Wink Of Stella here and there and some details with a white gel pen to finish my card.

Hope you like it and thank you so much for stipping by today! Have a lovely day! 

Sunny Studio Supplies Used:

Sparkle Word Die
Sparkle Word Die
Shop at:
Sunny Studio
Breakfast Puns Stamps
Shop at:
Sunny Studio
Tiny Dancers Stamps
Tiny Dancers Stamps
Shop at:
Sunny Studio
Tiny Dancers Dies
Tiny Dancers Dies
Shop at:
Sunny Studio
Fancy Frames-Circle Dies
Shop at:
Sunny Studio

Tuesday, February 20, 2018

Born To Sparkle Glittered Balloon Card with Vanessa

Hello everybody! Vanessa here today with a colorful card using Born To Sparkle with the Bold Balloons stamp set.

Sunny Studio Stamps: Born To Sparkle Bold Balloons Glittered Balloon Card by Vanessa Menhorn

I think this balloon set is one of the best layering stamps set ever, don't you agree? Here I dressed up one of my balloons with glitter embossing powder for the right amount of sparkle.

Sunny Studio Stamps: Born To Sparkle Bold Balloons Glittered Balloon Card by Vanessa Menhorn

First, I inked the top of my cardstock panel lightly with blue ink and applied tiny ink droplets. After I had adhered the panel to the card, I stamped and die-cut the balloons with the coordinating dies. Now I heat-embossed the blue balloon with the glitter embossing powder and adhered the images to the card. I drew the strings with a pencil and heat-embossed the sentiment onto a strip of blue cardstock, trimmed it and adhered it. 

Then I heat-embossed a piece of blue cardstock with the glitter embossing powder and die-cut the "sparkle" from it. I layered it with a word die-cut from fun foam and adhered it to my card.

I hope you like today's inspiration! Thank you for stopping by!

Sunny Studio Supplies Used:

Bold Balloons Stamps
Shop at:
Sunny Studio
Bold Balloons Dies
Bold Balloons Dies
Shop at:
Sunny Studio
Born To Sparkle Stamps
Shop at:
Sunny Studio

Monday, February 19, 2018

Team Player Masculine Sports Themed Birthday Card with Eloise

Hi everyone, Eloise here today and for today's card I'll be using the Team Player stamp set to create a masculine Birthday card. I love this set for this purpose, because it's so great for any guy in your life and it's super hard to come across a perfect masculine themed stamp set and this one, if your guy or son loves sports - it's perfect.


Sunny Studio Stamps: Team Player Masculine Sports Themed Birthday Card by Eloise Blue

To begin my card today, I first started off with a piece of watercolour paper and created a watercolour background using some Distress Inks. I first smooshed down some Squeezed Lemonade onto some acetate, spritzed it with water and smooshed it down onto my background. I then dried it slightly and moved onto Mustard Seed, repeated the same process and finished with Wild Honey. I just repeated these steps until I was happy with the results. I then dried it background completely and moved onto my images. I stamped down the stars, trophy and basketball and coloured them up with Copic Markers. I cut them out using the coordinating dies and set them off to the side. For my sentiment, I cut a banner from some green cardstock and a banner from some black cardstock in two different sizes. I then stamped 'Slam Dunk' onto the green banner and white heat embossed the 'Hope Your Birthday Is' sentiment onto the black. I then used some red Copic markers to colour in the letters on the 'Slam Dunk' piece.


Sunny Studio Stamps: Team Player Masculine Sports Themed Birthday Card by Eloise Blue


Once all my elements were ready, I first adhered my green banner down with some foam tape, then adhered the basketball and trophy on top of the banner. Next, I added my stars down onto the background of my card, scattered like I would sequins and then also adhered my black banner on top of the green as well. I adhered the entire panel to a card base and my card was complete. 

Thanks so much for stopping by today and I'll catch you next time. 

Sunny Studio Supplies Used:

Team Player Stamps
Team Player Stamps
Shop at:
Sunny Studio
Team Player Dies
Team Player Dies
Shop at:
Sunny Studio

Saturday, February 17, 2018

Guest Designer Spotlight: Cards with Debbie Olson

Good morning! Debbie Olson here, privileged to be a guest of Sunny Studio today! When Mendi shared the Sunny Studio new release, I knew that I’d love playing with it; so today I have cards using the Breakfast Puns and Tiny Dancers stamp sets to share.
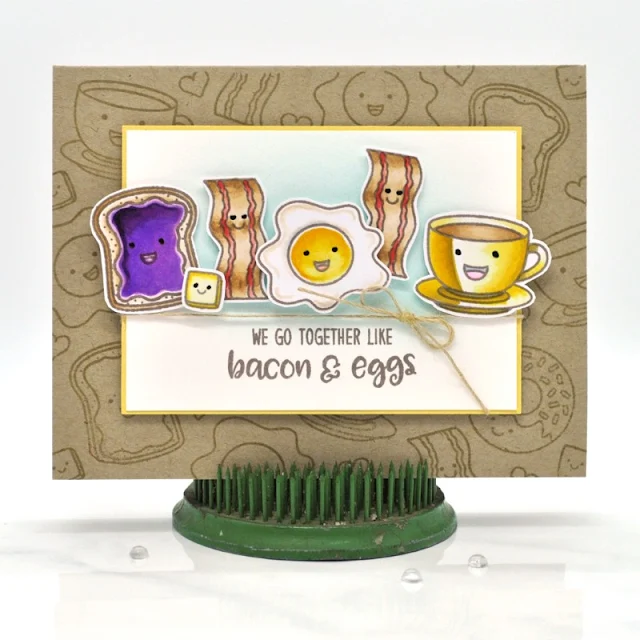
Sunny Studio Stamps: Breakfast Puns We Go Together Like Bacon & Eggs Card by Debbie Olson

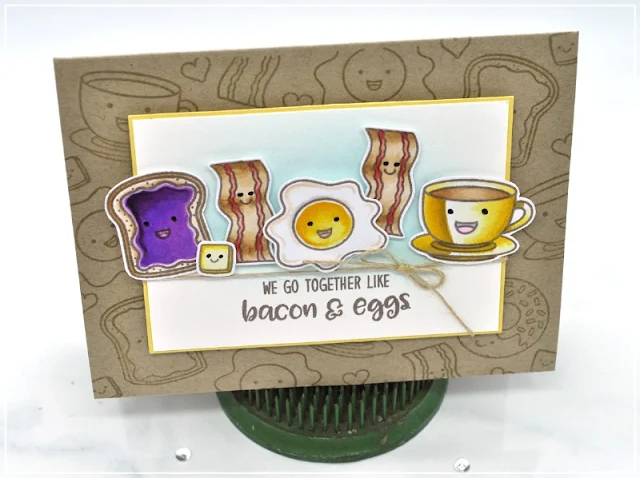
First up is Breakfast Puns - and there are SO many fun possibilities in this stamp set! I read all of the sentiments and still couldn’t decide upon just one or two, so I chose several of them, keeping the images relating to the sentiment in the center of my card. I stamped the images in Memento Rich Cocoa ink, colored them with Copic markers, cut them out with their coordinating dies, and airbrushed a hint of BG53 in the background to make the images stand out more. I stamped my chosen sentiment combination, and then used foam tape to pop up the images. The background is really simple—more images from Breakfast Puns stamped close together in a kraft colored ink to create a subtle background.


Sunny Studio Stamps: Breakfast Puns We Go Together Like Bacon & Eggs Card by Debbie Olson

Shown below are the Copic markers that I used to color the Breakfast Puns images.


Sunny Studio Stamps: Breakfast Puns We Go Together Like Bacon & Eggs Card with Copic Coloring by Debbie Olson


Next I have a Tiny Dancers card to share. Do you have children or grandchildren who are aspiring ballerinas?  Then you might need this one—it’s is a darling stamp set!  I made a smaller card for this one, 3-1/2” x 5” so that my focal ballerina would still be fairly large on the card base.

Sunny Studio Stamps: Tiny Dancers Ballerina Card with Sequin Window by Debbie Olson

Here is the inside of my card. As you can see, the focal image is actually on the inside of this card rather than the outside. I masked off the same size circle that I had die-cut on the front and airbrushed a simple background with my Copic markers. The Tiny Dancer is popped up on foam tape so that she sticks up a bit through the window.

Sunny Studio Stamps: Tiny Dancers Ballerina Card with Sequin Window by Debbie Olson

Shown below are the Copic markers that I used to color the Tiny Dancers image. I kept her hair smooth rather than textured just because she is pretty small. I used a glue pen to add some glitter to the tutu, lightening it and giving it some texture.

Sunny Studio Stamps: Tiny Dancers Ballerina Card with Copic Coloring by Debbie Olson

Honestly, the only challenging part was gluing on those sequins—not one of my wiser choices in life, but I did like them after I finished! (Be smart—use a frame die instead.)

Sunny Studio Stamps: Tiny Dancers Ballerina Card with Sequin Window by Debbie Olson

Thank you so much, Mendi and Sunny Studio Stamps, for letting me be a guest!

Instagram: @debbiedesigns

Sunny Studio Supplies Used:

Breakfast Puns Stamps
Shop at:
Sunny Studio
Breakfast Puns Dies
Breakfast Puns Dies
Shop at:
Sunny Studio
Tiny Dancers Stamps
Tiny Dancers Stamps
Shop at:
Sunny Studio
Tiny Dancers Dies
Tiny Dancers Dies
Shop at:
Sunny Studio