Friday, November 30, 2018

Coffee Lovers Blog Hop with Warm & Cozy Card by Eloise

Welcome!  We are thrilled to be a prize sponsor and hopping along today with the fall and winter Coffee Lovers Blog Hop!


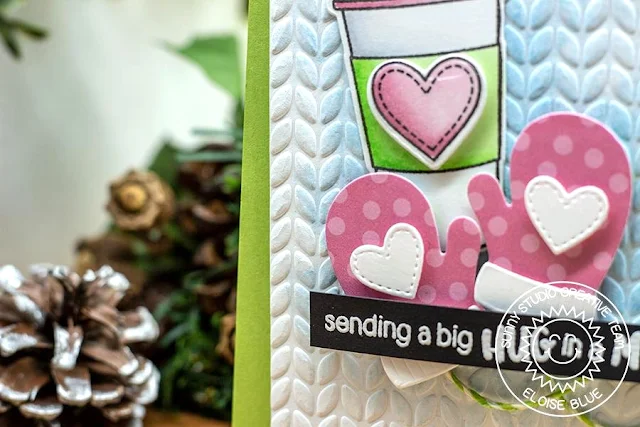
Hi friends, Eloise here and I'm so excited to be participating in the Coffee Lovers Blog Hop today. For my card, I'll be using the Warm & Cozy dies along with the Mug Hugs stamp set. 


Sunny Studio Stamps: Coffee Lovers Fall & Winter Blog Hop with Warm & Cozy Hot Cocoa Card by Eloise Blue.

To start off my card today I stamped out the travel mug and heart from the Mug Hugs stamp set and coloured them in with Copic Markers. I then cut them out with the coordinating dies. I then took the Holiday Cheer paper pad and cut out the mittens from the Warm & Cozy die set from some pink polka dot paper. I also cut out the little stitched heart and cuff details from white cardstock.

Sunny Studio Stamps: Coffee Lovers Fall & Winter Blog Hop with Warm & Cozy Hot Cocoa Card by Eloise Blue.

For my background I used the Cable Knit embossing folder and ran it through my Big Shot Machine with some watercolour paper. I then did a little blue water colouring onto the background and dried it off with a heat tool. I then added adhesive to all the pieces and adhered it onto my watercoloured background. I then adhered the embossed piece at an angle onto a green card base. 

Sunny Studio Stamps: Coffee Lovers Fall & Winter Blog Hop with Warm & Cozy Hot Cocoa Card by Eloise Blue.

For my sentiment, I took the 'Sending A Big Hug In A Mug' sentiment, cut it apart with my scissors and white heat embossed it onto a thin strip of black cardstock. I added foam tape to the back and adhered it onto my card as well. 

Thanks so much for stopping by today. 

How can you participate? Create a coffee, tea or cocoa card of your own to link up HERE.  There are loads of prizes up for grabs from a number of cool sponsors and unlike other blog hops you are eligible based on linkups, not commenting. Also don't forget to use the hashtag #fallwinter2018clh when sharing on social media.  ;)

Winners will be posted on the Coffee Loving Cardmakers blog & their Facebook group on Sunday, December 9th.    :)


Sunny Studio Supplies Used:

Mug Hugs Dies
Mug Hugs Dies
Shop at:
Sunny Studio
Mug Hugs Stamps
Mug Hugs Stamps
Shop at:
Sunny Studio
Holiday Cheer 6x6 Paper
Shop at:
Sunny Studio
Cable Knit Embossing
Shop at:
Sunny Studio
Warm & Cozy Dies
Warm & Cozy Dies
Shop at:
Sunny Studio

Thursday, November 29, 2018

Here Comes Santa Ink-Blended Holiday Card with Vanessa

Hi everybody! Vanessa here today with an ink-blended card using the Here Comes Santa stamp setI wanted the scene to look like Santa was just starting from North Pole, so I tried to create a background that imitates the Northern Lights.

Sunny Studio Stamps: Here Comes Santa Ink-Blended Holiday Card by Vanessa Menhorn

I started with a panel of white cardstock and applied various Distress Oxides with an ink blending tool. Then I used a very small sponge and added streaks of white pigment ink to achieve that glowing impression.

Sunny Studio Stamps: Here Comes Santa Ink-Blended Holiday Card by Vanessa Menhorn

Now I stamped the silhouettes with black ink and added stars with a white gel pen. Finally, I adhered the panel to a black card base.

What do you think? Mission accomplished? Thank you for visiting today, see you next week!

Sunny Studio Supplies Used:

Here Comes Santa Stamps
Shop at:
Sunny Studio

Wednesday, November 28, 2018

Happy Owlidays Night Sky Background Card with Franci

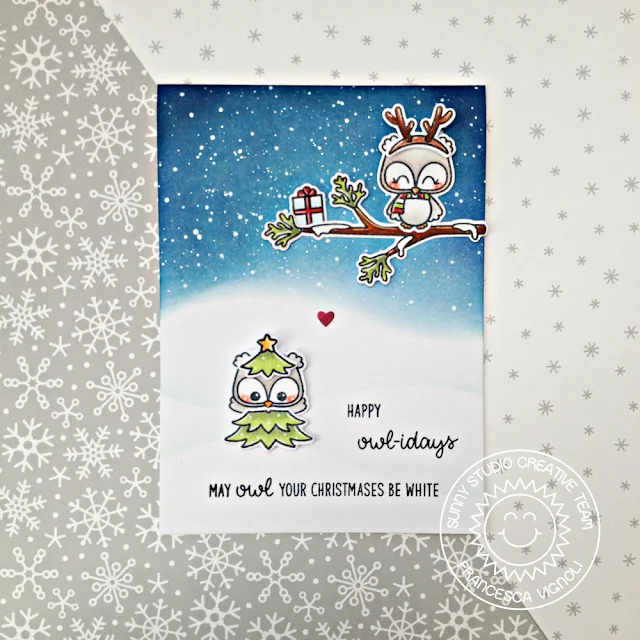
Hi there and happy Wednesday! Franci here with you today, with a festive card showcasing the Happy Owlidays set.

Sunny Studio Stamps: Happy Owlidays Night Sky Background Card by Franci Vignoli

I love, love, looove these little owls so much! They are adorable and so festive with all of the coordinating punny sentiments. I can't even pick a fave! 


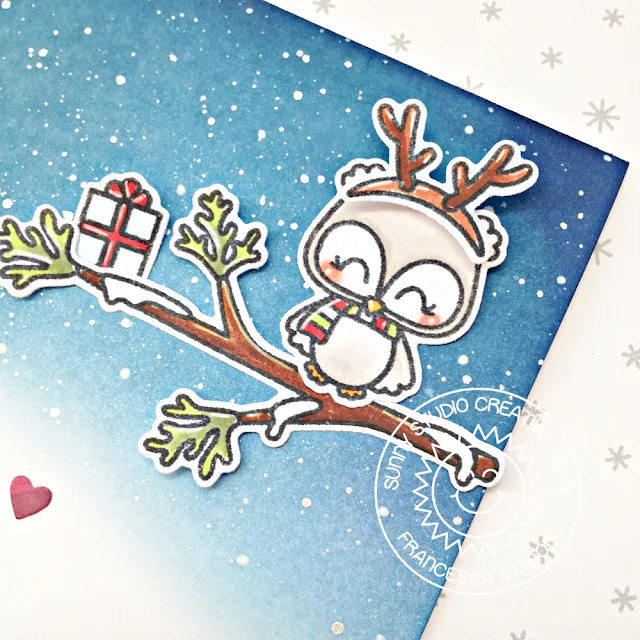
Sunny Studio Stamps: Happy Owlidays Night Sky Background Card by Franci Vignoli

This is pretty much a one layer card - if you don't consider the images that are glued with foam adhesive. First, I created my card base out of white cardstock. Then I inked my background with Distress inks to create a snowy hills effect at the bottom, and a snowy dark night feel for the top.


Sunny Studio Stamps: Happy Owlidays Night Sky Background Card by Franci Vignoli

I let everything dry completely and then I stamped, colored and die cut all the images with the coordinating diesI stamped my sentiments at the bottom of the card, and after masking the snowy hills, I splattered some white gold watercolor on my sky. 


Sunny Studio Stamps: Happy Owlidays Night Sky Background Card by Franci Vignoli

Finally, I glued down all of the elements, added some white details here and there with a white gel pen, and my festive card was finished!

Hope you like it and thank you so much for stopping by today! 

Sunny Studio Supplies Used:

Happy Owlidays Stamps
Shop at:
Sunny Studio
Happy Owlidays Dies
Happy Owlidays Dies
Shop at:
Sunny Studio

Tuesday, November 27, 2018

Thank You For Helping Us Feed The World's Hungry

Thank you for your business this weekend!  We know you had lots of really good places to spend your hard earned money this past week so it means so much to us that you chose to shop with us... 


With your help we were able to donate $1500 today to Convoy of Hope to help feed the world's hungry. You're the best! 

Rustic Winter Shaped Winter Shaker Card with Juliana

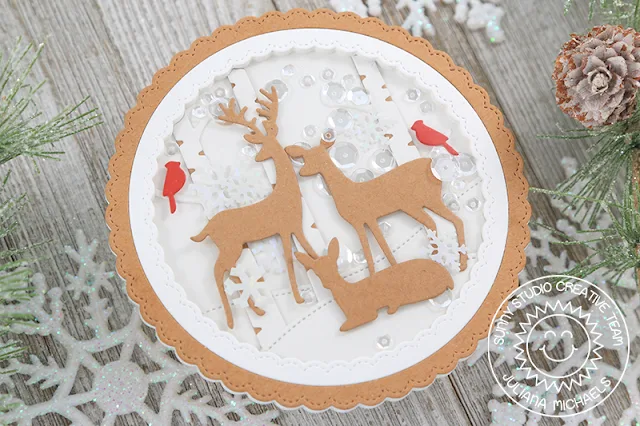
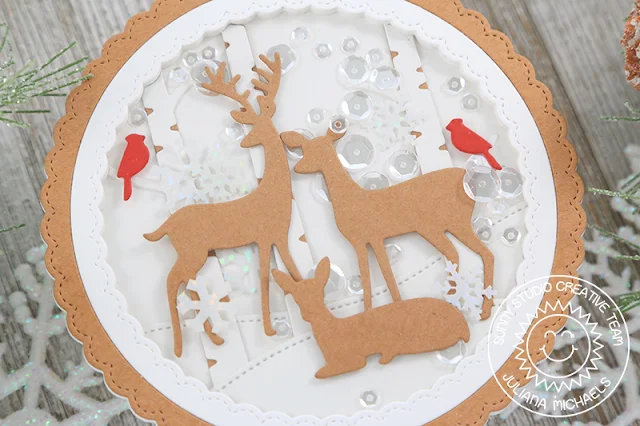
Happy Holidays friends! It's Juliana Michaels and today I'm here to share a Rustic Winter shaker card created using the new Rustic Winter dies combined with the Fancy Frames Circle dies.

Sunny Studio Stamps: Rustic Winter Woodland Borders Fancy Frames Shaped Winter Shaker Card by Juliana Michaels

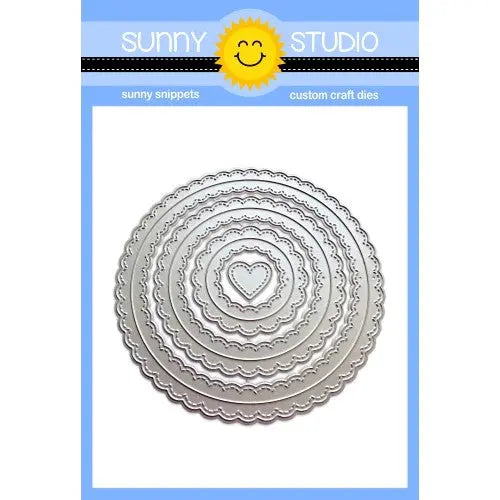
To get started use the large Fancy Frames Circle dies to make the top of the shaker. Die cut the outside frame from kraft cardstock and the inside frame from white cardstock. Next, cut a piece of acetate using a circle die (I used one from my stash) and adhere it to the backside of the frame.

The next step is to create the shaker box frame. Die cut the large Fancy Frame Circle dies 5 times from white cardstock and glue them all together. Using the same circle die you used to cut the acetate, cut another circle from white cardstock. This is the back of the shaker. Set these pieces to the side for now.

Sunny Studio Stamps: Rustic Winter Woodland Borders Fancy Frames Shaped Winter Shaker Card by Juliana Michaels

Next, take the Rustic Winter dies and cut the top layer of the trees from white cardstock and the bottom layer from kraft cardstock. Die cut some snowy hills from white cardstock using the Woodland Border dies. Grab the Rustic Winter dies again and cut some birds from red cardstock and the deer from kraft cardstock. Once you have all of the pieces cut out, layer them together to create the scene. Adhere them all to the back piece of the shaker and trimmed off anything that hang over the edge. Use double sided foam tape to adhere the deer and to add some depth and dimension to the scene.


Once the scene is complete, adhere the shaker frame pieces to the back piece. Now it's time to add the fun stuff. Pour in a mix of sequins and beads to add some sparkle and shine to the shaker card. Once the shaker is filled, glue on the top to complete the card front.

Sunny Studio Stamps: Rustic Winter Woodland Borders Fancy Frames Shaped Winter Shaker Card by Juliana Michaels

For the final step, you will create a circle shaped card base. To do this, fold a piece of cardstock in half and place the same circle die you've already used so that a little edge of it hangs over the fold. Run this through your die cutting machine and you will have created your own shaped card base. Now, just adhere the shaker to the front of the card base and your card is complete!


I hope you enjoyed this Rustic Winter shaker card I shared with you today. Thanks so much for joining me today! Until next time, happy holiday crafting!

Sunny Studio Supplies Used:

Fancy Frames-Circle Dies
Shop at:
Sunny Studio
Woodland Borders Dies
Shop at:
Sunny Studio
Rustic Winter Dies
Rustic Winter Dies
Shop at:
Sunny Studio

Monday, November 26, 2018

Foxy Christmas Colorful Winter Themed Holiday Card with Eloise

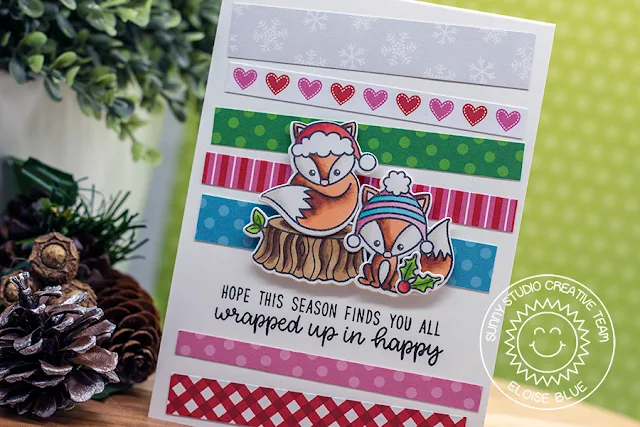
Hi friends, Eloise here and today I'll be using the Foxy Christmas stamp set along with the Holiday Cheer Paper Pad to create this colourful winter card.

Sunny Studio Stamps: Foxy Christmas Holiday Cheer Paper Pad Colorful Winter Themed Holiday Card by Eloise Blue

To start off I stamped and coloured my images from the Foxy Christmas stamp set. Once they were coloured I cut them out using the coordinating dies

(Copic Markers Used: R14, R24, R27 / BG02, BG05, BG23 / YG03, YG23, YG67 / R81, R83, R85 / C00 / W00, W1 / R30 / E95, E97, E99, E07 / E55, E57, E59)

Sunny Studio Stamps: Foxy Christmas Holiday Cheer Paper Pad Colorful Winter Themed Holiday Card by Eloise Blue

Next I cut up strips of patterned paper from the Holiday Cheer paper pad and adhered them onto my card base leaving room for the sentiment. I then added foam tape onto the backs of my images and adhered them into place. 

Sunny Studio Stamps: Foxy Christmas Holiday Cheer Paper Pad Colorful Winter Themed Holiday Card by Eloise Blue

Lastly I stamped the sentiment from the Foxy Christmas stamp set with black ink underneath the images. 

Thanks so much for stopping by today, I hope you enjoyed. See you next week! 

Sunny Studio Supplies Used:  

Holiday Cheer 6x6 Paper
Shop at:
Sunny Studio
Foxy Christmas Stamps
Shop at:
Sunny Studio
Foxy Christmas Dies
Foxy Christmas Dies
Shop at:
Sunny Studio

Saturday, November 24, 2018

25 Days of Christmas Tags featuring Build-A-Tag Dies


Hello there!  We're so excited to be hopping with Tracey McNeely's 25 Days of Christmas Tags (which you can learn more about at her blog In My Creative Opinion).  I have created lots of tag featuring our two newest mix and match Build-A-Tag dies.

Tag Set #1: For my first set of tags I paired our Holiday Cheer 6x6 Paper with our Build-a-tag #1 dies and the cute images from our Holiday Alpaca stamps which I colored with Copic Markers.  For my "to" and "from" I heated embossed the words from our Christmas Icons stamps.

Tag Set #2: Up next is another set of tags using our Foxy Christmas stamps together with our Build-A-Tag #2 dies.  I love that these holiday products can expand to also work beyond Christmas for some cute Valentine's Day themed tags!  :)

Tag Set #3: For my third tag set I paired the round tag from our Build-A-Tag #1 dies with the scalloped circle from our Fancy Frames Circle dies.  Since the opening of the fancy frames is the same size as the circular tag, I sandwiched a piece of printer paper in the middle that was punched just slightly larger to hold everything together, adding patterned paper to both sides. For my decoration, I used the mini holly die from our mini basic shape die set together with the stitched heart from our Warm & Cozy dies.

Tag Set #4: For my last set of tags today, I die-cut my tags using the other tag from our Build-A-Tag #2 dies layered together with two of the scalloped topper available.  I paired them with some holly and berries from our Christmas Trimmings stamps and the "to" and "from" in a different font from the same Christmas Icons Stamps.

Thank you for joining me today!  :)

Here's a list of all the companies participating with a new company featured each day with lots of prizes up for grabs.  Make sure to stop by Tracey's blog to see more tags today using our products and for details on how you can win a $25 gift code to our store.  :)

Also, before you go, just a reminder that we are automatically offering free shipping on all orders over $25 when shipped within the USA, a free word die with each order and we are donating 15% off all retail sales to Convoy of Hope through November 26th at 11:59 pm PST (cannot be combined with other promo codes).  :) 


Sunny Studio Supplies Used:
Christmas Icons Stamps
Shop at:
Sunny Studio
Fancy Frames-Circle Dies
Shop at:
Sunny Studio
Mini Basic Shape Dies
Shop at:
Sunny Studio
Holiday Cheer 6x6 Paper
Shop at:
Sunny Studio
Christmas Trimmings Stamps
Shop at:
Sunny Studio
Christmas Trimmings Dies
Shop at:
Sunny Studio
Alpaca Holiday Stamps
Shop at:
Sunny Studio
Alpaca Holiday Dies
Alpaca Holiday Dies
Shop at:
Sunny Studio
Foxy Christmas Stamps
Shop at:
Sunny Studio
Foxy Christmas Dies
Foxy Christmas Dies
Shop at:
Sunny Studio
Build-A-Tag #1 Dies
Build-A-Tag #1 Dies
Shop at:
Sunny Studio
Build-A-Tag #2 Dies
Build-A-Tag #2 Dies
Shop at:
Sunny Studio