Today I'm sharing product peeks and card ideas for our new Happy Owlidays & Eskimo Kisses stamps, as well as two new Build-a-tag dies that I'm super excited for!
Card No. 1: Up first is a card featuring the new Happy Owlidays stamps and the fun wreath from that set as a window to the inside of the card. I die-cut a circle in the front of my card and then placed the wreath over the opening.
Here's a little peek at how I finished the inside of my card, inking a small circle in the center with my jumbo dauber. The patterned paper strip along the bottom peeking out from the Stitched Scallop Border is also a fun way to have the card look cute both inside and out.
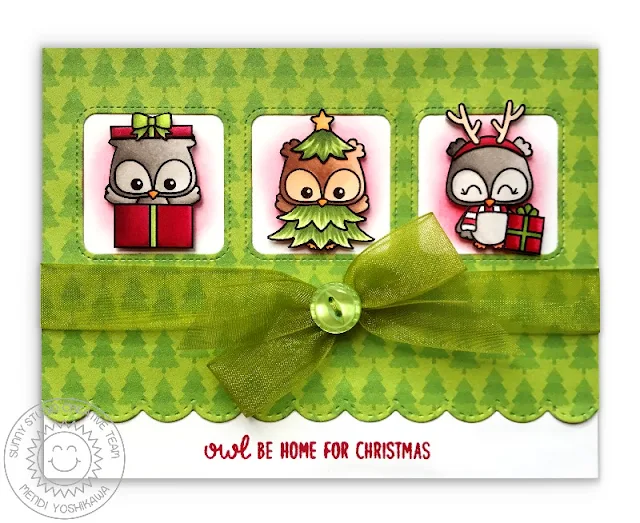
Card No. 2: For my next card I couldn't wait to dress up the owl with the little present and Christmas tree costumes. To frame my trio of owls I turned to our Window Trio Square dies cut from the tree print patterned paper from our Holiday Style paper pack. I cut the edge using our Stitched Scallop Border dies and inked behind each image using Worn Lipstick distress ink. A big bow tied from organza with a button stitched over the knot felt like the perfect finishing touch.
Card No. 3: This set comes with an icy tree branch and a stocking, ornament & jingle bell, along with strings in two lengths to have them hang from. For this card I cut my front panel using the grey & white polka-dot paper from our Holiday Cheer Paper Pack and layered it with two largest ovals from our new Stitched Oval dies. I then inked up the center with some tumbled glass distress ink and layered my little owls over the top. In the end I didn't want to take away focus from my owl couple so I decided to save my greeting for the inside of my card.
Card No. 4: For my last card I did a stamp resist technique to create the look of a chalkboard for my background using our Snow Flurries stamps. I started by stamping my entire background with the stamp onto white cardstock using white pigment ink. I then inked over the top using my jumbo dauber with black soot distress ink, leaving a subtle snowflake print visible. When everything had fully dried, I then heat embossed the snowflakes along the edges of my card using various stamps from our Snow Kissed Stamps. When that was complete I then inked the center with a little bit of white pigment ink to soften the center and complete my chalkboard illusion.
This time I chose to have the little jingle bells dangle from my wreath and finished off my card using a greeting from our Alpaca Holiday Stamps heat embossed onto the banner from our Little Angels stamps.
Card No. 5: Up next is a fun little 2x3 stamp set called Eskimo Kisses that comes with a bundled up boy and girl, three hearts and a scripty sentiment. There's so much cuteness & possibilities packed in a mini set! As soon as I had them in my hands I knew they would be adorable paired with our new Cable Knit embossing folder. The rest of my card was left soft and simple to keep the focus on the texture and sweet images.
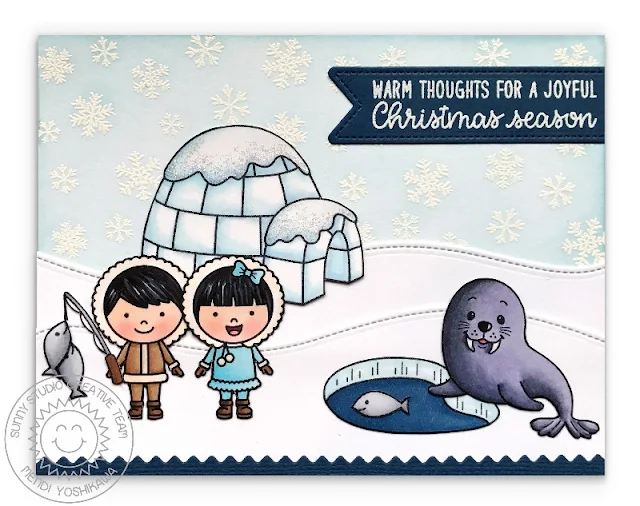
Card No. 6: My next idea for this little couple was to pair them with our Polar Playmates stamps from last year. The igloo, walrus and ice fishing from this set are the perfect compliment!
For my card background I inked up my panel with Tumbled Glass distress ink and then heat embossed the snowflake print using our Snow Flurries stamps. The snowdrifts were created with our Woodland Border dies and I heat embossed the sentiment on Navy cardstock that had been cut into a pennant shape using our Fancy Frames Rectangle dies.
Card No. 7: For my last card with Eskimo Kisses I thought it would be fun to color them red for the holidays and pose them on an ice block from our Snow Kissed Stamps. As I was pulling out papers the pink snowflakes and striped prints from our Holiday Cheer Paper pack called out to me. I stamped and colored three of the hearts from the set with my Copic markers and coated them in glossy accents. I finished my card with a simple white stitched scallop border which felt like the perfect transition between the two prints. I love that this little set can transition from Christmas cards to Valentine's Day cards!
Tag Set No. 1: For my last sneak peek of the day I have two new Build-A-Tag die sets to share. Sized at 2" wide x 3-1/2" high they are a great size for mass producing simple gift tags for all your gifts like I've done here or personalizing with stamped images.
Each set comes with two tag bases with two different bottoms and then several mix and match toppers, edges & hole reinforcers. The combinations and options are truly endless!
Tag Set No. 2: Our Build-A-Tag 1 dies come with a simple 1-1/2" round tag die that is just the right size to fit into the opening of our scalloped circles from our Fancy Frames Circle Dies. To get them to stay without falling right through the opening I punched a 1-3/4" circle from copy paper and sandwiched it between dies cut for both sides of my tag. On one side I stamped and colored images from our Christmas Icons stamps and on the other I stamped my "to" & "from" words using that same stamp set.
Tag Set No. 3: For this tag set using our Build-A-Tag 2 dies I pulled out my Holiday Cheer Paper scraps that were leftover from all the cards I created throughout the release. It was so fun making use of these small pieces that ordinarily would end up on my craft room floor or in my recycle bin. One of the prints in this paper pack includes a variety of borders that compliment so many of our stamps and dies. They also were great all on their own as a quick way to add interest to my tags with very little effort.
Tag Set No. 4: While I was going I made another tag set along the same lines with our Build-A-Tag 1 dies. This set comes with the little "v" shaped border that works as a great pop of color on both die sets.
That wraps up my projects for the day. I hope you've enjoyed all the peeks. Make sure to keep checking back all this week as we reveal more sets from the new release. On Friday we will be celebrating our company's third birthday with a special blog hop with loads of special guests and prizes.
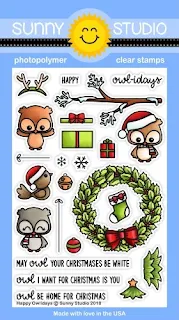
Here's a closer look at the new stamps & dies used today (available for purchase on Friday, September 28th).
Other Sunny Studio Supplies Used:
Christmas Icons Stamps Shop at: Sunny Studio |
 Stitched Scallop Dies Shop at: Sunny Studio |
 Sunny Borders Dies Shop at: Sunny Studio |
 Sunny Borders Stamps Shop at: Sunny Studio | |
 Memento Tuxedo Black Marker Shop at: Sunny Studio |
 Tsukineko Jumbo Dauber Shop at: Sunny Studio |
 Polar Playmates Stamps Shop at: Sunny Studio |
 Polar Playmates Dies Shop at: Sunny Studio | |
 Snow Flurries Stamps Shop at: Sunny Studio |
 Ric Rac Border Dies Shop at: Sunny Studio |
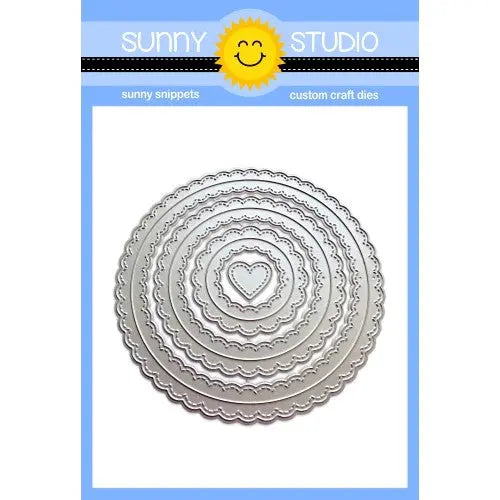 Fancy Frames-Circle Dies Shop at: Sunny Studio |
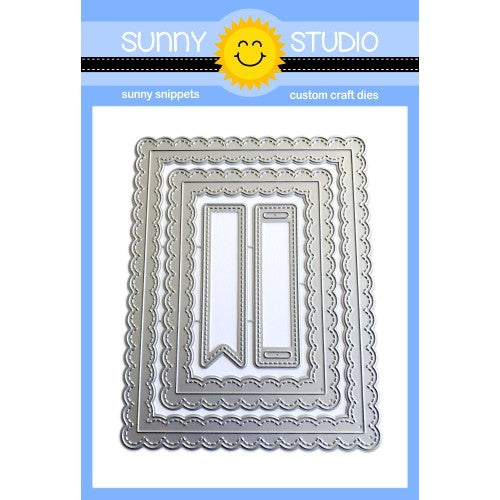 Fancy Frames- Rectangles Shop at: Sunny Studio | |
 Window Trio- Square Die Shop at: Sunny Studio |
 Classic Gingham 6x6 Paper Shop at: Sunny Studio |
 Gingham Jewel Tones 6x6 Paper Shop at: Sunny Studio |
 Dots & Stripes Jewel Tones 6x6 Paper Shop at: Sunny Studio | |
 Holiday Cheer 6x6 Paper Shop at: Sunny Studio |
 Cable Knit Embossing Shop at: Sunny Studio |
 Alpaca Holiday Stamps Shop at: Sunny Studio |
 Stitched Oval Dies Shop at: Sunny Studio |








The owls are just adoraable. LOVE this set.
ReplyDeleteYou seem to outdo yourself every day! Everything is just so
ReplyDeletestinkin' ca-ute!! My favorite is card #1 - just love the owl
& birdie together and I love wreaths, too. I love that set.
Awesome samples using these fun stamps and dies! The owls are my favorite!
ReplyDeleteTotally adorable!
ReplyDeleteLOVE the owls and the tags!
ReplyDeleteOh my gosh! I love all the projects created with these terrific new supplies! I want them all!
ReplyDeleteI love your little owls, they are so cute !!!
ReplyDeleteThese are so cute! I love the little owls!
ReplyDeleteThose are the cutest little owls I've ever seen! And the mini eskimo stamp set is simply adorable. I love all your cards and tags!
ReplyDeleteSERIOUSLY THE CUTEST! I love the owls soooo much!
ReplyDeleteThe owls are a must have.
ReplyDeleteThe sweetest owl!!!
ReplyDeleteI'm in love with these Adorable owls!!! Super cute cards!!
ReplyDeleteLooove the little owls!!! And Eskimos and tags!! 🤗
ReplyDeleteWonderful new products and fabulous projects to showcase them!
ReplyDeleteAwesome cards and tags today. The happy owliday stamp is so cute
ReplyDeleteCuteness overload and I love the tags!
ReplyDeleteSo cute, Mendi! Love the tags!
ReplyDeleteWhat AMAZING ideas!!!! I love everything you guys make and own almost all of your stamp sets!!!! I can't wait to order the little Eskimos! ������
ReplyDeleteOh my gosh! I just LOVE Owls and you know this!!!!!! So I am jumping for joy and excitement over here for this adorable Owl set!!! I really LOVE the tag builders too!!! Such gorgeous cards and tags my friends!!!! Love it all!
ReplyDeleteHugs,
Jo
More sunny Studio goodness!!!! :)
ReplyDeleteI could "ooh & ahhh" over several aspects of today's sneak peek, but I want to address the Eskimo Kisses card. It is sooooo cute! And I can just imagine opening it up and finding "and Valentine wishes" on the inside. After all, the heart and snowflake images are perfect for February when much of the country gets the most snowfall!! Just an idea!
Awwww.... eskimos! Super cute, and those tags! Must have!
ReplyDeleteAaawww !! In between the irresistibly cute critters and these adorable eskimos : My Heart is melting !! 💕 Love, Marjorie
ReplyDelete[margessw(at)icloud(dot)com]
Just darling. Love Eskimo kisses and the tags! Love them!!!
ReplyDelete